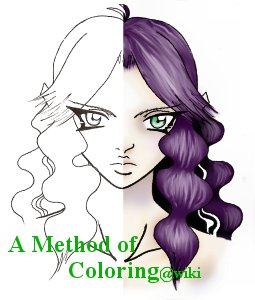
A Method of Coloring
Last Updated 2005.12.12
This is a tutorial on a very quick and easy way to nicely color an image.
It can be done with a mouse or a tablet and any version of Photoshop that has Gaussian Blur and layers.
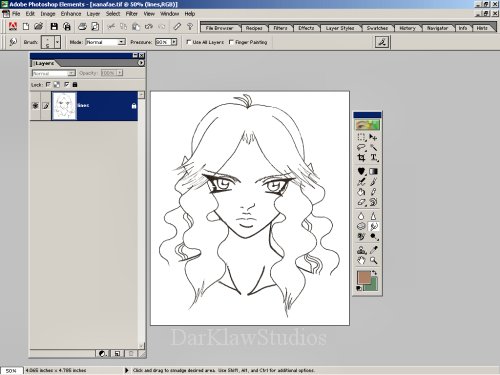
Step One
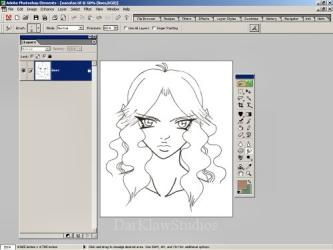
First off, get your image ready to color. Clean up and/or smooth the lines and get rid of any blemishes. If you do this in another paint program, when you open the file in Photoshop, duplicate the line layer, set it to 'Multipy,' them lock it. This will prevent you from accidentally painting on it.
Now your're ready to actually start coloring.
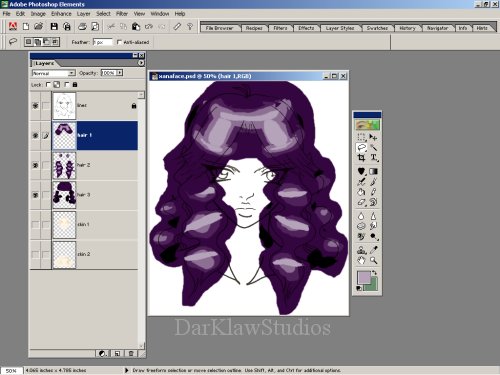
Step Two
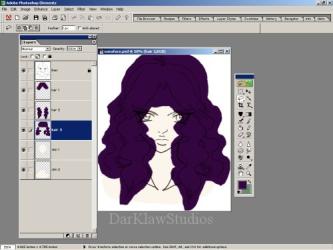
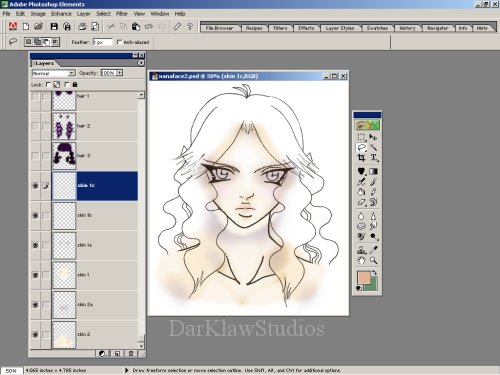
Next you need to put in the base colors. Try to divide each section of the image into parts; this makes an upcoming step much easier. Create a seperate layer for each of these parts. Now take your freeform selector and highlight the part you want in that layer and floodfill the color. Make sure to select a fair amount outside the lines when you do this or you'll have problems later.
I created five (5) layers for my image.
Hair 1 - Bangs
Hair 2 - In front of shoulders
Hair 3 - Behind shoulders
Skin 1 - Face
Skin 2 - Neck and shoulders
When you finish, it'll look like blobs of color, but we'll get that taken care of in the next few steps.
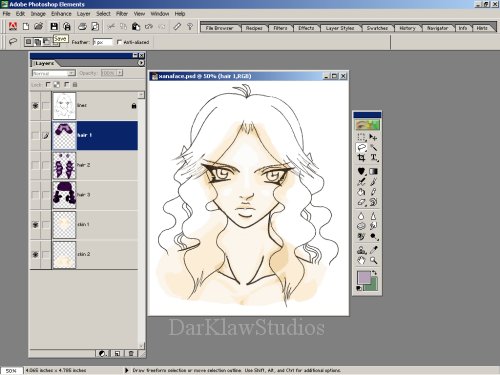
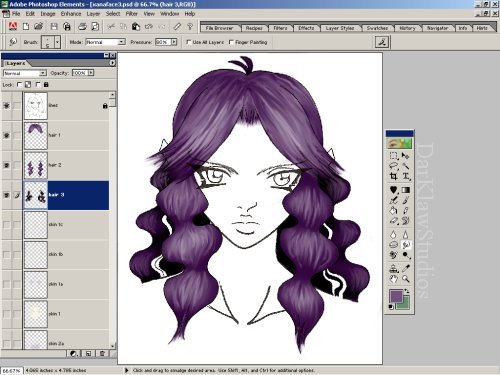
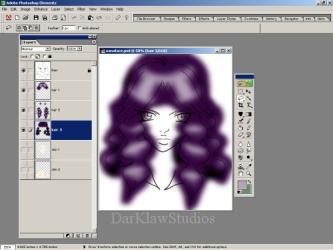
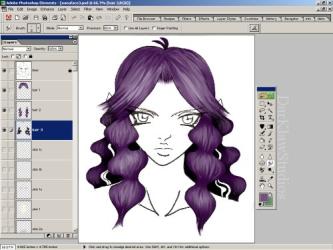
Step Three
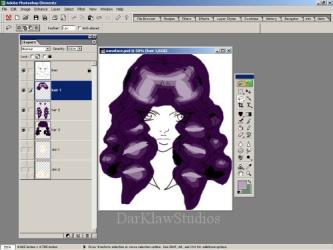
Now, use your freeform selector to fill in highlights and shadows. This is where your light source comes in, as it will direct where the shading will fall. Knowledge of the contours of the face and any other objects in the image are neccessary too. Since this is an illustration for one of my other wikis, I went with a very basic head on light source.
It still looks like a bunch of blobs of color, but just watch... ~.^
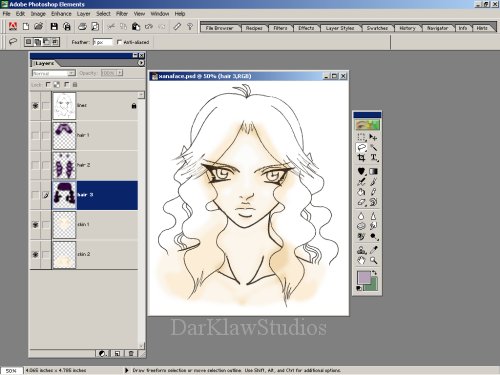
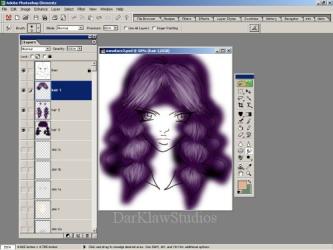
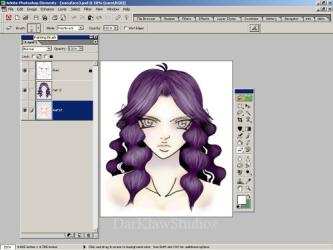
Step Four
Now hide all your layers but one color and the line layer. Go up the Filter > Blur > Gaussian Blur. Play around with the number until in looks right. Then hide that layer and chose another. Repeat until you've finished all your layers.
*Note- This is where the extra color around your lines comes in. If you don't select enough, the color will start blending where you don't want it to, like fading into white inside the line, in my case.
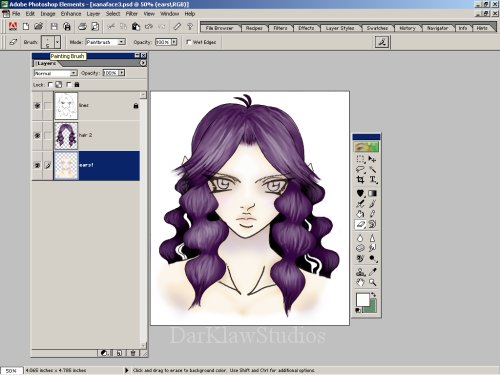
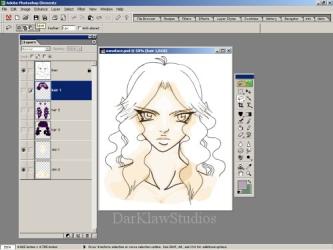
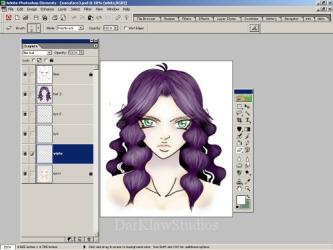
Step Five
Now, once you finish blurring all the layers, the image is still rather plain. Add more layers and make any additional adjustments you want to the image. More shadows or highlighs, smudging, floaty light dots- whatever you feel the image needs.
Things I altered:
Skin - Purple hue to shadows, pink to cheeks, orangeish to lips
Hair - Attacked with smudge tool
Step Six
This is easily the most frustrating step: cleaning up all that excess color. Again, hide all but one layer, and use you freeform tool to select the excess color and delete it. Then, come back through with the eraser to get right up to the lines. Start with the top-most color layer, because the lower layers will be covered and won't need as much erased.
For example, once I got down to the face layer, I only had to do the ears and chin.
Step Seven
This is pretty much the final step. Add any final touches to your image. Once I put in the eyes, this one was finished.
DarKlawStudios Tutorials Stumble!