 So you want to manipulate a portrait? Well, this might help. It's very simple and Chimes-esque but hey, I made it, it's allowed. I apologise for the shoddy picture that I used... these things can't always be helped :P But anyway, I hope this helps and if you use it, show me the results! I'd really like to see them. :) Any further questions, ask.
I warn you now, I suck at explaining things.
All images are clickable :P
This tutorial uses Gimp (http://gimp.org) but can be done in photoshop, except where it says 'open as layers' at that point you have to copy and paste.
Please ignore the person signing into my msn. XD
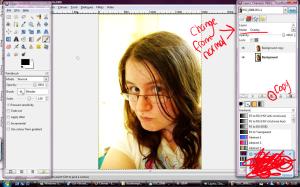
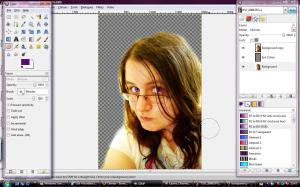
First, you choose your photo. Make sure it's large and of a good quality, otherwise the manipping could prove difficult... and no one likes that. I chose this really bad photo of myself – I wanted a recent one and I don't have many. Before you start manipping you can edit the contrast or colours but I chose to leave mine as it was (editing the contrast and colours is easy, so I haven't included it).
Right, onto business. Whenever I start a portrait manip I copy the background and set it to overlay (this slightly increases the contrast, so if you change your contrast you should probably take it into account) This is to keep definition in at a later stage, it also helps any colour changes look a little bit more realistic as you have the natural colours over them. I choose to leave mine at full opacity, but you can fiddle if you wish. Please, make sure you haven't made the skin so bright that you lose any possible shadowing, otherwise it will probably look bad – especially if you want to add make up.
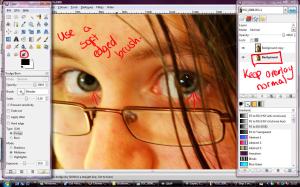
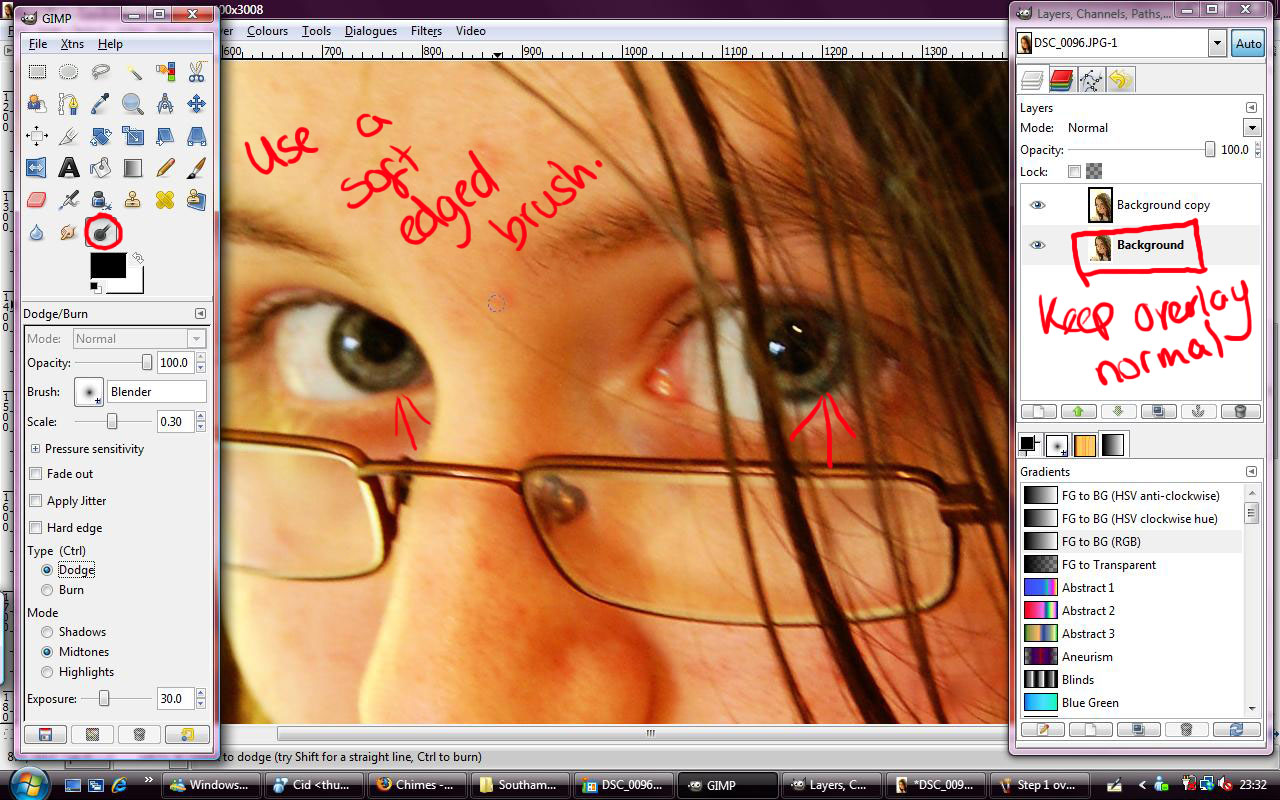
I always do the eyes first, I don't know why but I do. It's a habit now. Editing the eyes is all using the dodge and burn tools, you can smudge if you want... but I don't. This part is mainly to give the eyes more oomph. (my eyes seem to look brownish in this O.o Odd, my eyes are blue) Anyway...
Select the doge/burn tool, set it to dodge and turn the exposure down to about 30, 50 is waaaay too much, unless you want to make the eyes completely white... then you can leave it. Select a soft-edged brush, you won't find the one I used because I made it – I wanted a really really soft brush so I edited one of the premade brushes.
Note: Do not edit the overlay! Only the background
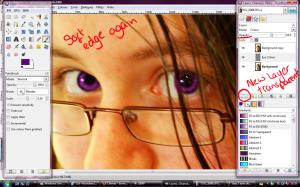
Now, you can do this one of two ways, you can dodge first or burn first. Personally, I dodge. The idea is to make the iris go from lighter to darker, in a smooth way. Dodge the iris, leaving the edges darker, always make the bit nearest the pupil the lightest and work darker from there. Once you have got that to how you like it burn the edges, it improves contrast and makes it look pretty. I also burn just under the top eyelid, I think it works well. At this stage, I also lighten the whites of the eyes, it makes it look prettier and blend with the edited iris better. To do this you simply dodge the white, easy.
If you want to keep your eyes the colour that they are after the last step, you can ignore this... though if you want to add makeup or change any colours, you probably shouldn't.
Create a new layer. The button you need is circled in the screen shot, make sure the layer is
transparent. Set the layer mode to 'Colour'. Using the normal paint tool and a soft-edged brush paint the iris your chosen colour or colours. It will look to bright but don't panic, if you do not like the mass brightness go to the layers panel and take down the opacity until you find a level you like... mine's 63.something..
. as you can see. :] Now, if you still think it's a little strange, go back to the background layer and dodge and burn on the eye until you think it looks good.
The same applies if you want to change hair colour or skin colour, or add makeup. Especially dodging and burning to make it look more natural. If you want an example of this, ask in the comments and I'll make one. :]
The make-up you see in the final image below (right at the bottom) was just me putting colour on like I explained for the eyes, for my picture I didn't need to use dodge or burn to make it look more natural - to me, it was fine just as a colour. I do believe the transparency is the same as that of the eye colour layer.
At this point I also went back and dodged my skin a little, I'm not entirely sure why but I did. You don't need to do this, but you can dodge and burn your skin if you want to to enhance shadows and highlights.
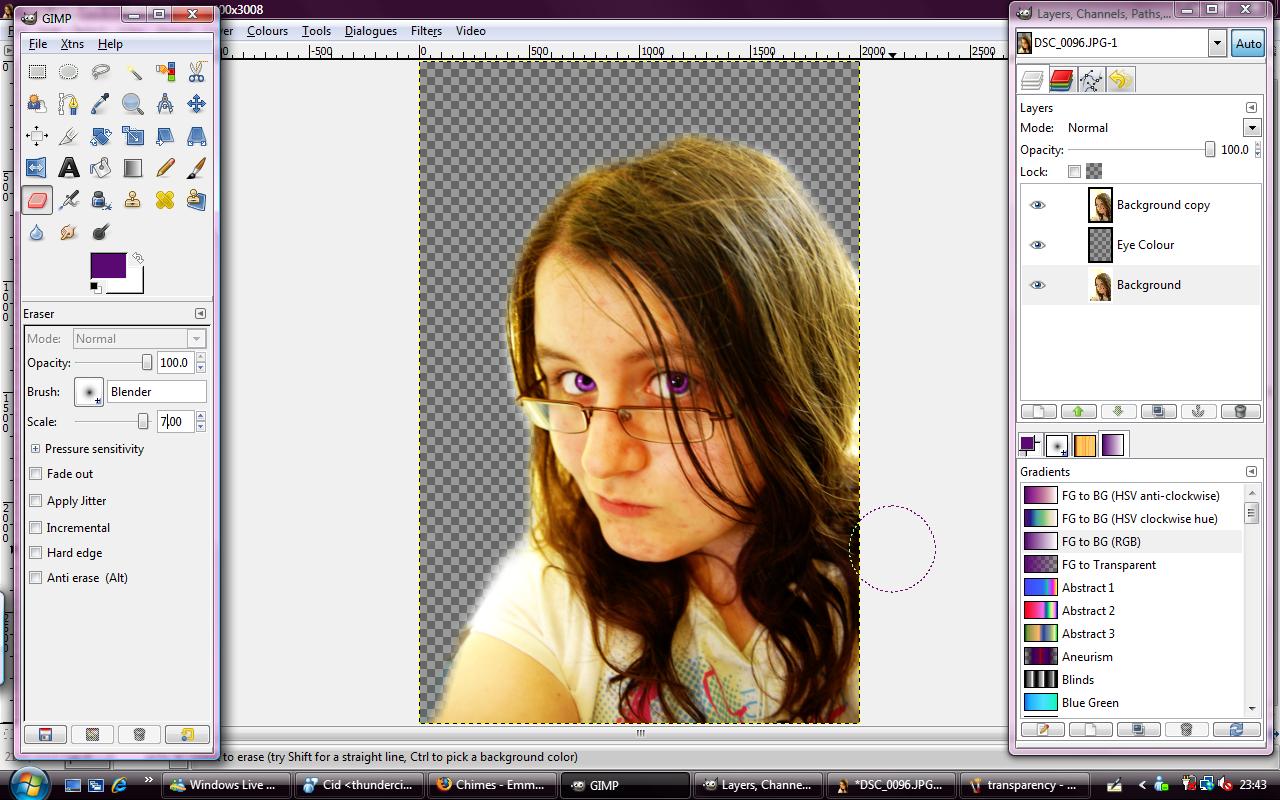
You could leave your background as it is... but I choose to substitute it. This step is REALLY simple for this style of manip. Select your background layer, the eraser tool and a soft edged brush and simply erase. :P It doesn't matter if it's messy, it should look good anyway.
If you start erasing and all that happens is white appears, you need to add a transparent channel to the layer. This is easy, I don't even need to explain it with words... click this:  (make sure you still have the background selected though)
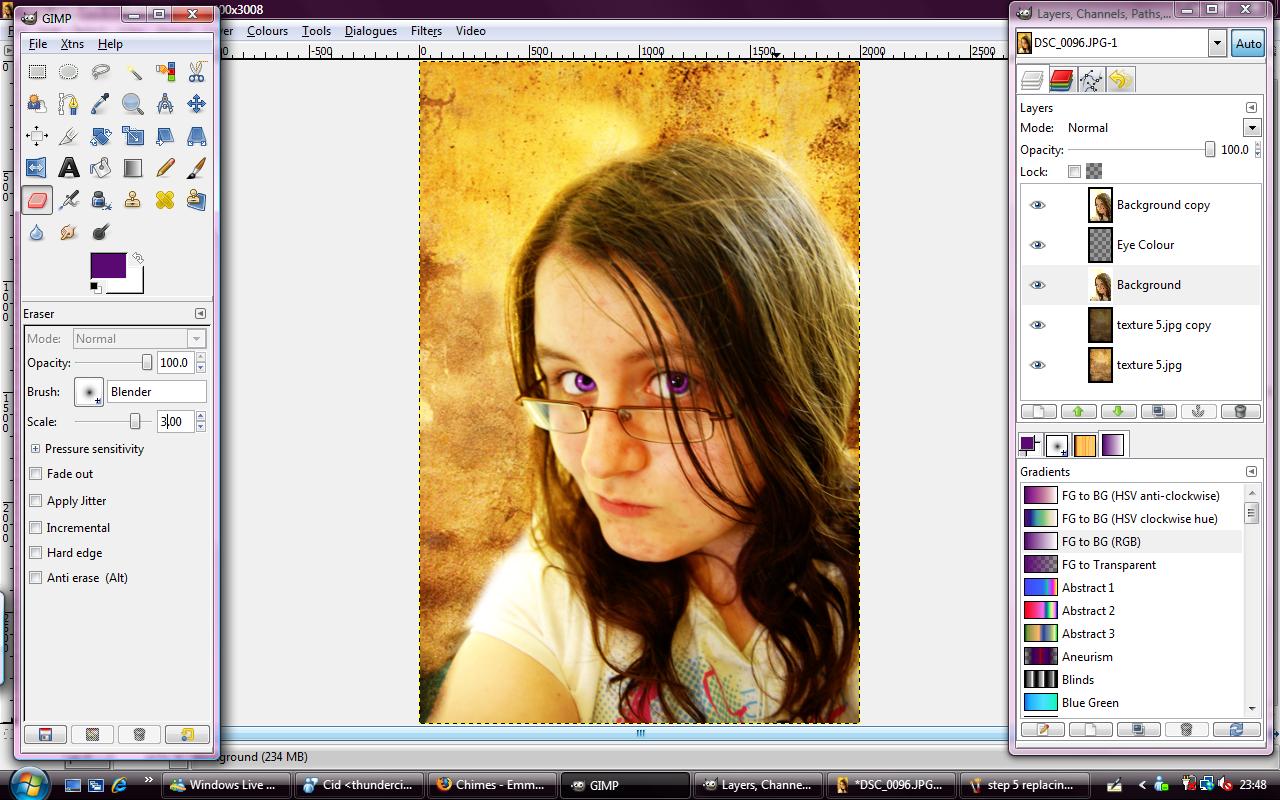
To put the background in go to the file menu, click 'open as new layer' then simply open it. :] You may need to move it underneath you layers, to do this use the down arrow on the layers box.
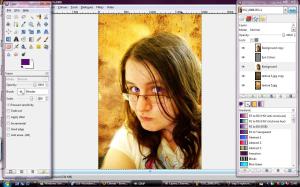
This is what it looks like with a background. When I do this I choose to use textures as my backgrounds, I think it looks good and suits my style. Experiment with the kind of backgrounds you use, you could get some interesting results.
I got my rust texture from here: http://princess-of-shadows.deviantart.com/art/rust-textures-92960093
My background looked too light so I duplicated the layer, set it to overlay then darkened it loads... you can do this too but it's not necessary, I did this to help it blend with my image.
You could choose to leave the manip as is, but I always like adding a texture to it. It gives added depth... I think. I also like how it looks – visually pleasing. :P
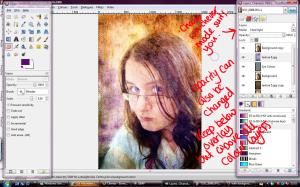
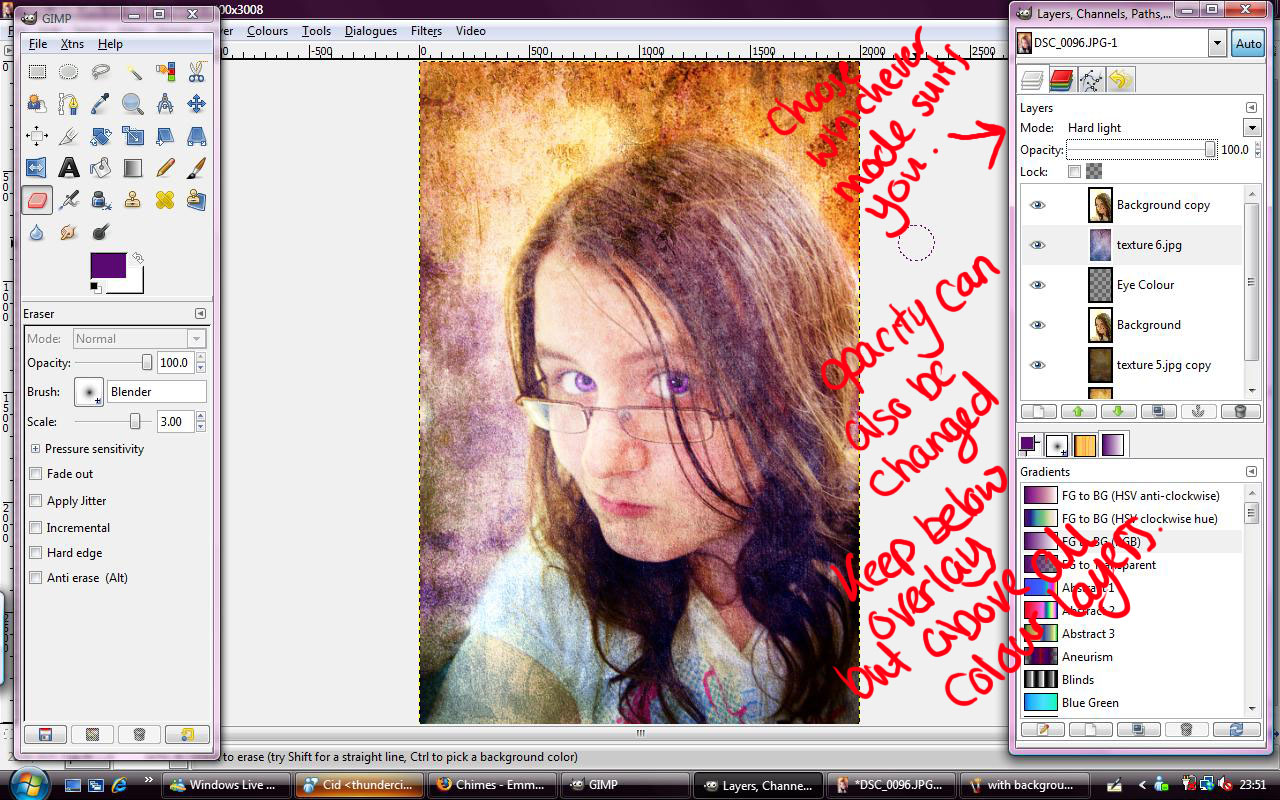
As a final step, I add a texture, as I said above. This bit is really simple. You just choose a texture, open it as a new layer, and then set that layer mode to whatever you want. I choose to use hard light but sometimes that's too strong, so I fiddle with the opacity. Experiment with the layer modes, you can get some interesting results. Choose whichever best suits you or the image. :]
Make sure the texture layer is above any additional colour layers, otherwise it'll look funny and make sure it is below the overlay. You know the definition I was on about earlier? Yeah, that's where this comes in. It just helps your image stand out more. It could be deleted... but I choose not to.
The texture came from: http://princess-of-shadows.deviantart.com/art/victorian-dreams-texture-pack-84323858
You can see my result below, I went back and put some makeup on it afterwards in the same way I coloured the eyes, I used a little bit of burning but it's mostly just colour.

I hope this helped and would love to see your results. :]
/Chimes' Tutorials
 Stumble!