Page name:
Character Design Basics 3 [Logged in view]
[RSS] 2004-08-26 17:30:23
|
# of watchers: 1
|
Fans: 0
| D20: 17 |
CHARACTER DESIGN BASICS 3
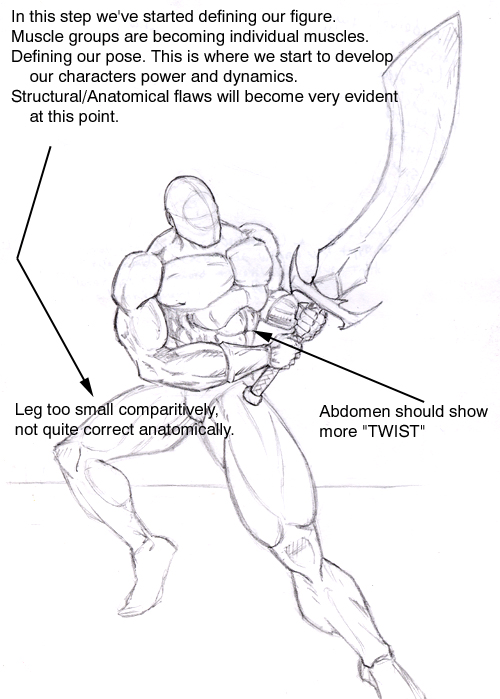
Ok, starting to get a character here!
By this point we can start taking those basic shapes and refining them. Making muscle groups into defined muscle masses. A cylinder that signified the upper arm now becomes a bicept and tricept. This is where you will show how big and strong your character is going to end up. How much detail and definition you're looking for.
Now at this stage, I do things slightly different than most other artists I know. I'll bet you're wondering, "What if my character is going to be clothed or armored?". Well I always draw in the basic muscle structures and minor details anyway. Nothing bothers me more than looking at pics where knights have on armor that looks so tight its like skin. Or clothing looking like its draped on like a blanket. Attention to detail is key to makeing beleivable, realistic, eye-pleasing character renderings.
So now you have your basic character hashed out, maybe showing off a specific weapon, maybe a concept for some cool armor or whatever. Well now you can go in and start erasing some of your guidelines.
Ok, this is the end of the road. I'm not going to keep working this character for you. From here you'll have to use your own imagination to make the character your own and unique. If you have an questions or concerns please feel free to message me ([
Farewell]). Also if there are any specific things you'd like me to go over please don't hesitate to ask. Good luck drawing!
Back to step 1
Character Design Basics
Back to step 2
Character Design Basics 2
Back to
Tutorials
| Show these comments on your site |
 Stumble!