Page name:
Creating Transparent GIFS on MS Word [Logged in view]
[RSS] 2006-09-11 09:00:38
|
# of watchers: 1
|
Fans: 0
| D20: 12 |
Creating Transparent GIFS on Microsoft Word
I have found a way of creating GIFS for all you people out there who don't have a Photoediting program like Photoshop or even the free one called GIMP. (lol, I love that name!) And I do it... du-dudah!!! On Microsoft Word!!!! *gasp**gasp**g
asp* and in 3 easy steps. It might only work on the XP version, and forgive the screenshots if they don't look exactly the same, I use an Apple Mac.
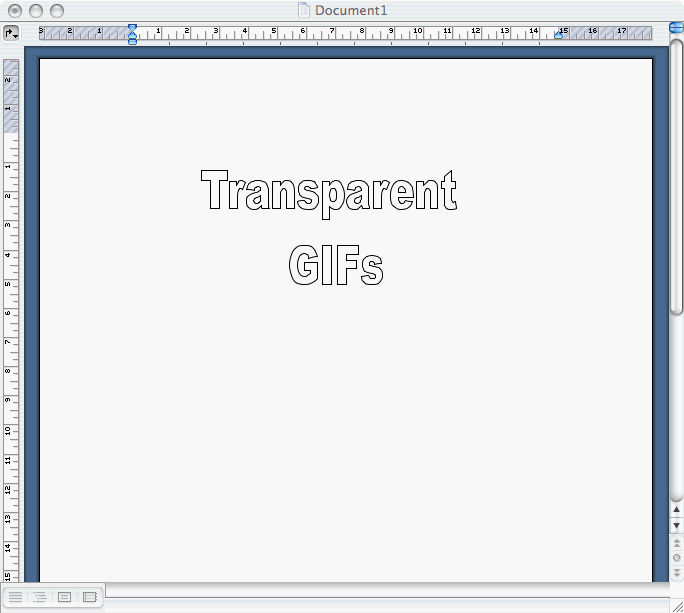
1. First, you make your design, like say a word or picture (or use an old one)
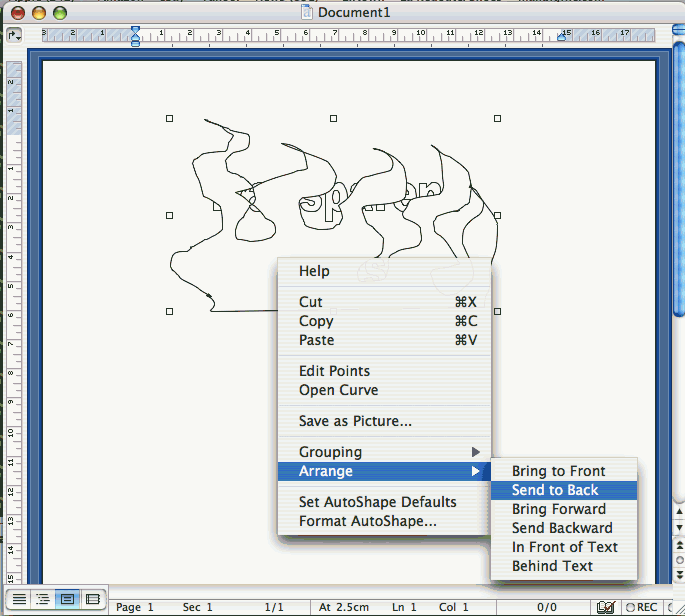
2. If you want to make a complicated design that uses more than one shape, you first have to make it, making dure they are all in the right place, like if you want something overlapping the other, but it cam out the other way round, you right-click the picture and go to "Arrange" and either click on "Bring to Front" or "Bring Forward".
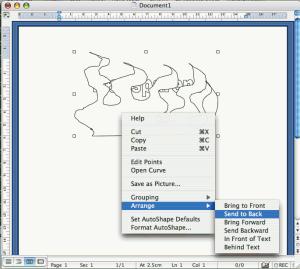
When you are happy with your design, then use the "Select objects" tool in the drawing toolbar, (The second one down that looks like a cursor in a dashed rectangular box) then right-click on one of the objects, go to "Grouping", then click on "Group" Now the many pictures are one! To edit after, right-click on the picture and go to "Grouping"-"Ungroup". Voila!
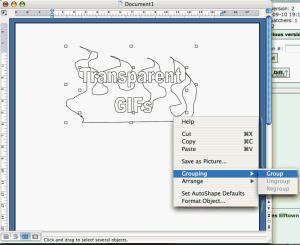
3. Once you have done that, create a rectangular box slightly bigger than the picture, then double-click on it and set the transparency to 100%. (I sometimes create a big rectangle, set the transparency, then resize it.) You then drag it over the picture and Arrange it so you "Take to Back" in the same way as in step two. Finally, double click on the box again, and where it tells you the colour of the line, click on it and select "No Line". Now watch out, because now the box is completely invisible so make sure it's in the right place before you do this.

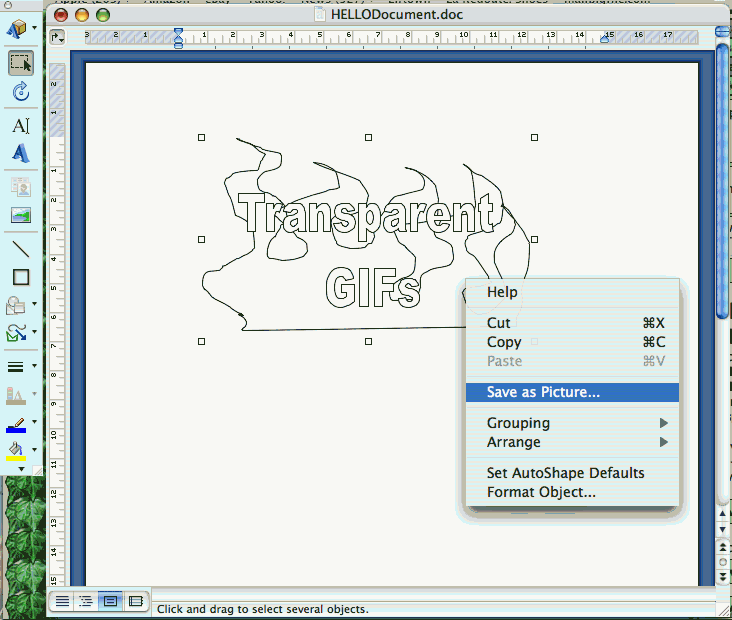
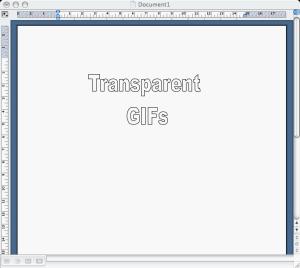
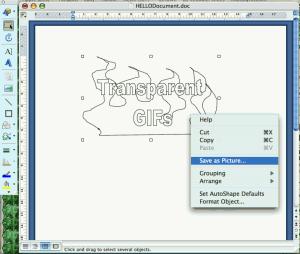
Then use the "Select Objects" tool again, and group the box and pictures together, making one picture with a transparent background. Finally - and this is important, DON'T take a screenshot of the picture otherwise the transparency doesn't work - right-click the picture, then click "Save as Picture" You can now sit back, sip some tea, and get a snazzy badge of an ant if you want. (you can do this step at the beginning, but I find it easier to do it at the end. If you do do this at the beginning, remember not to take out the line otherwise you might not be able to find it again!)
| Show these comments on your site |
 Stumble!