Instead of just throwing you into inking manga style and seeing if you sink or swim, we're going to go over a few inking basics.
Now, as manga inks tend to be a lot more detailed than a regular ink, it takes more time, and there is more room for error. Hopefully, this reveiw can help avoid some hassel.
First off, there are two main ways to ink: by hand and digitally. I ink by hand, mainly because none of my paint programs have a pen tool. Now, when inking traditionally, there are three tools one can use: pens, brushes, and nibs. Pens are a good tool for beginners, but anyone can use them. Nibs and brushes can give line width variation in one stroke, but are harder to control. Personally, I use pens of different sizes.
Having a steady hand and arm really helps when inking, especially with long, flowing lines. Left handed artists, like me, have to be especially careful not to smear our inks all over the paper. Keeping a scrap sheet to rest your hand on can be a big help.
Alright, let's start with a pencil drawing!
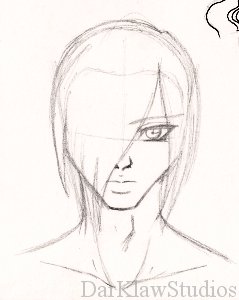
I draw in H2 pencil because it is light, easy to erase, and doesn't smear too much.
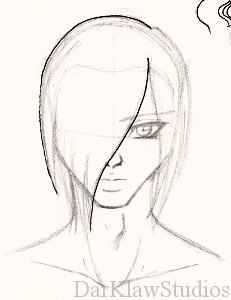
Now, pick an area to start inking. Being left-handed, I usually start on the right side of the page to avoid the dreaded smears, but you can start just about anywhere you like.
For this particular piece, I started with the hair. It's the top-most part of the drawing and since it covers most of his face, it makes the most sense to ink it before what is underneath. Note the contiunous look, even though each of these lines are made up of two strokes.
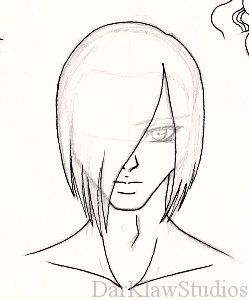
Keep inking, but try not to stray to far from your pencil lines as this can make things look a tad lopsided. I tend to leave the most detailed area, in this case, the eye, until very last so there's virtually no chance that I'll smear it.
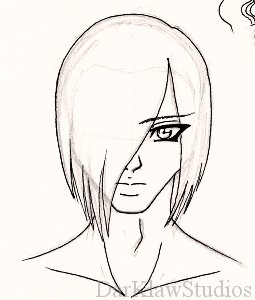
Inked in the eye, adding heavier black for the eyelashes. The eyebrow is made up of several little strokes instead of one line. I think it looks more interesting, and more like a real eyebrow that way.
Now you have a nicely linked drawing! ...But, it's a little drab, with all the lines being the same width.
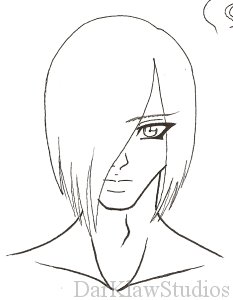
This is where having pens of different sizes comes in. With a larger pen, I came in and added heavier black to his jaw and shoulders. Using varied line width like this gives your ink more pazazz, and is very important in manga.
I also erased the pencil lines. Remember to let your ink dry before you erase so you don't smear!
Now, this is a fairly basic ink. This image is destined for color, so I didn't go into as mush detail as I would in something that was going to be screentoned.
We'll go into the particulars of manga-style inking in the next step.
On to the next Tut - DM- Manga Inks
Back to Inking Top - DM- Inking
Back to the Index - Drawing Manga
 Stumble!


