Elysiann's Inking with GIMP - Style 1
PLEASE note that this tutorial is written for beginners, but should also be useful for peeps who have experience as well.
Anyways, I have provided a picture that may be used for the purpose of this tutorial, and this tutorial only... You may also use it on Elftown if you state clearly that the picture was drawn by me, and coloured by you... give credit, were credit is due!
Here is the picture...

Okies, as You can see, I draw very messy, which is why I often use black lines in my art... neatens the whole thing up. Anyways save image enlarge if you have to, but zoom works just as well.
Okies ready?
 STEP 1
Pictures have been thumbnailed
STEP 1
Pictures have been thumbnailed

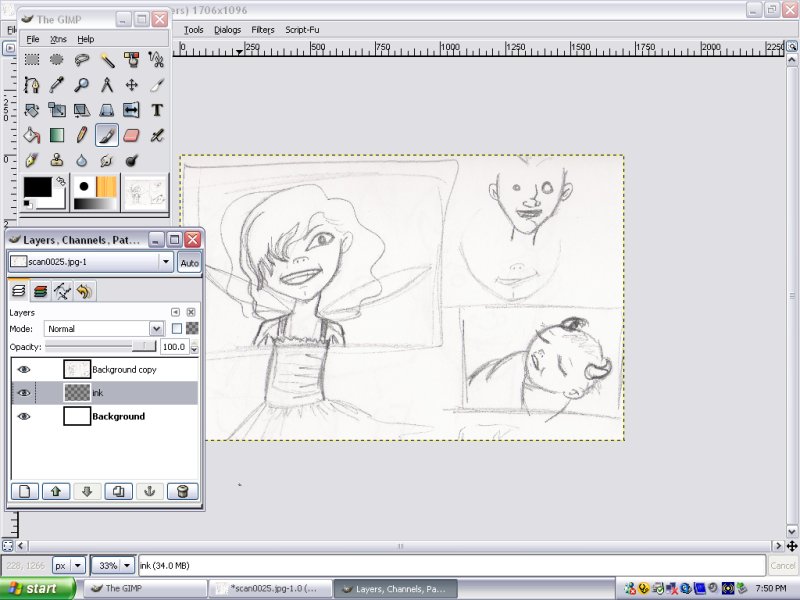
First open image.. (of course! duh!) and Duplicate the image... if you don't know how to do that, well it is the little button in the little button on the layers dialog that features the two little pages together. Now clear the original background so that it is plain white, and change the the sketch layer from normal to multiply, then create a new transparent layer and call it ink.
STEP 2

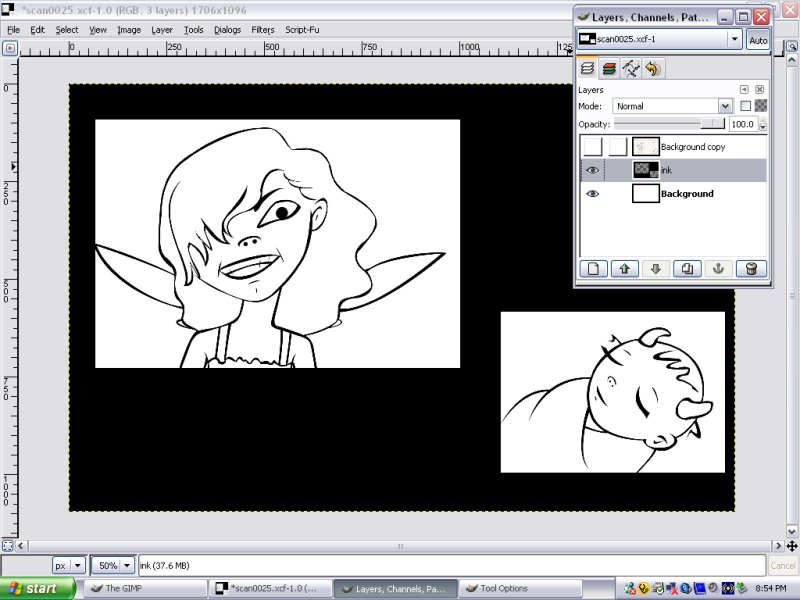
Make sure that the ink layer is selected, now we is gonna use the rectangular selection tool, and make a selection around the pictures. Done that? good, invert your selection and then bucket fill with whatever colour you like... I used black. Next turn the visability for the layer off and select a rectangle around the next image... (the baby), and cut. Make the layer visable again.
You might wanna save about now, mainly cause computers have a tendency to crash after you have just about completed whatever it is you are working on, so if you save reguarly you save yourself a lotta trouble.
STEP 3

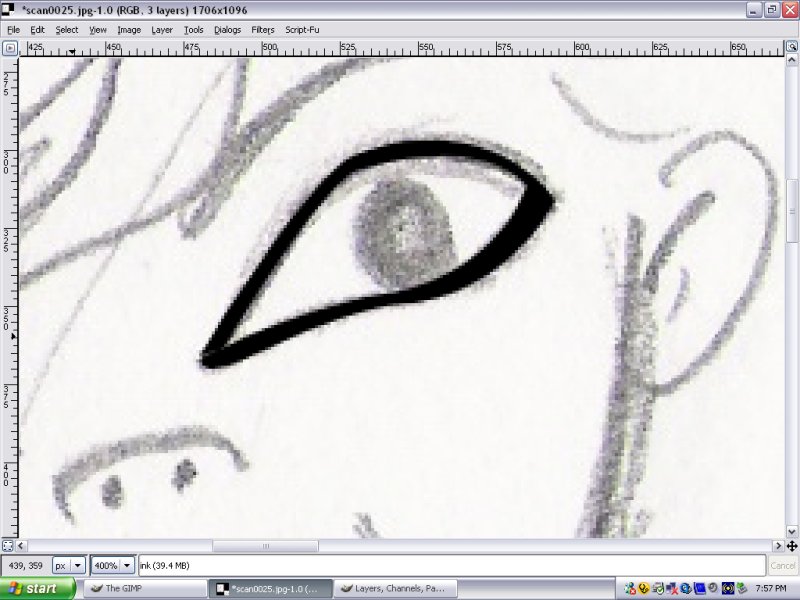
Now to ink in the picture... This takes a while, and you might want to really zoom in on the picture, makes it a hell of a lot easier, and make sure you are still on the ink layer. Now select your path selection tool thingy (not sure what it is called). and put the anchors around the line you are going to ink, making sure that when you get to the end of the line, to bring the anchors back up the other side of that line (refer to image for example), now curve the selection lines to fit the pencil line.
Note, the selection lines don't have to be exactly parallel to each other, a little bit of unevenness adds to a great ink line that looks really cool and comic booky :P ( if you understand what I am talking about I congratulate you cause I am confused!). go to your tool options, select create path. That pencil line should now be selected, now bucket fill with the colour of your choice... once again I chose black.
your line should now look like this.

Go and repeat for the whole image.
You don't need to stick eactly to the lines of the drawing... use it as a guide only. and remeber to un zoom occasionally to see how the image is coming together as a whole.
Finished inking?
Your image should now look like this

You can also delete your sketch layer now.
you should end up with this.
 STEP 4
And now the fun begins.
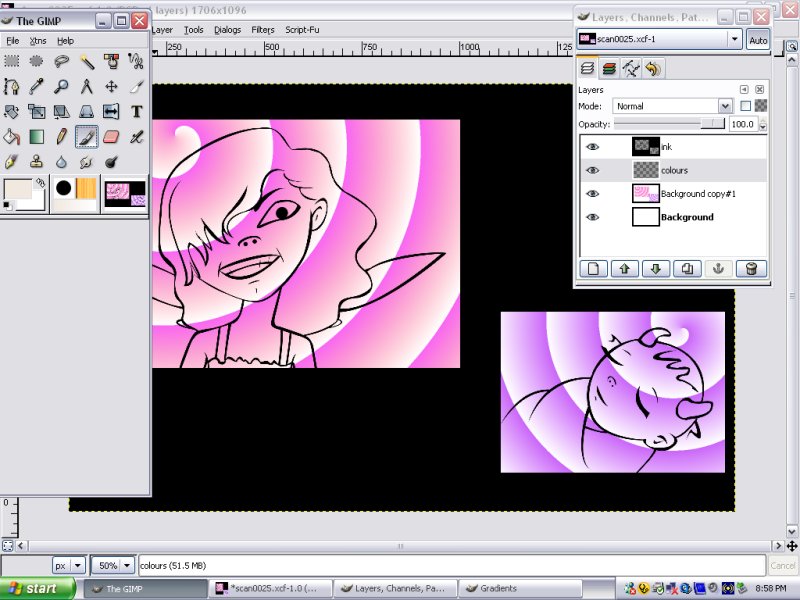
duplicate the white background layer. then rectangular select the first little image. Now experiment, go crazy, whatever, make the background purdy.
I have used a gradient, and in the tool options made it swirly... but that is just me. Pink for courtney cause she loves that colour, then I repeated the process but used purple for Katrina (what didnt I tell you? this is a portrait of my daughters you is working on... :P better do a good job of it cause they is liking to be critical).
 STEP 5
time to colour the kiddies. New layer name it colour. and colour away... I have done mine... have you done yours?
 STEP 6
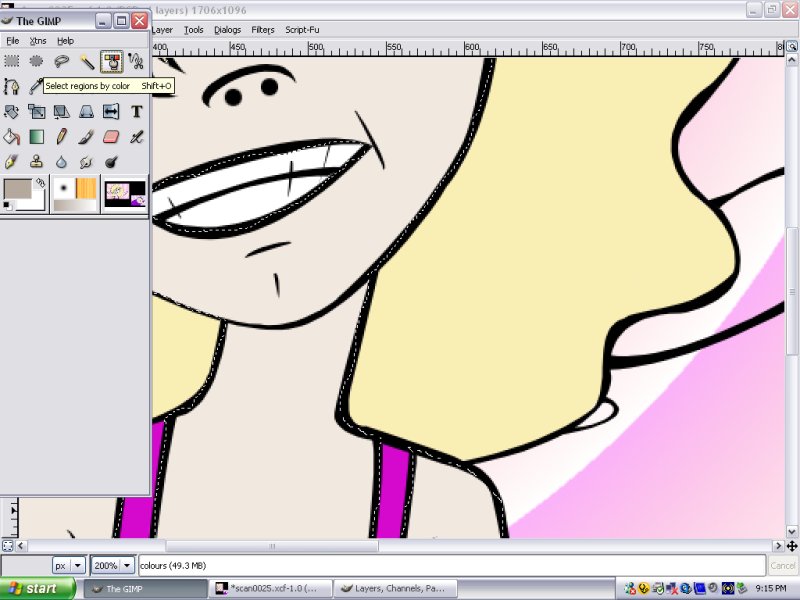
now we better add the shadows... and I'll let you in on my favourite shortcut. You will want to select the 'select regions by colour tool. select the colour you are going to add the shadows to, then use you paint tool and shadow away( i find that a fuzzy brush works well for this), this way you won't get any of the shadow colour in places it probably should be... i.e shadow fo skin in the hair.
 If you are colouring with a mouse, it is so much easier and neater if you do it on zoom...
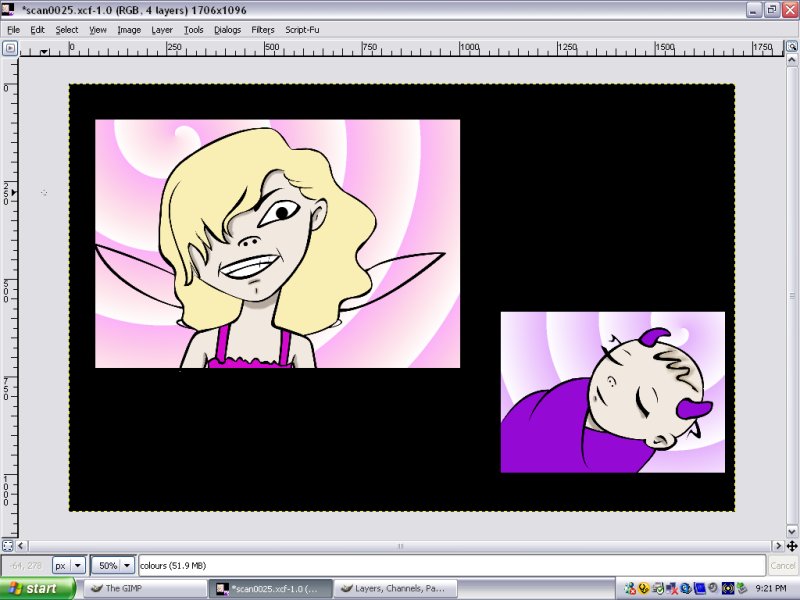
we should now be looking like this...
 my god almost forgot the wings... just add new wing layer. colour then make it about 50% opacity
STEP 7
my god almost forgot the wings... just add new wing layer. colour then make it about 50% opacity
STEP 7
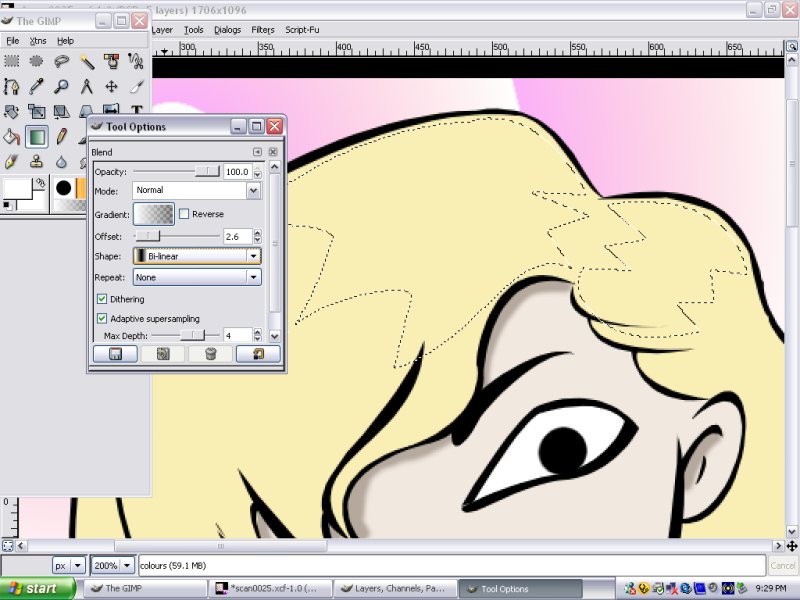
highlights... would someone get me some highlights please! :P
using the path selection thingy me bob make a area were you is wanting the highlights, then have white as your colour and select the gradient foreground to transparency, and with the tool options, set the shape to bi linear, and there you go.

okay we should be looking like this now.
 STEP 8
finally... last step.
decoration... have fun, experiment whatever...
I made up a brush, and did allsortsa star thingys...
well, we is all finished now. YIPPEEEE!
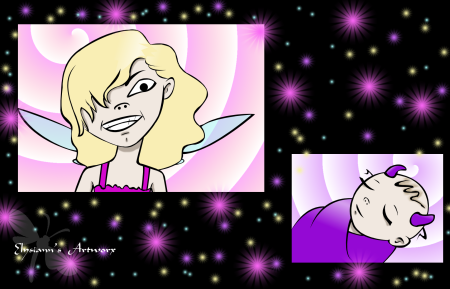
just resize image to whatever size you want it, and save as a .png the colours are better when you do. *happy dance* finished! woot woot.
I haven't gone into a lot of detail with the backgrounds and decoration and stuff, because I believe you should experiment. You get to know the program a lot better when you have to work a few things out for yourself :).
If you had any trouble understanding anything, just ask me and I will try to clarify :).
If you used my drawing for this tutorial please put a copy of it at
Elysiann's tutorial end results, It would be much appreciated... thankies people.
Back to Elysiann's GIMP tutorials
Back to A tutorial by Elysiann
Back to [Elisha Kelly]
 Stumble!