Page name:
Elysiann's Inking with Gimp - Style 2 [Logged in view]
[RSS] 2005-11-29 23:33:43
|
# of watchers: 1
|
Fans: 0
| D20: 14 |
Elysiann's Inking with GIMP - Style 2
Okay this is the first style I learn't for inking lines on my pictures, it is more uniform and even, and while it is not my favourite method, it is faster.

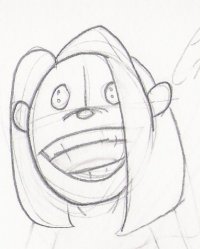
Okay Here is an image I have provided for your use in this tutorial
PLEASE note that this image if used must be place at Elysiann's Tutorial end results and credit must be given to me as the drawer of the artwork. Also this picture is not for use outside of Elftown.
Okay onto
STEP 1
Images have been thumbnailed, click to see a fullsize version

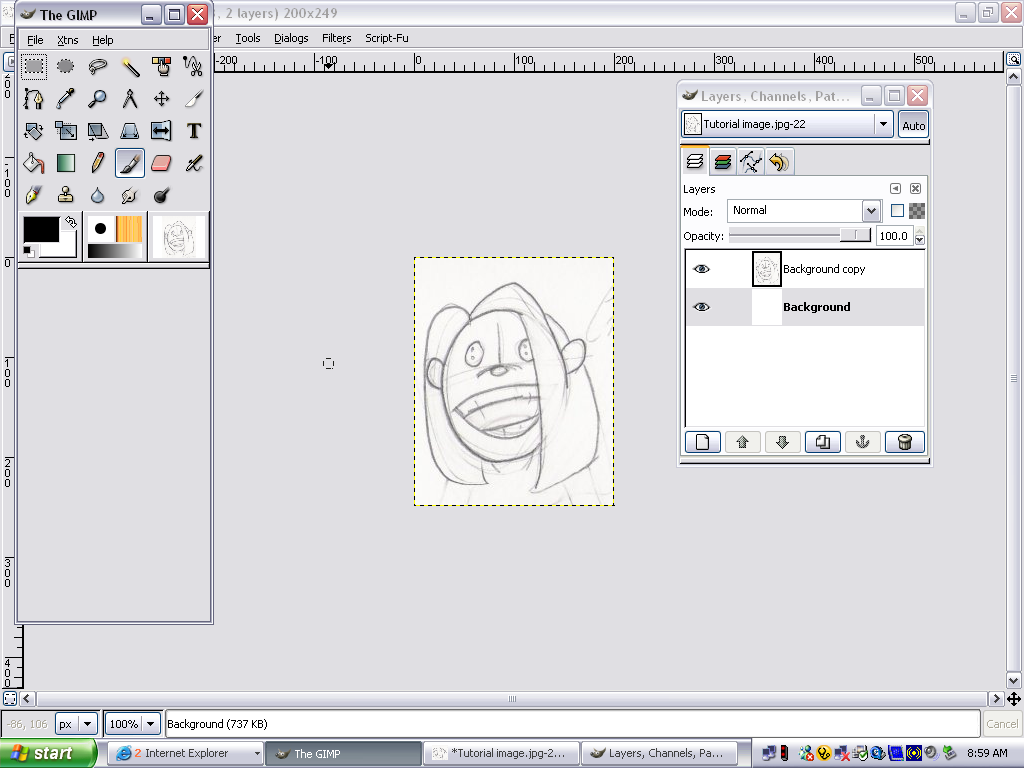
Okay open image... duplicate layer then clear the original layer so you have a white background. now click on the sketch layer (better rename it from background copy to sketch) and change it's mode to multiply.
STEP 2

Make a new transparent layer, calling it ink then zoom in on the picture.
you don't have to zoom in on the picture but it is a lot easier if you do
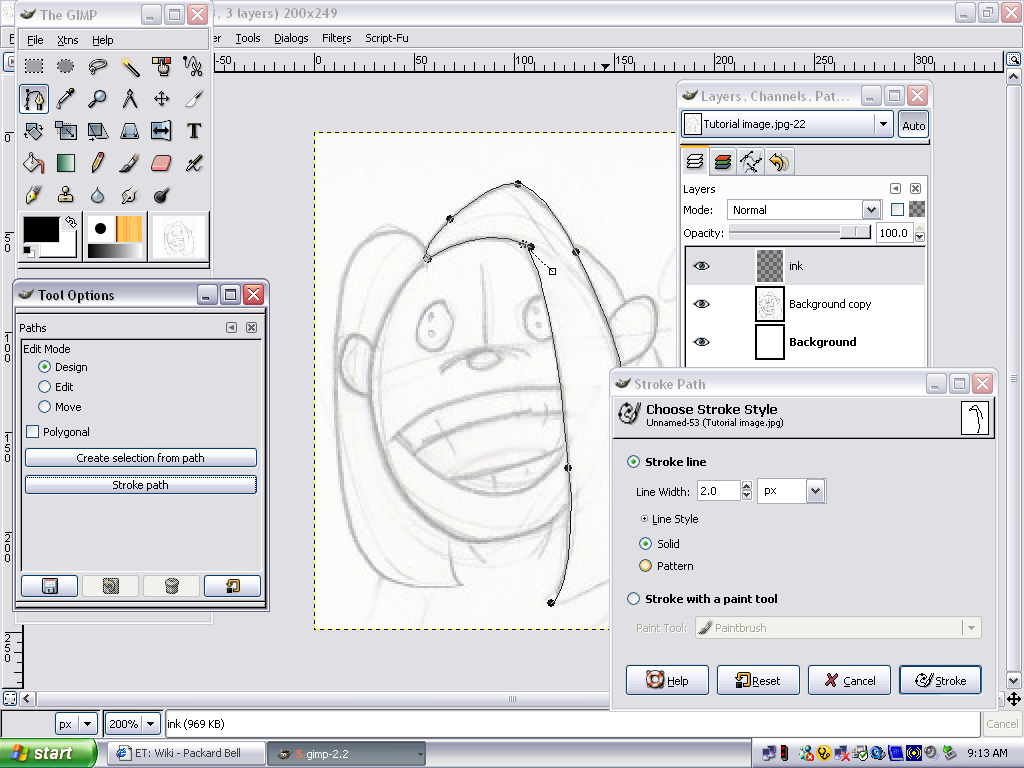
STEP 3

now alls you have to do is select the create and edit paths tool, then placing anchors (just click on the line and a little circle thingy appears this is an anchor) along the line you are ready to ink. after the anchors are placed adjust the curve of the anchor lines to the drawn lines. Open your tool options window (double click on the create and edit tool) and select stroke path a choose stroke style window should come up (so many freakin windows :P) I always choose stroke line... it is easier, stroking with paint tools pretty much looks the same anyway, though I would use this option if you you wanted to use a specific brush to create the line. Anyhoots if you have selected Stroke line you need to then select the size of your line... I chose 2 pixels for this drawing, but you can choose whatever size you like :P now press STROKE... and you have an inked line.
NOTE you can ink more than one line at a time, just make sure that all anchors are unselected before you anchor the next line.
Okay after each line you need to unselect the create and edit path tools, why Well cause otherwise you will re-ink the anchored line that is why, that is the only wy I know to make the anchors go away .
Now go finish inking.
note that you can play around with different line thicknesses and such (is that even a word o.0), to create intereting lines in your artwork...
Finished?
well delete your sketch layer and you should end up with this...
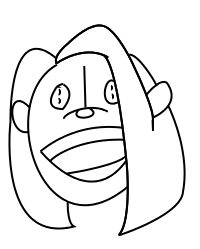
Tadaaaaa :P it is so easy peasy.
Back to Elysiann's GIMP tutorials
Back to A tutorial by Elysiann
Back to [Elisha Kelly]
| Show these comments on your site |
 Stumble!