| Entrance | Mainstreet | Wiki | Register |
|
# of watchers: 1
|
Fans: 0
| D20: 8 |
| Wiki-page rating |  Stumble! Stumble! |
| Informative: | 0 |
| Artistic: | 0 |
| Funny-rating: | 0 |
| Friendly: | 0 |
 | Step 1: Fill that empty white void with something less distracting. I’ve started with a murky green here, but you can use whichever colour suits the world you want to visualise. Flat colours are fine, or you might want to just swish your brush around to have a base texture that is even more comforting. This is how I start almost all of my paintings, but it works especially well for experimental world building. |
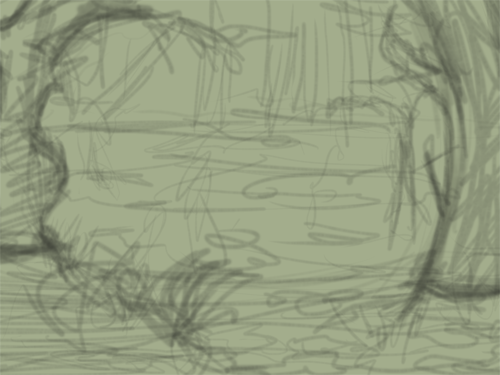 | Step 2: Now you can either start sketching or just lump colours on, whichever you prefer. What you want to do here is to plan out the very basics of your composition and any major forms you’ve already decided on from the start. It’s ok if this isn’t very well planned out at this stage because this tutorial is all about experimentatio |
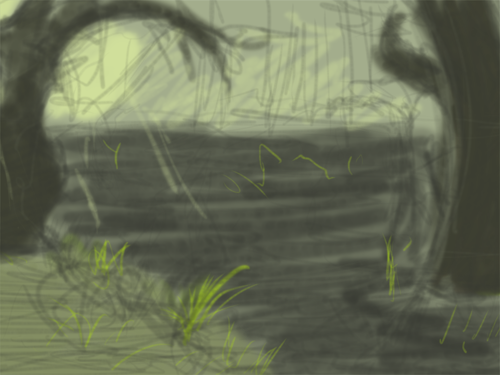 | Step 3: Now plan out some more details: this is where most of your environment creation should start. Scribble in any plants, trees, buildings, and the general idea of your world’s colour scheme. Working in a few layers is usually good here because you can just move and resize things as you please until you have something you like. Another tactic for this, if you are a photographer or have some stock you’re allowed to use – is to roughly cut out the forms of different objects you think would suit your world and just collage them around (either in your painting or on a separate page) to get an idea. When you’re happy with the composition just paint or sketch everything in on a new layer, don’t worry too much about perfecting it at this point. |
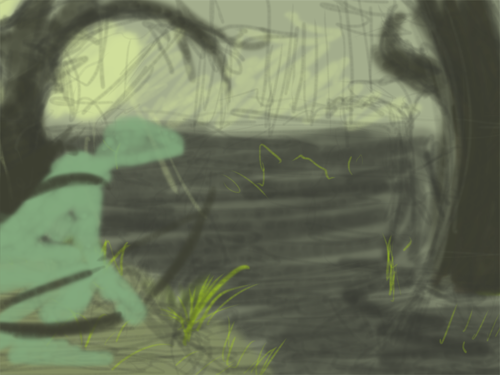 | Step 4: Start plotting in your inhabitants. I just have three in mine, and one is very much in the foreground – but they add a bit of life and scale reference to your scene. If your focus is on the world itself and you’d rather not draw any detailed figures - silhouettes and small figures in the distance usually have the same effect. |
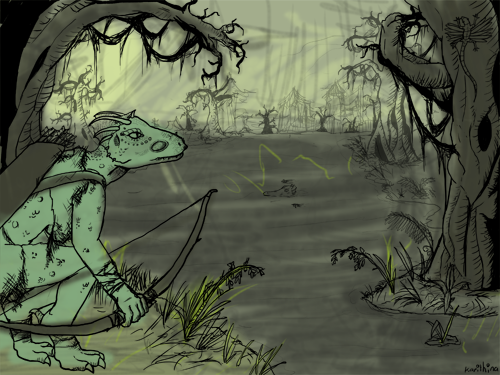 | Step 5: If you are very much into lineart then start working around your sketches and/or colour blobs. Depending on my mood I will either use my lineart in my final image or paint over it entirely later. You’ll want to decide which parts of your sketch to keep and if you want to add any new details. If you aren’t a colourist you can just discard your experimentatio In this particular painting I decided I wanted to keep my lines for the final piece, so I refined them here and finalised out a lot of my scene here rather than in the next step. I’ve worked in a few layers of lines so that those in the distance could be set to a lower opacity. |
 | Step 6: The majority of your paintjob is what may be one of the lengthiest parts of your painting, depending on how you work. You should have a basic idea of most of what you need to paint now so you can go ahead and paint in whichever style suits you. I’ve used a custom brush that looks a bit like a Copic marker for most of my colouring, working out my midtones first – followed by shadows, and then my highlights. Since you’re creating a world here feel free to experiment and do things in a random order until they look like what you need. |
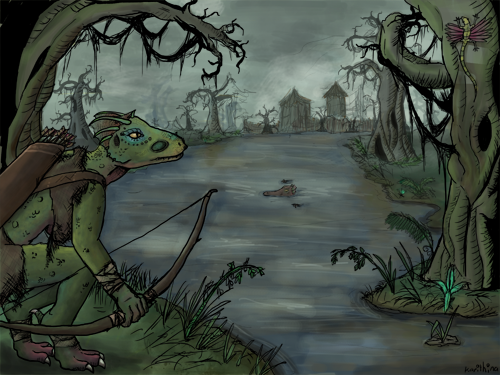
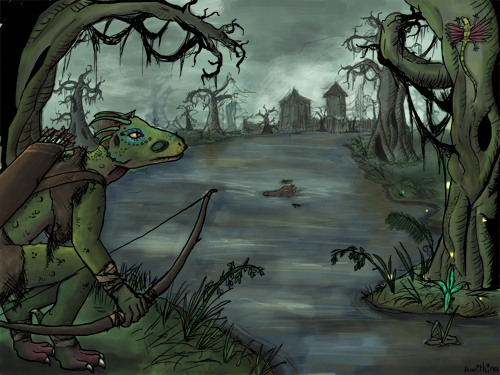 | Step 7: Add the finishing touches! Little eye-catching details, any highlights, and usually where I’d fiddle around with my hue/saturation and brightness if I wasn’t happy with my colours. |
| Show these comments on your site |
|
Elftown - Wiki, forums, community and friendship.
|