 Welcome to Hummingbird's Colouring Tutorial!
 This tutorial will go through the colouring process step by step for you, my rather sloppy process >:3. Remember this is only my way of colouring, you will have your own style that will work for you :) this is just to give you an idea lol heres a tip before we start, make sure your wrists aren't resting on the edge of your keyboard! Ouch huh?

 Ok
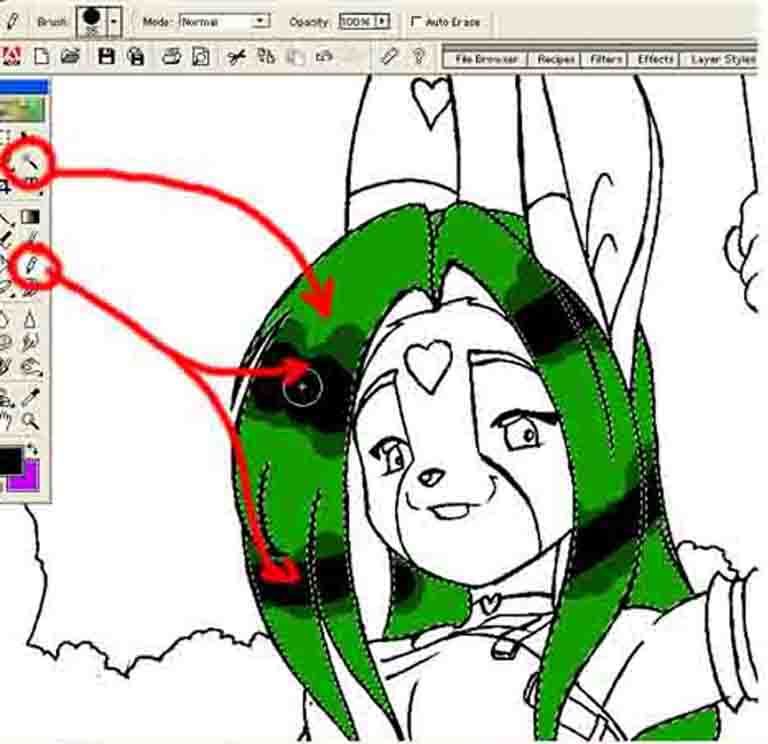
Ok here I'm starting with the line art, this has to be pretty clean, try messing about with the 'Brightness and Contrast' option in the Enhance menu :3 I'm also using Adobe PS
Elements, now this is no where near as good as the full thing but its fine for this little walk through!
Once you've got your lines nice and tight click on the magic wand as shown and highlight your chosen area, here I'm doing her hair, heres a tip, if you hold the shift key while highlighting you can choose more that one area <:3
Now that you've got it block in the colours your going to use! Here I've gone for green (tis the smex ;p) once thats done, choose a lighter and darker version on your fist colour. It'll work, trust me.

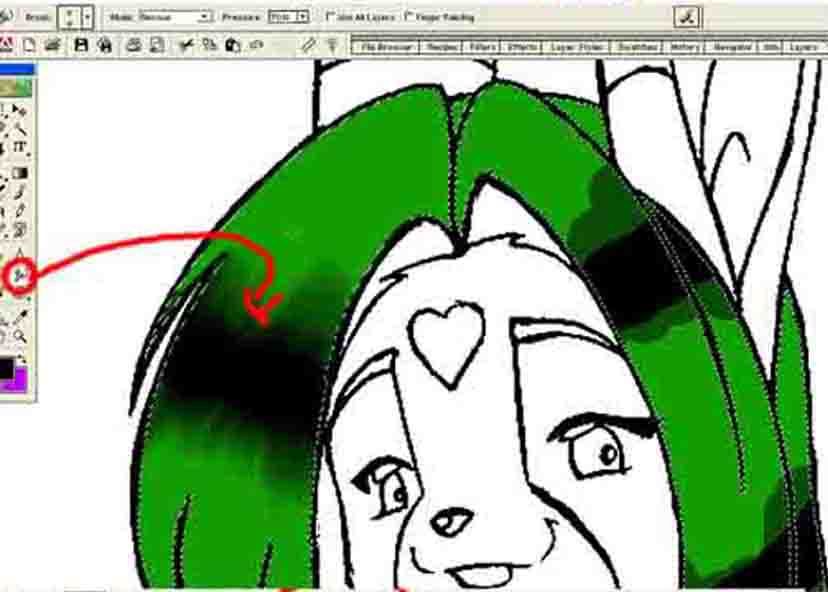 You
You dont need to do this but I find it helps, use the Smudge tool to blend all the colours roughly together to work with :)

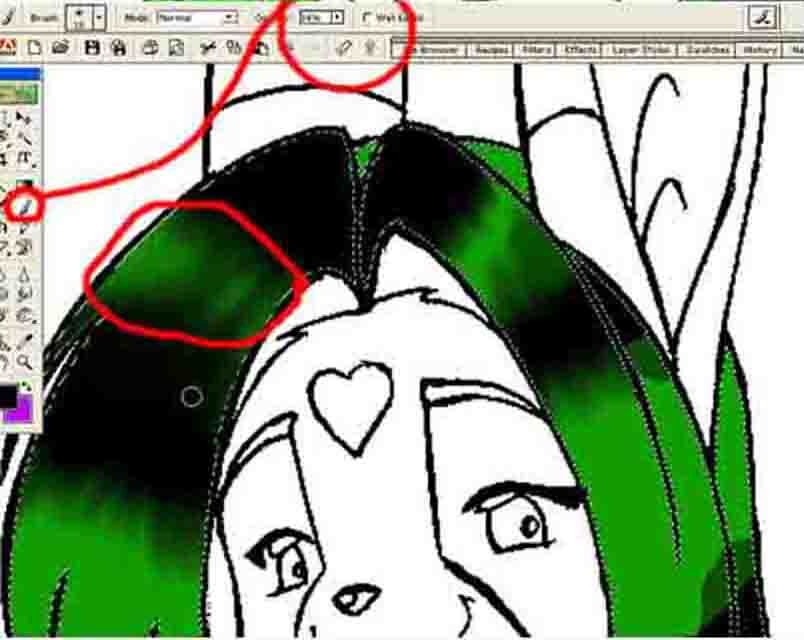 Here
Here I've changed some of the dark spots, just ignore that, I bet you dont make those sorts of mistakes ;)
After your done, take the paint brush and change its opacity setting right down to about 10 or 12 circled in red for you :) This will make blending easier. Now just start making hair, basicly covering up the smudge lines. Have a try at separating the hair strands, down strokes, easy peasy!

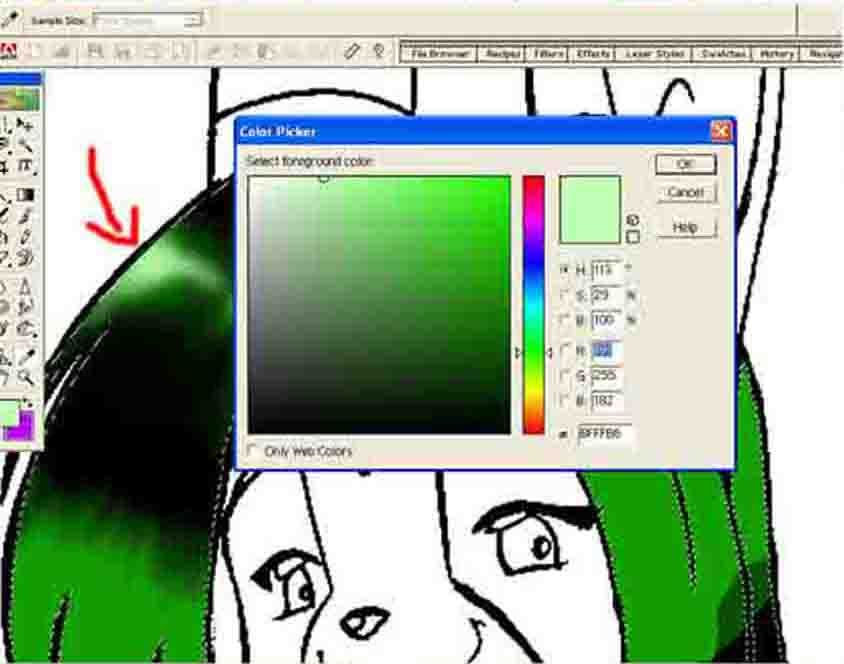 For
For the shiney shiney look you'll be needing highlights, try not to use white, I find using a very light version of your starting colour looks alot better. Try to keep in ming which direction the light is coming from :) plus a tip, less is more.

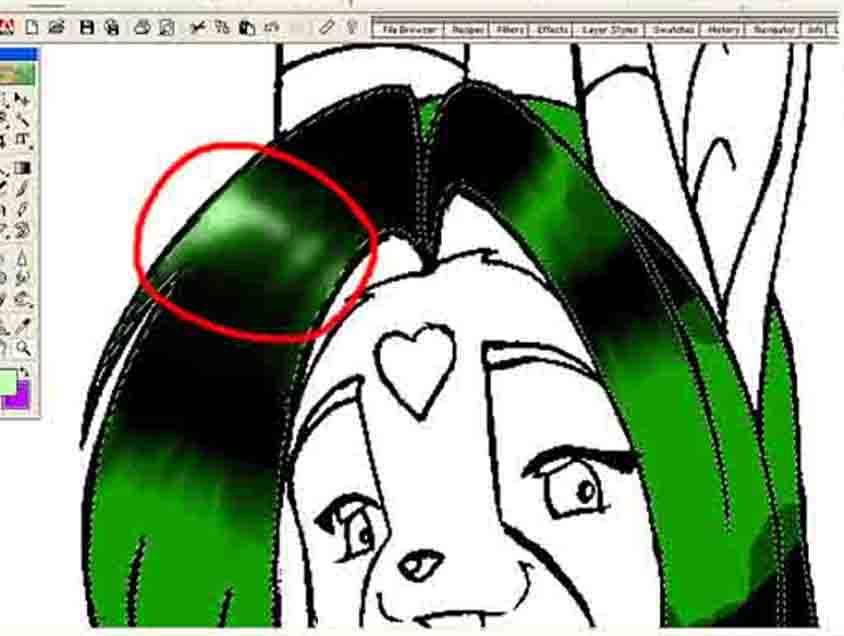 Here
Here it is, half way through adding some of the highlights! Hope yours looks better than this XD
 Omg wheres the rest? I only have a few colours!? That can't be it!
Calm down and turn the page ;p
Colouring - Second page

Enjoying yourself so far? Got those fingers going? Whats next huh? anything else you can work on? of course there is! What do you take me for? a lazy person?? Dont answer that >:3
Back to
Hummingbird's Tutorials for more!! Or run the other way, which ever works for you :3 get back here!!
 Stumble!


