
At first I wanted to devote this entire page to inkting alone, but then I figured out that I wasn't smart enough yet to make a complete inkting tutorial when I can't explain what I'm doing. So, you got to live with it.
For this combined tutorial, we'll be using a new piece since the other one of the previous tutorial is a little bit complex and I burned it after I finished last page. Ahem.
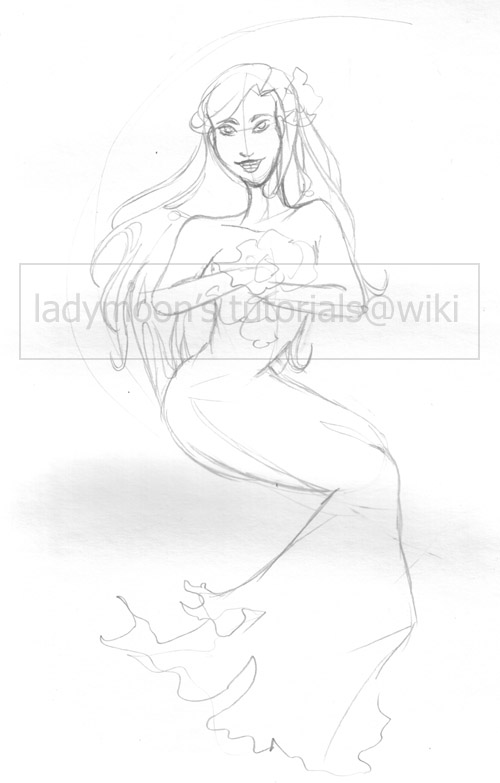
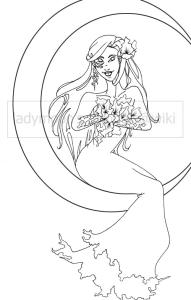
Take a drawing
Like this one:

As you can see, I'm a very messy sketcher and I can tell you that it's quite annoying sometimes. So remember
thin lines and no real pressure on the paper. You'll curse yourself in the end if you don't.
I started to
inkt the drawing with a
0.1 size Rotring pen bought in the art store in town. I like to work with this size of pen since the lines become very crispy and smooth after you scanned and resized the darned thing in photoshop.
My kind of pen is an inkt pen with a filling and not one of those manga-ka pens that you have to dip in the bottle of inkt every time over and over again. The great thing about this kind of pens is, that your work hardly smudges and that the inkt is quickly dry. You can also inkt your drawing in in photoshop if you have a tablet or if you're that good with the mouse but this is an easy way to do it.
I recommend you start somewhere around the head. I myself always like to start with the eyes, then the nose mouth, outlines of the face, hair etc. Just work your way down.
If you start to feel that the pen is slipping of the lines, then
immediatly stop! If you continue, then your lines will only wander off further of the sketch and it will all become messy. There's no way to really learn this. You got to feel it and practice a lot.
Yeah, I'm cruel.
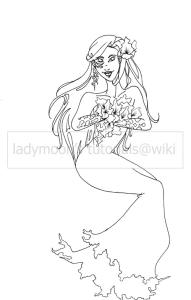
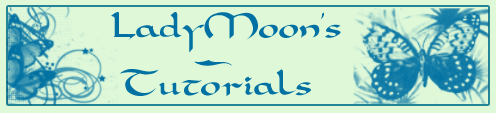
As you can see, I added and changed some things around. (That's the fun of intking, you can always add something more if you feel something is missing. Be carefull on that one though, cuz inkt won't erase itself). The face is a little more joyfull and the drawing is somewhat more in proportion.
After all lines are done in inkt, you can erase all pencil lines off the paper. I like to use a soft eraser stolen from my art teacher who never uses the stuff anyways. By the way, don't steal from your art teachers! Understood? I'm so not gonna learn you kids how to steal.
Anyhow, if you drew soft lines it should be fairly easy to remove all lines without crumbeling and ripping the paper. It's recommandable to use a think kind of paper and to place your hands on the ends that might become ripped off. Also,
don't erase too hard. You might burn some lines in.
Time to scan lovelies!
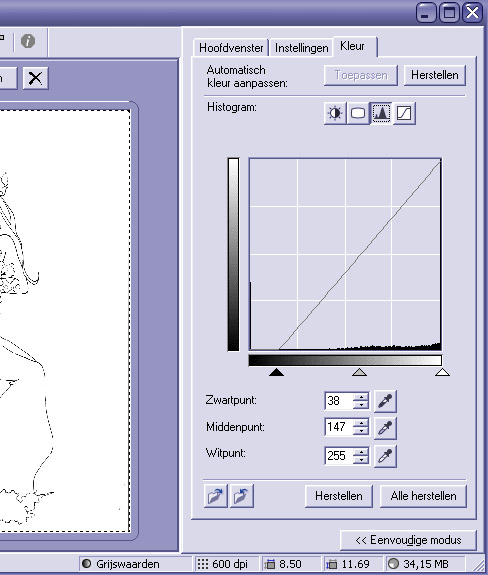
Open your Photoshop or whatever kind of programme you're using and open your scanning programme. I myself have a good old Canon LiDE 30 and when I open it this image pops up:
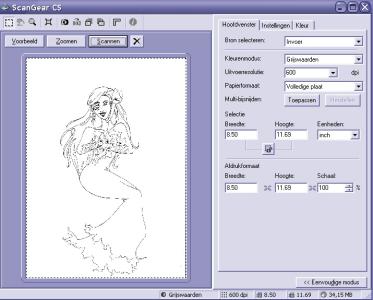
Alright, don't shout before you know what it says. Since I like my stuff in my own language it's in dutch, but I'm only gonna tell you what to do. You load the image like I did and on every scanning programme, something like this should appear.
I've set my settings on
600 depts and
greyscale.
If you'd scan the image now, it would look very soft grey and the lines won't be as crispy as they should, so we're gonna play a bit around with the levels. This can also be done in Photoshop itself by clicking on
Image -> Adjust -> Levels. In my scanner, this has been build in, so I click on
Color (the far right tab saying
kleur) and this image appears:
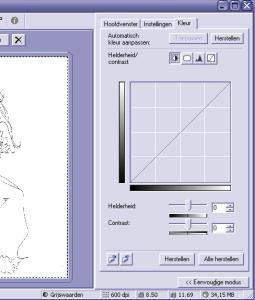
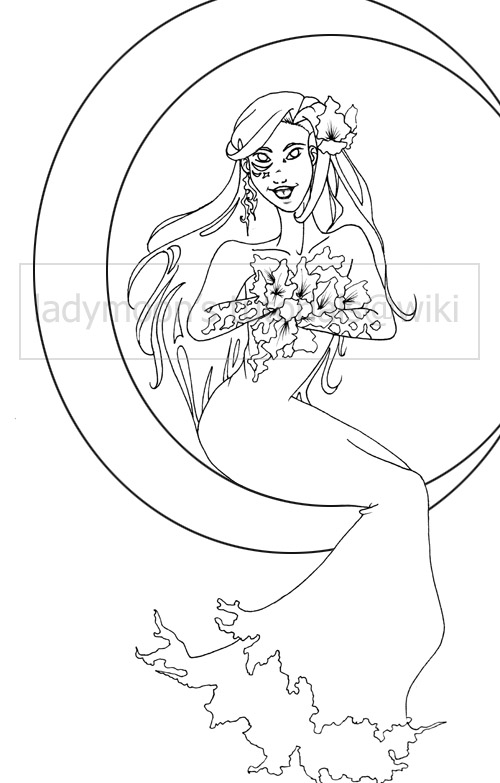
I click on the

button and wh00pa this happens!
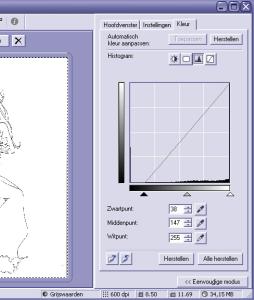
This pops up and you might recognise it. It's the window for changing the
Levels of your drawing.
I moved the black angle a little bit to the right so the black lines of the drawing become more clear and smooth as they should be. There is no real guide line for this, it's all about how you like your work scanned and how you develope yourself.
After I scanned the image and resized it to something acceptable, I didn't liked some parts so with a
3 pixel brush I painted some parts away, like where my pen took an off road exprience and the eye lids annoyed me greatly too. I also added a little beginning of a background with the

tool and used
Select -> Modify -> Contract to get those nice borders which I will explain later if someone is dying to know.
Stay tuned for the next challenge!
Colouring.
Onward! -->
Nuu! Back to LadyMoon's Tutorials<--
--How to lay the perfect Egg
--How to crack the perfect Egg
--From Doodle to Drawing
 Stumble!