Back to
Lighting Magic: The Dolphin
On to
Lighting magic - part two
1. Sketch
This has to be said: I hate sketching. The sole idea of repeating the same image over and over is enough to kill whatever inspiration I might have at the time. Thankfully, we are now in the era of digital thingies, and there’re several solutions to the sketching problem. One approach is creating many little thumbnails, with creative use of copy-paste. The purpose of said thumbnails is to figure out the composition and lighting (and colors and…) at a small size where you aren’t distracted by detail. Another way to go about this is take a file of medium size, and sketch on various layers in the same file, one sketch on each layer. It’s easy to compare them, and once you find the right one, you can delete the excess layers and expand the image to the size you want. Yet another way (my favorite) is to start with an image of the size that you expect the final product to be in, zoom out, and then sketch on different layers – or even the same one. This method has the advantage that, since the file you’re working with is essentially big, you can afford more rampant cropping than with smaller image sizes, and you won’t end up sketching with 1 pixel brush in mere minutes.
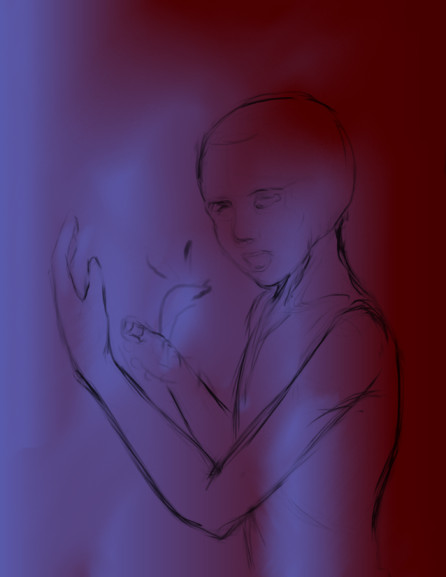
How this relates to the image at hand is that I first had the image in mind that involved the child being depicted at full height. One or two sketches later I realized that it wasn’t the optimal solution, so that’s where cropping came in handy – I was using the approach of sketching on large size image, while zoomed out. After some messing around with the brush and eraser I came to the concept that you can see in the provided image. It’s far from anatomically perfect (I mean, look at the length of that arm), there’s also no detail to speak of, and the kid is bald, but it served the overall purpose of laying out the composition and general pose.
At this stage I also took care of some underlying background colors, while keeping the sketch on its own separate layer, set as ‘gel’, where it stayed almost until the very end. Background is, like it or not, a very important part of any painting, so it is extremely advisable to have at least some inkling of what you’re going to put back there as soon as you start working on a picture. It is even better if you put this inkling down on the canvas or paper as soon as you start working – a) it will keep your values in check, b) it will ensure color coherence throughout the picture, c) it will prevent headache later on when you realize that your character has been hopelessly stranded in empty space and you’ve no idea what to do to ground them. Normally I’d block the general shapes of the background in right away, but for this image I’d already decided that it would have to be something semi-abstract looking, so I just filled the canvas layer in with a pretty red color, and put some even prettier blue streaks all over it. Note that I did not keep them from being neatly arranged or symmetric, because the more ‘orderly’ the picture is, the harder you have to work to keep it dynamic (read: interesting). On a side-note, I later on discovered that this particular color combo is exceptionally hard to print, although it looks nice on a screen, unless you know a very good printer. OK, next!
Back to
Lighting Magic: The Dolphin
On to
Lighting magic - part two Stumble!