Wiki:
Page name: Origami birdbase, crane and dinosaur tutorial [Logged in view] [RSS]
2010-11-15 17:45:12
# of watchers: 4
Fans: 0
D20: 16
Bookmark and Share
 Slideshow 

Origami birdbase, crane and dinosaur tutorial


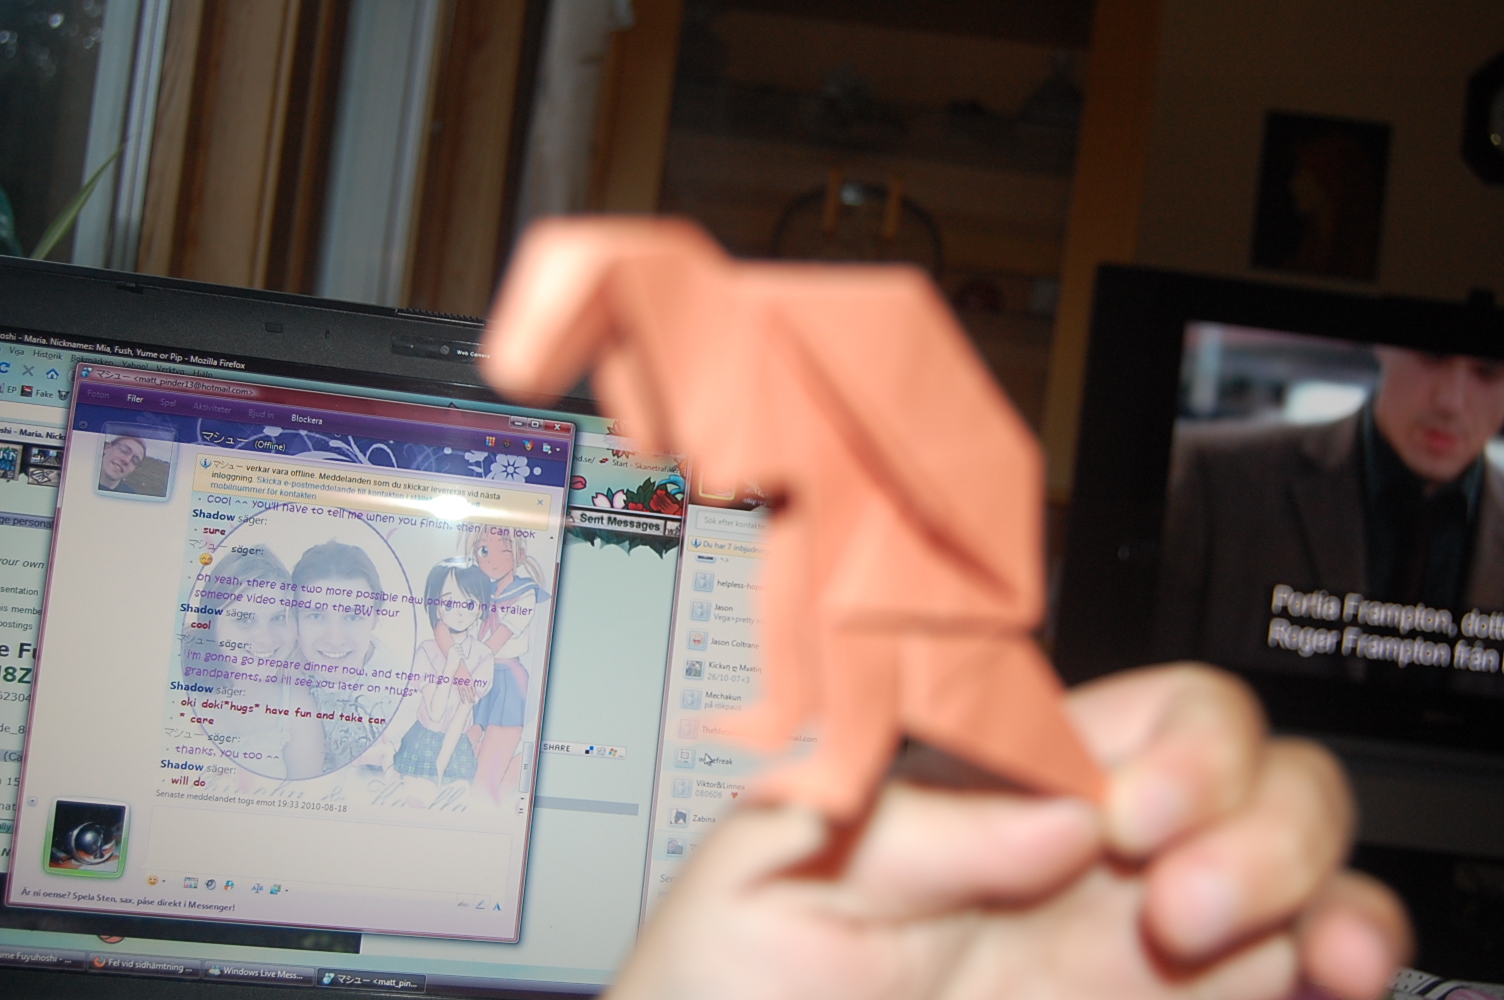
As I once said in my house I'd make a tutorial if someone wanted a tutorial of some origami so I decided to make one for the bird base and then show you how to make the dinosaur and the crane. The crane is the easiest of the make of the two so I'd recommend to make the crane first. I've used two different kind of paper, for the dinosaur I used a real origami paper with one white and one brown side, and for the crane i used an ordinary one colored square paper but you you can use what ever paper you want as long as it's square.


The bird base


<img300*200:stuff/Bird_base_step_one%3a.jpg>
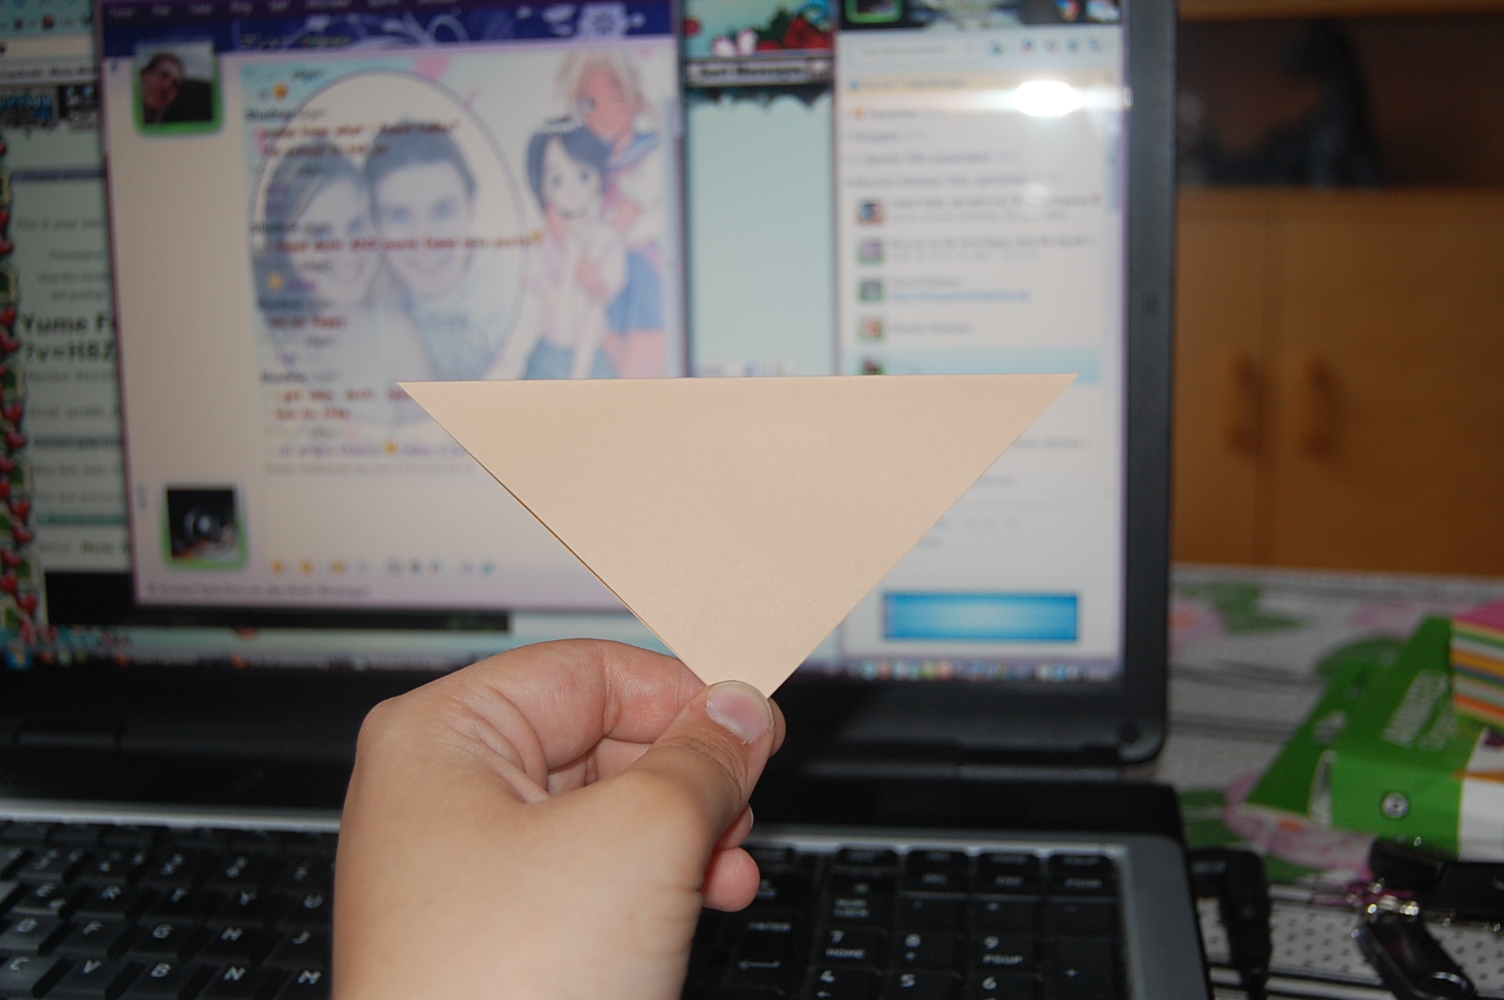
1.Start out with a square paper
<img300*200:stuff/Bird_base_step_two%3a.jpg>
2.Fold the paper to a triangle, unfold turn it 90 degrees and fold again.
<img300*200:stuff/Bbird_base_step_three%3a.jpg>
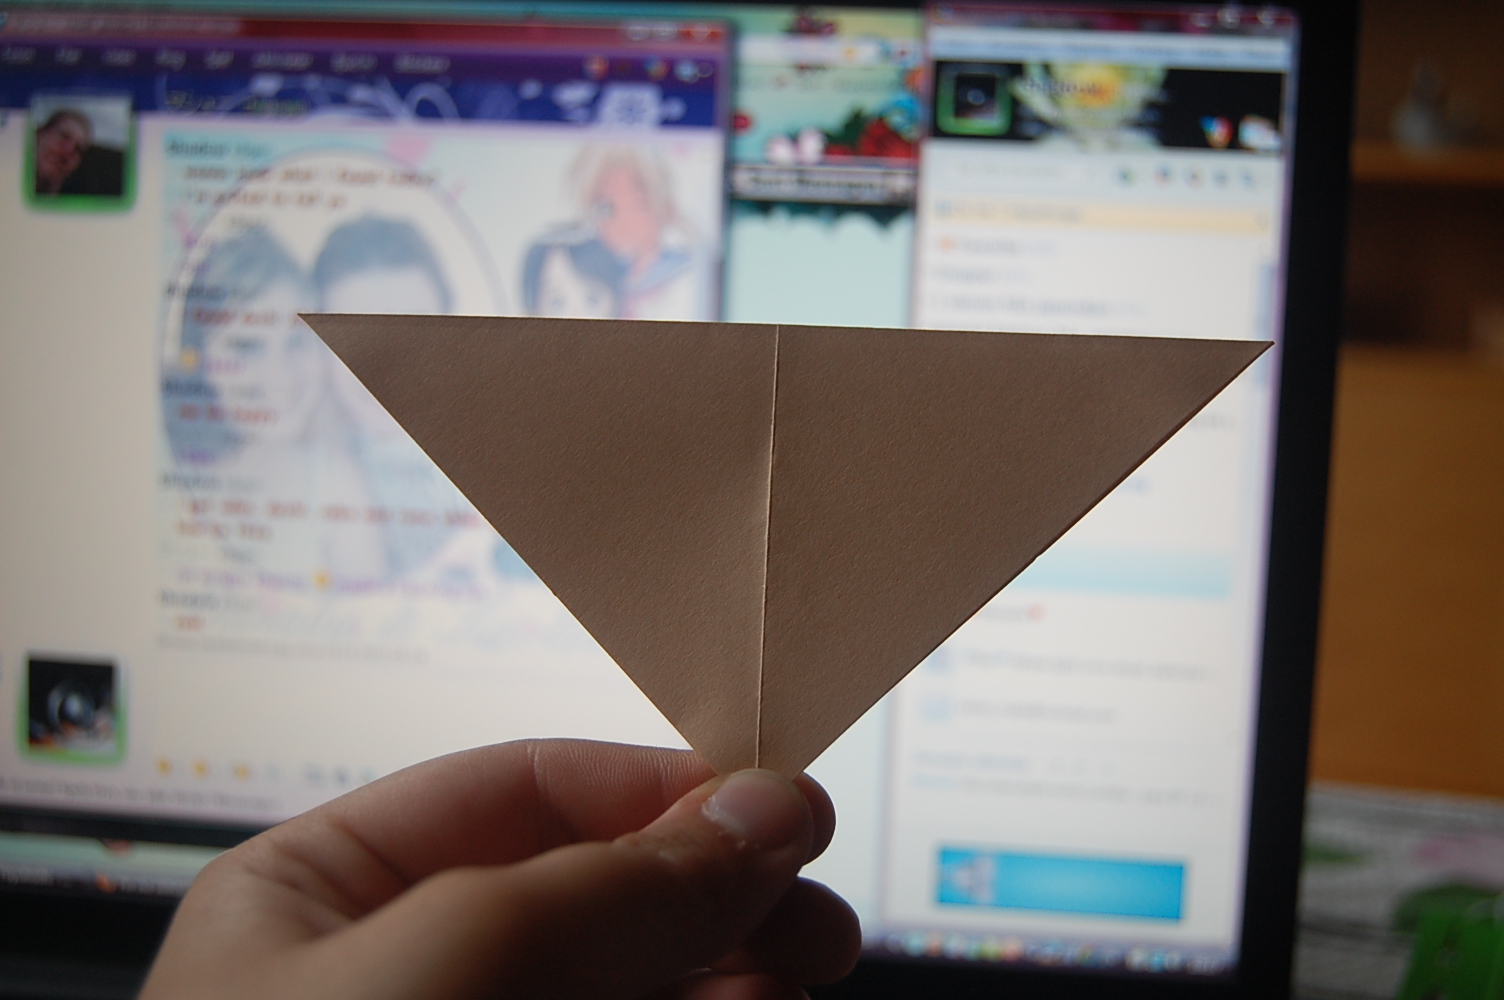
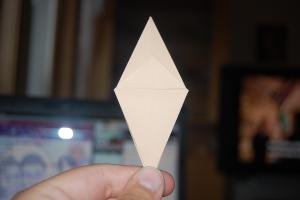
3.When step 2 is done the paper should look like this.
<img300*200:stuff/Bird_base_step_four%3a.jpg>
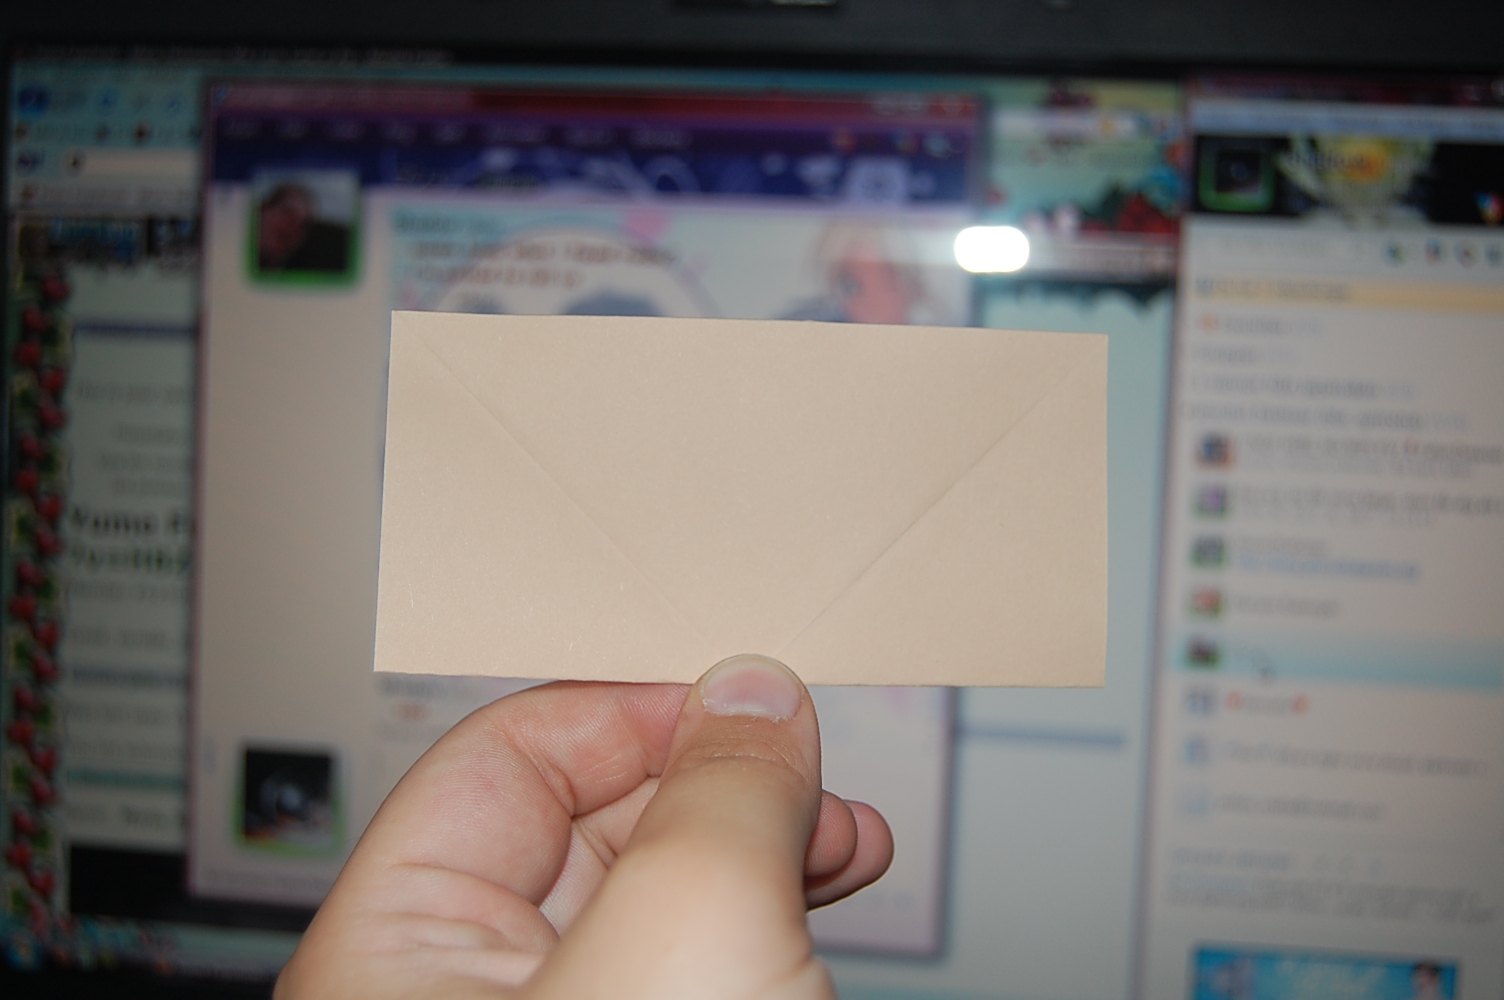
4.Now fold the paper so it becomes rectangular like it is in the picture. Then unfold and turn 90 degrees and repeat.
<img300*200:stuff/Bird_base_step_five%3a.jpg>
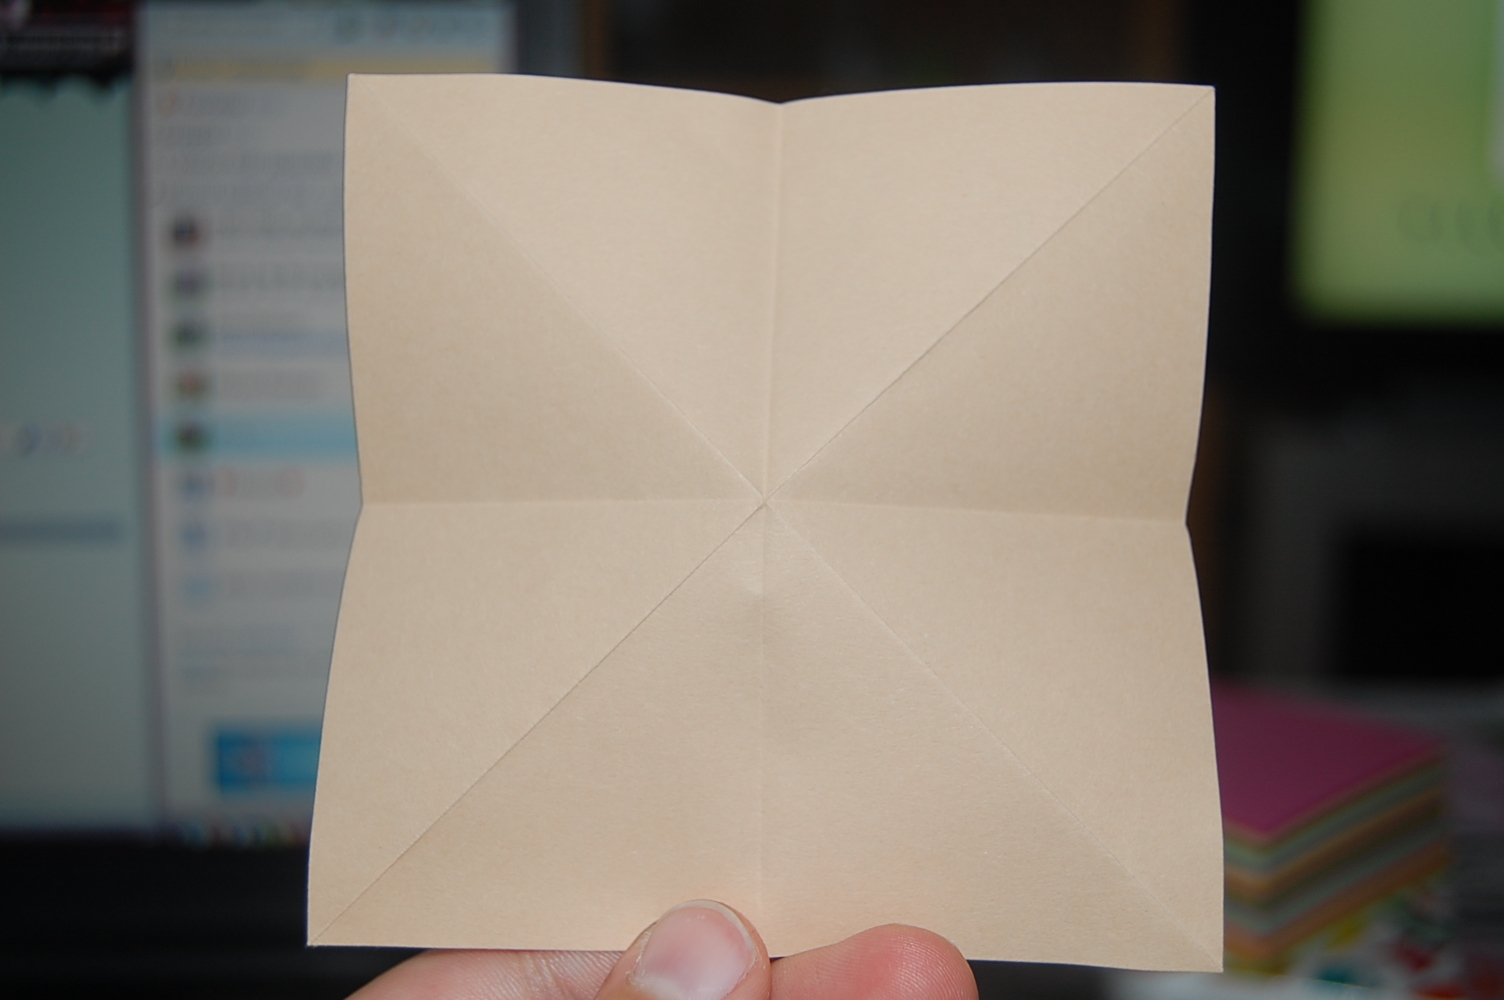
5.Unfold and it should look like there's 8 small triangles on the paper.
<img300*200:stuff/Bird_base_step_six%3a.jpg>
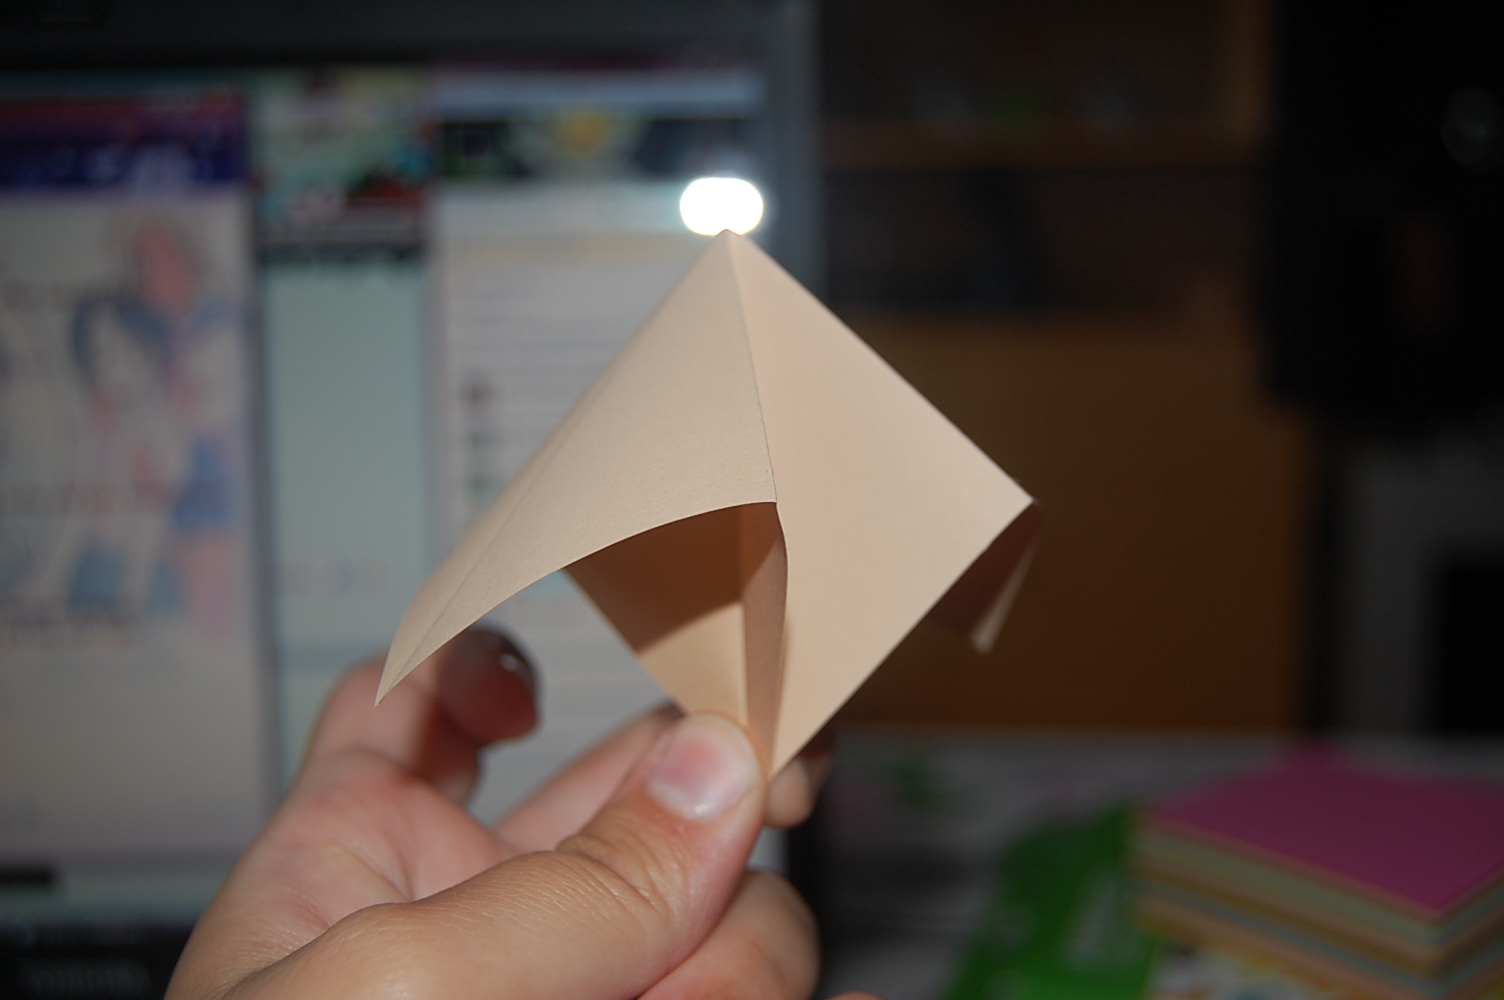
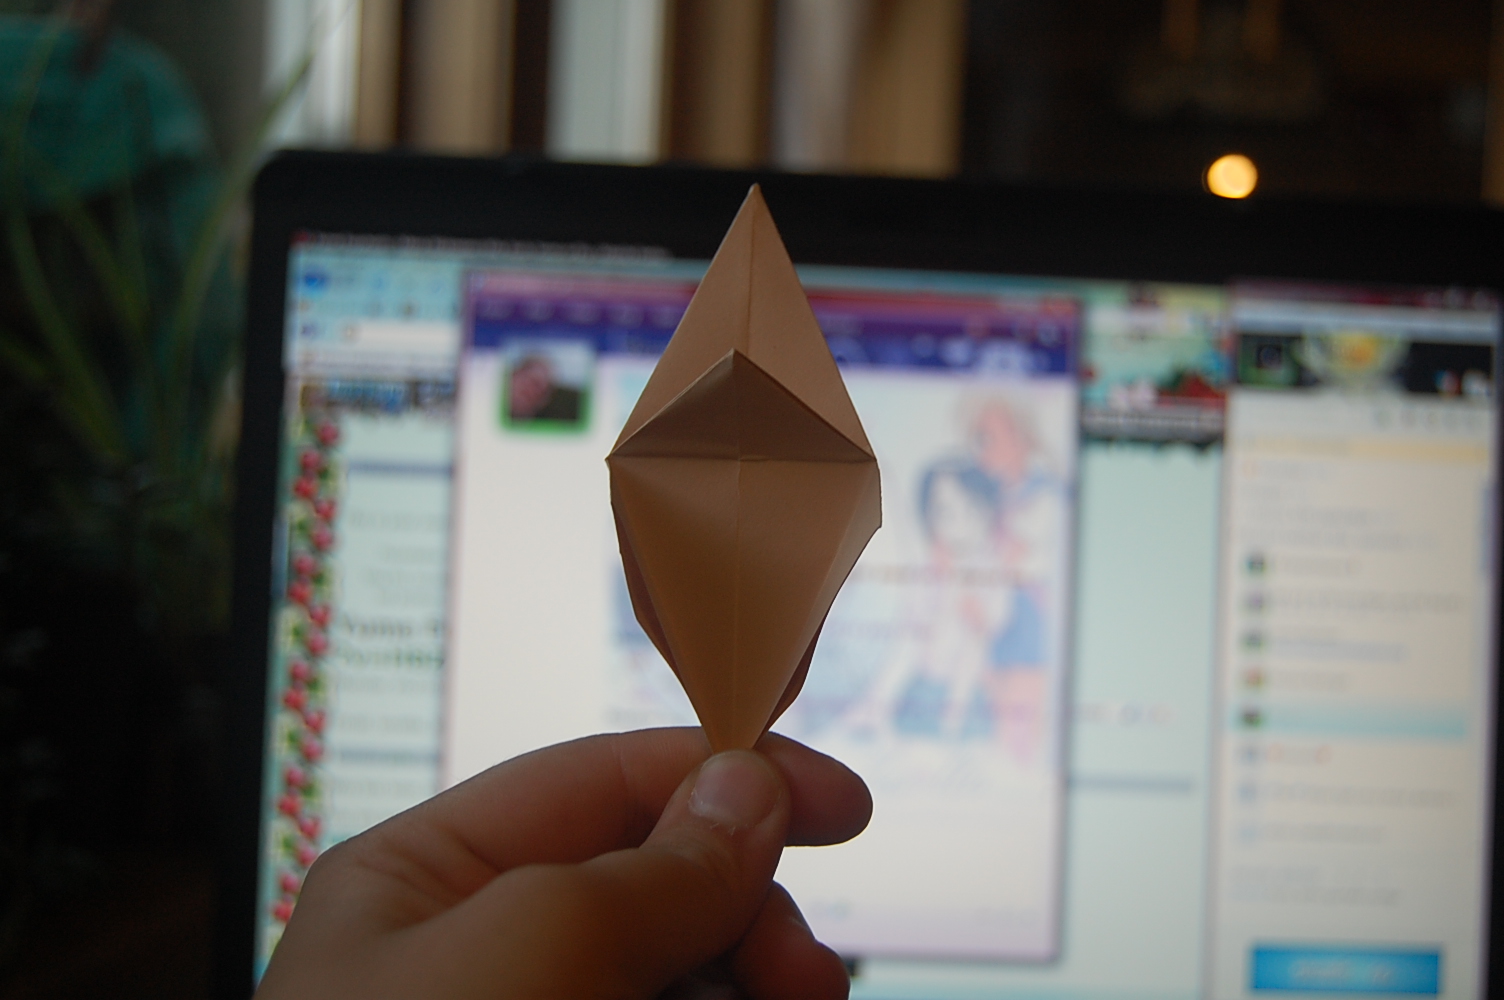
6.Fold the paper to a triangle again now you should be able to fold in two of the pointy ends and make it to a smaller square.
<img300*200:stuff/z/62304/Origami%2520birdbase%252c%2520crane%2520and%2520dinosaur%2520tutorial/DSC_0293.JPG>
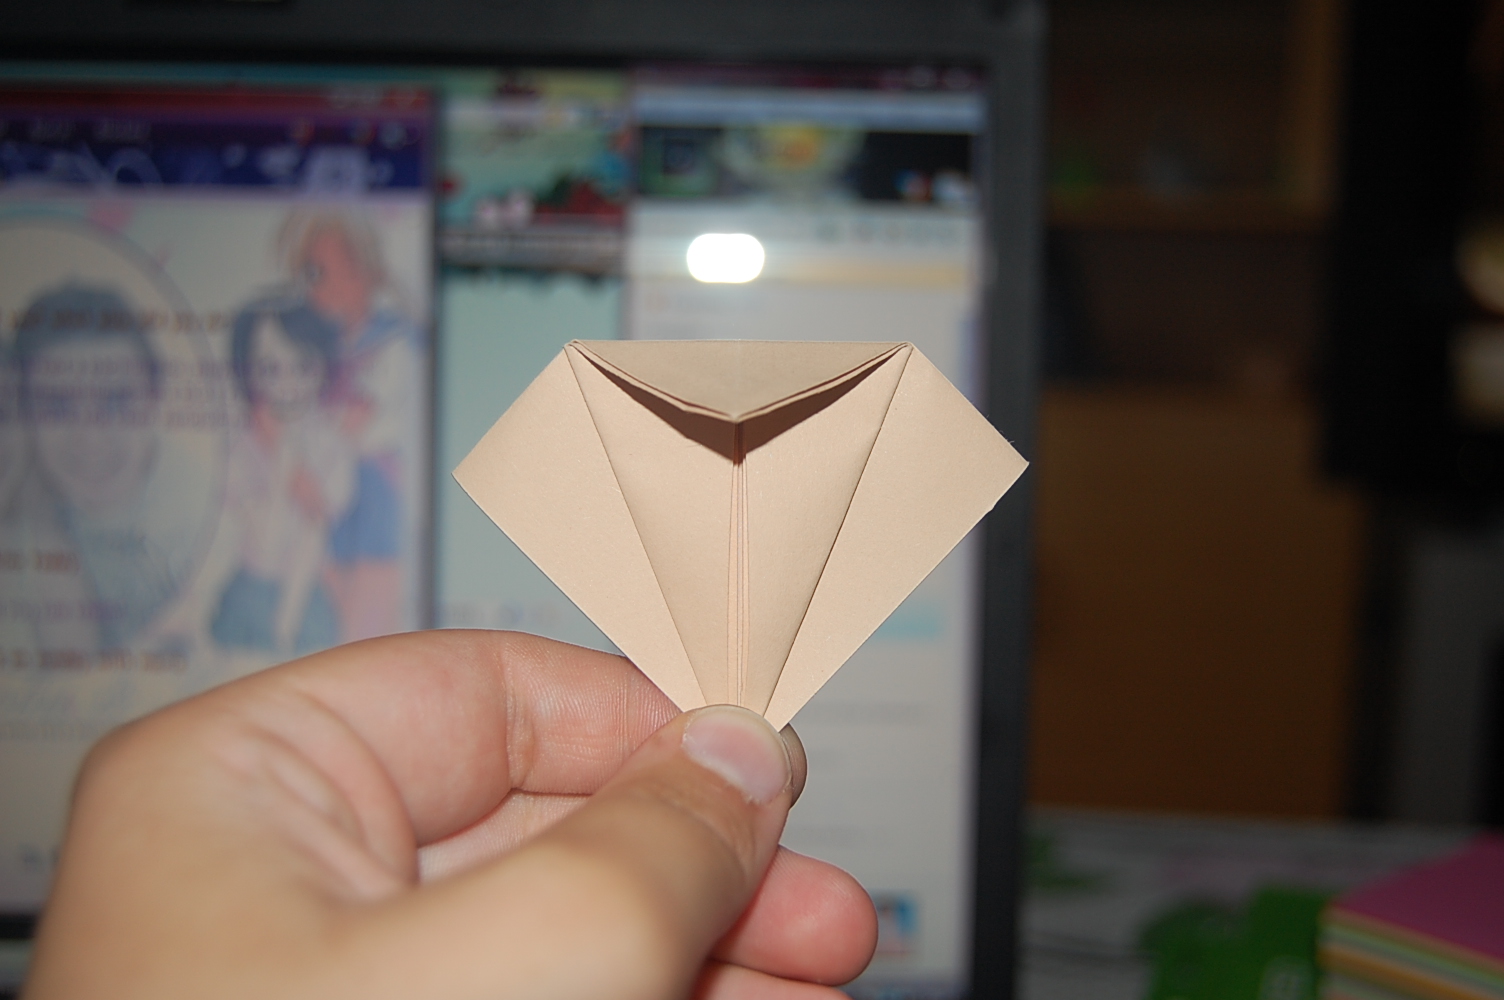
This is just how it should look like when you fold it
<img300*200:stuff/z/62304/Origami%2520birdbase%252c%2520crane%2520and%2520dinosaur%2520tutorial/DSC_0294.JPG>
This is how it should look like from the front when you've finished step six.
<img300*200:stuff/z/62304/Origami%2520birdbase%252c%2520crane%2520and%2520dinosaur%2520tutorial/DSC_0295.JPG>
And this is how it should look like from the side.
<img300*200:stuff/Bird_base_step_seven%3a.jpg>
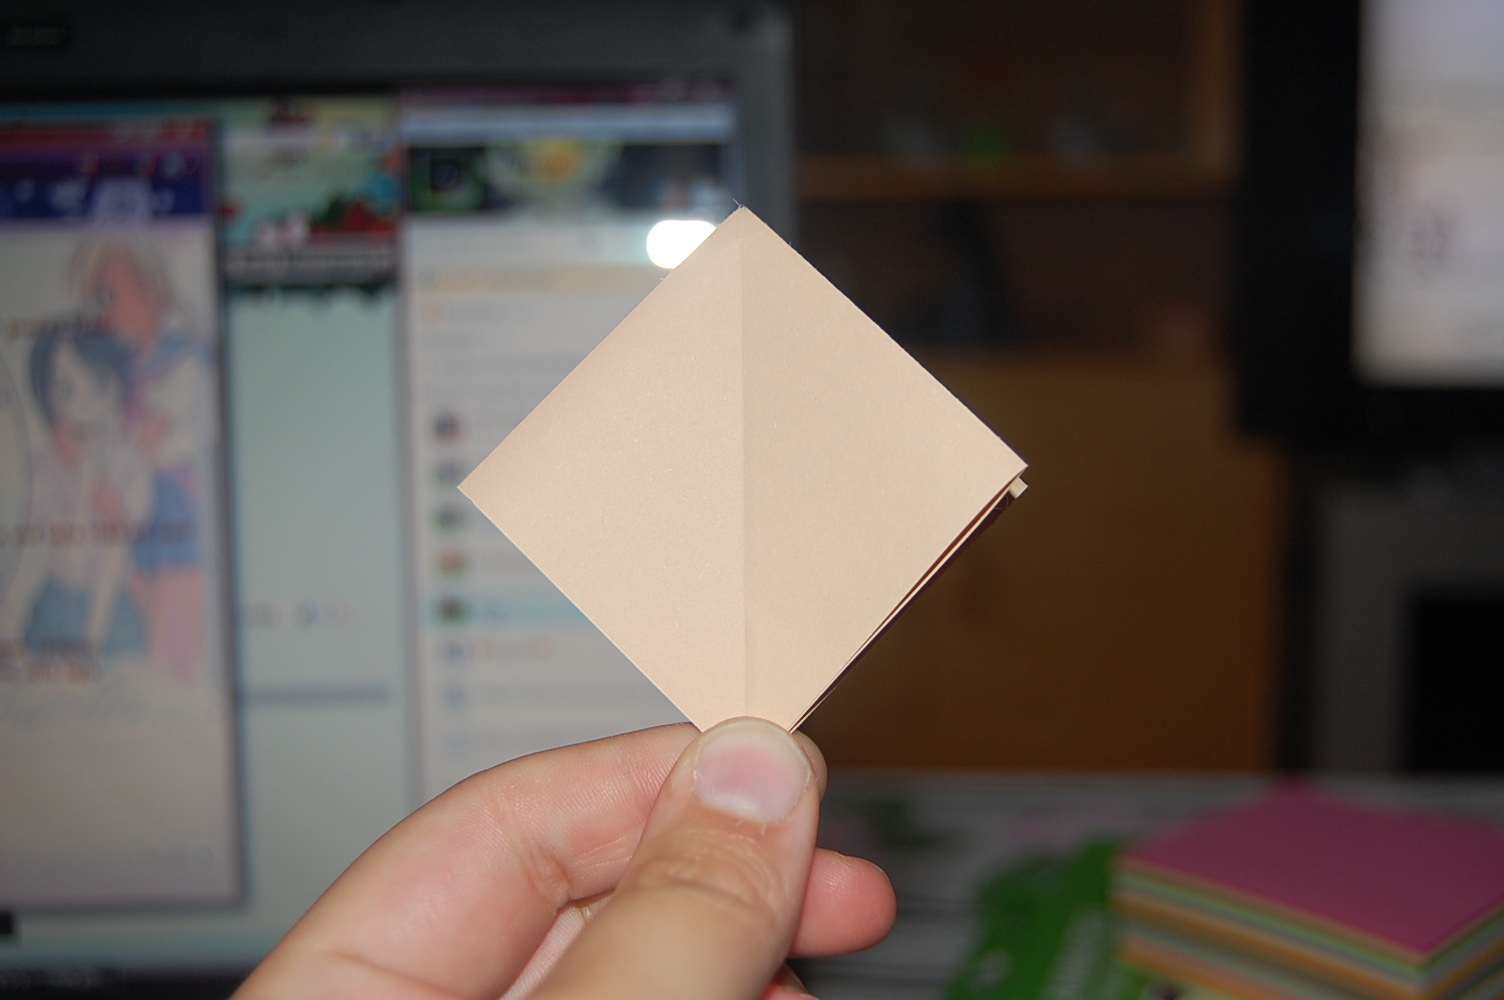
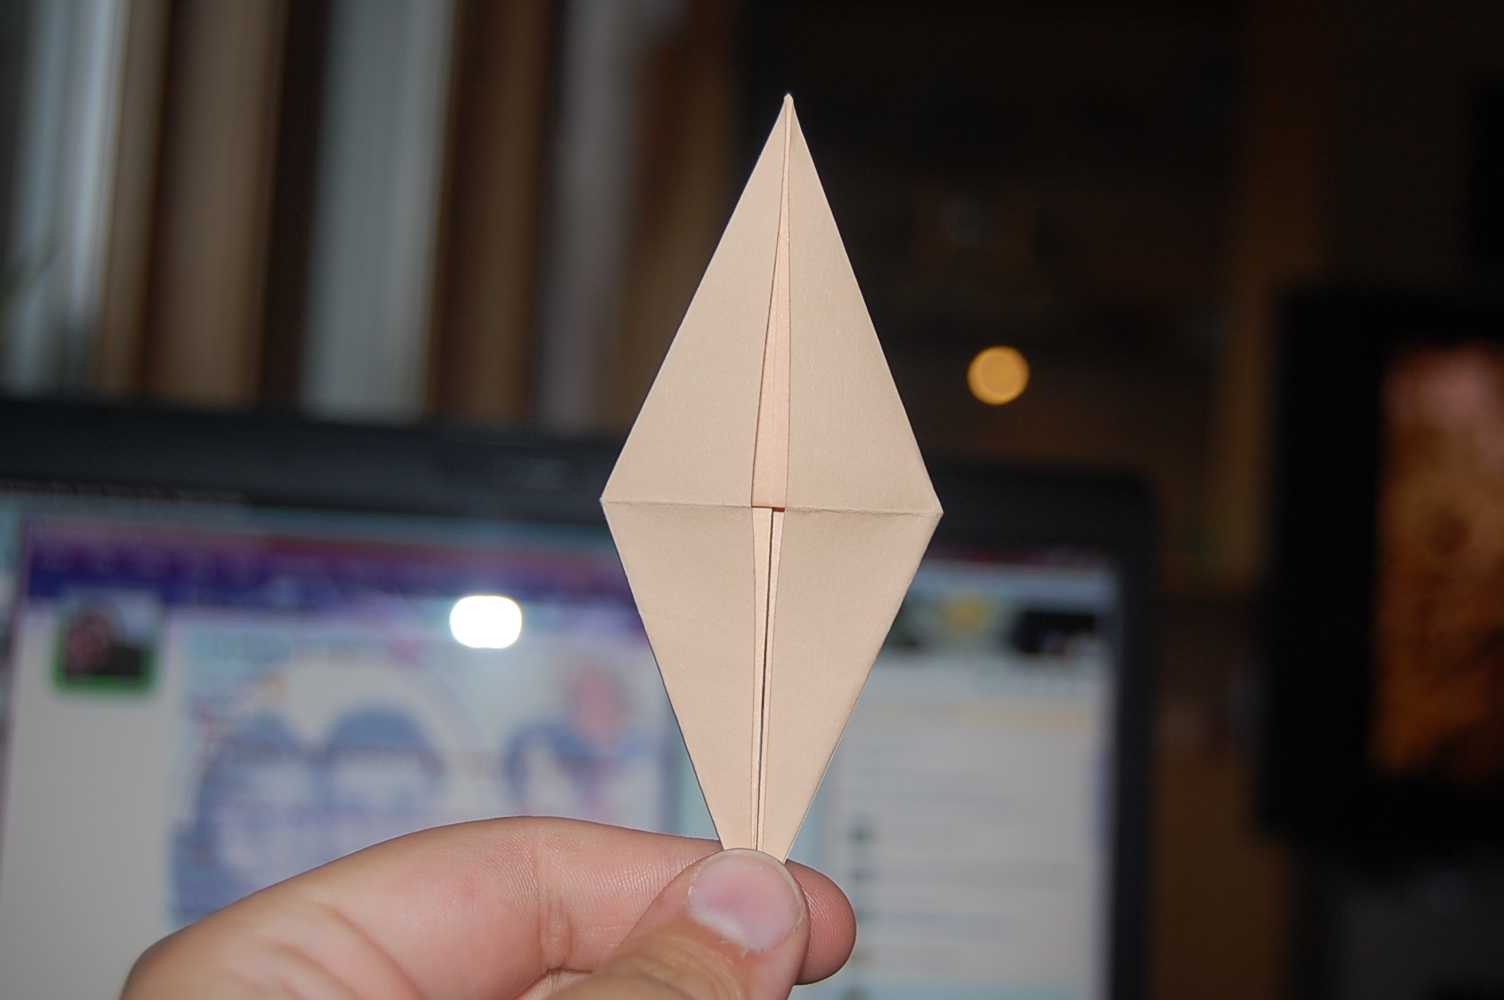
7.Now the "closed" side of the paper should be on top and the "open" side should be down. Fold the the top layer(there will be two layers of paper on each side) to the middle so you have half of a kite shape.
<img300*200:stuff/z/62304/Origami%2520birdbase%252c%2520crane%2520and%2520dinosaur%2520tutorial/DSC_0297.JPG>
This step seven from the side.
<img300*200:stuff/Bird_base_step_eight%3a.jpg>
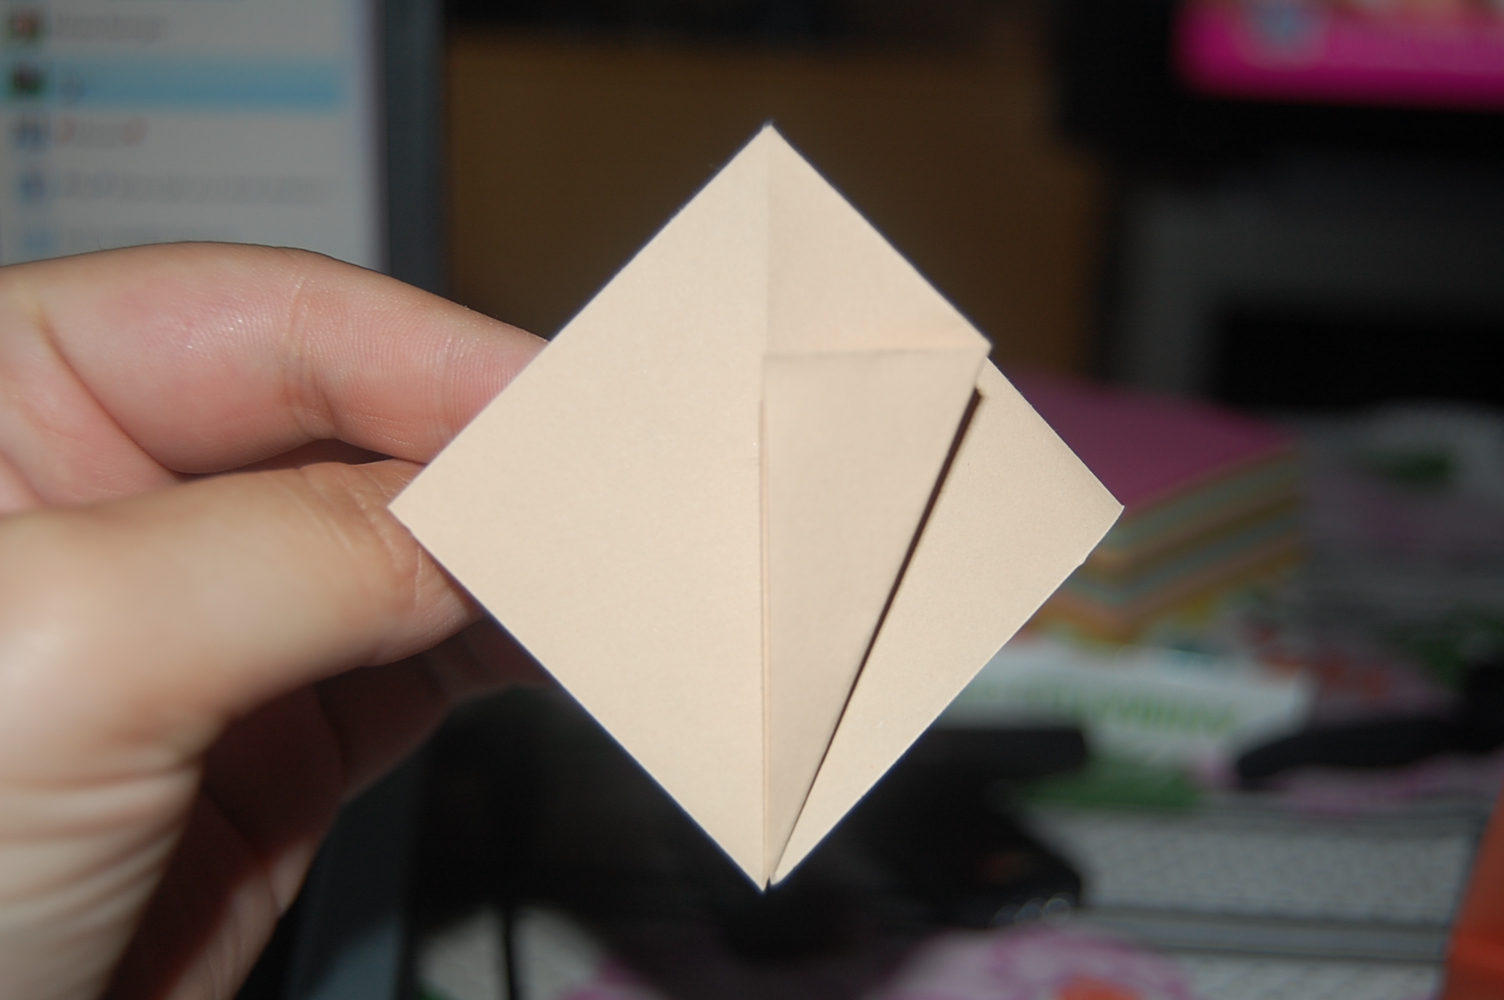
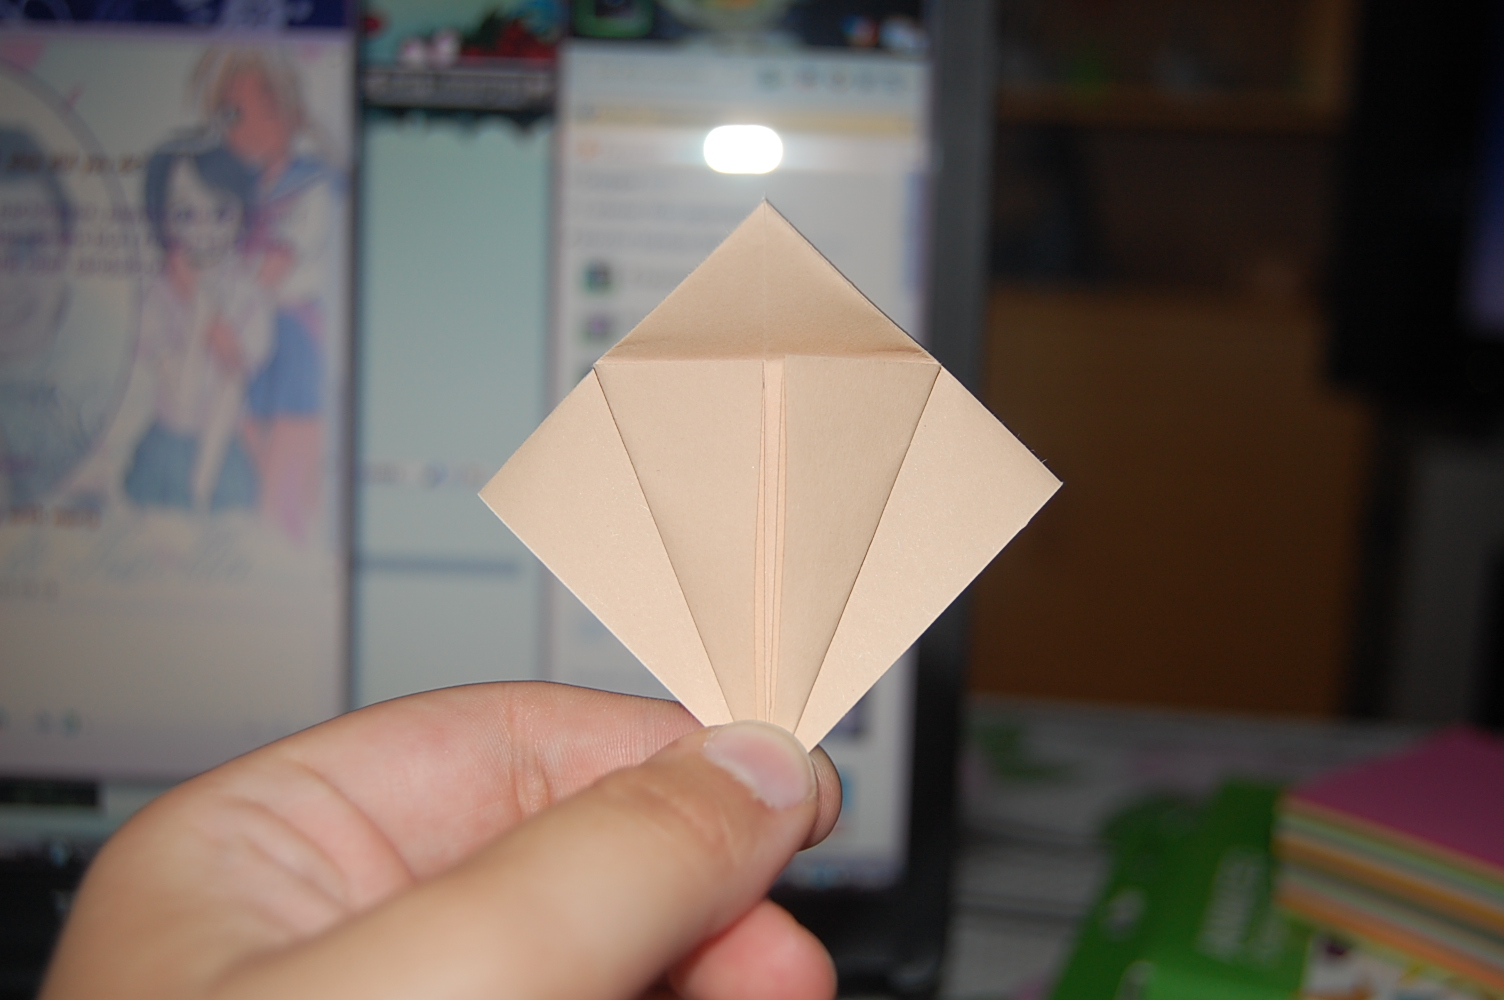
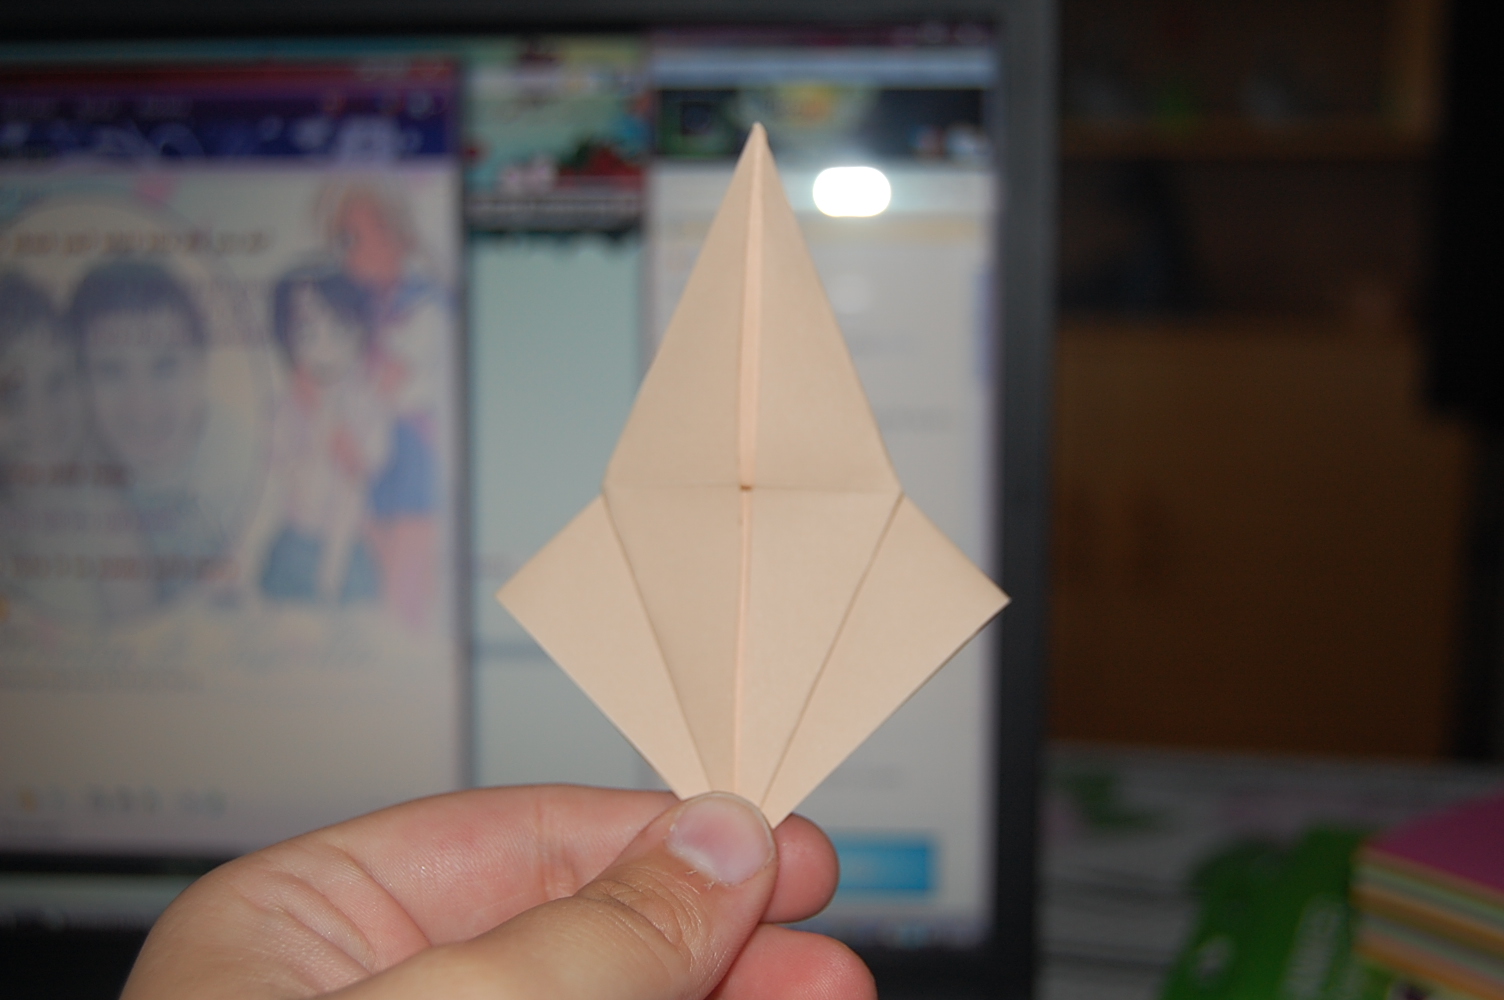
8.Repeat step seven on the other side now you'll have some thing that looks like a kite with some extra wings.
<img300*200:stuff/Bird_base_step_eight..jpg>
Step eight seen from above
<img300*200:stuff/Bird_base_step_nine%3a.jpg>
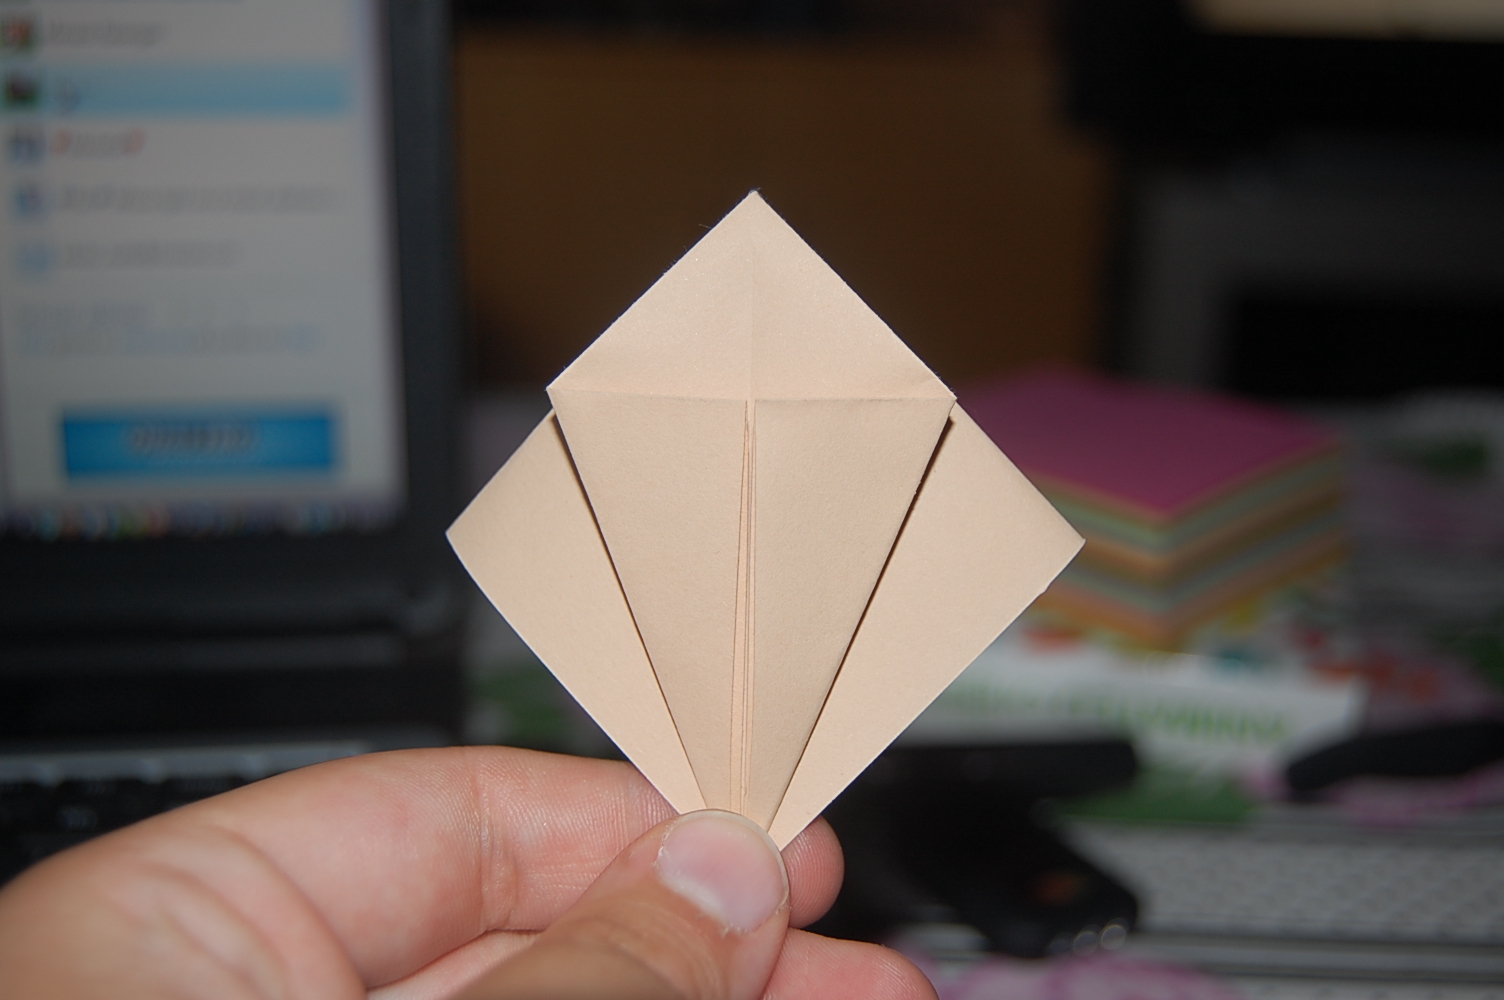
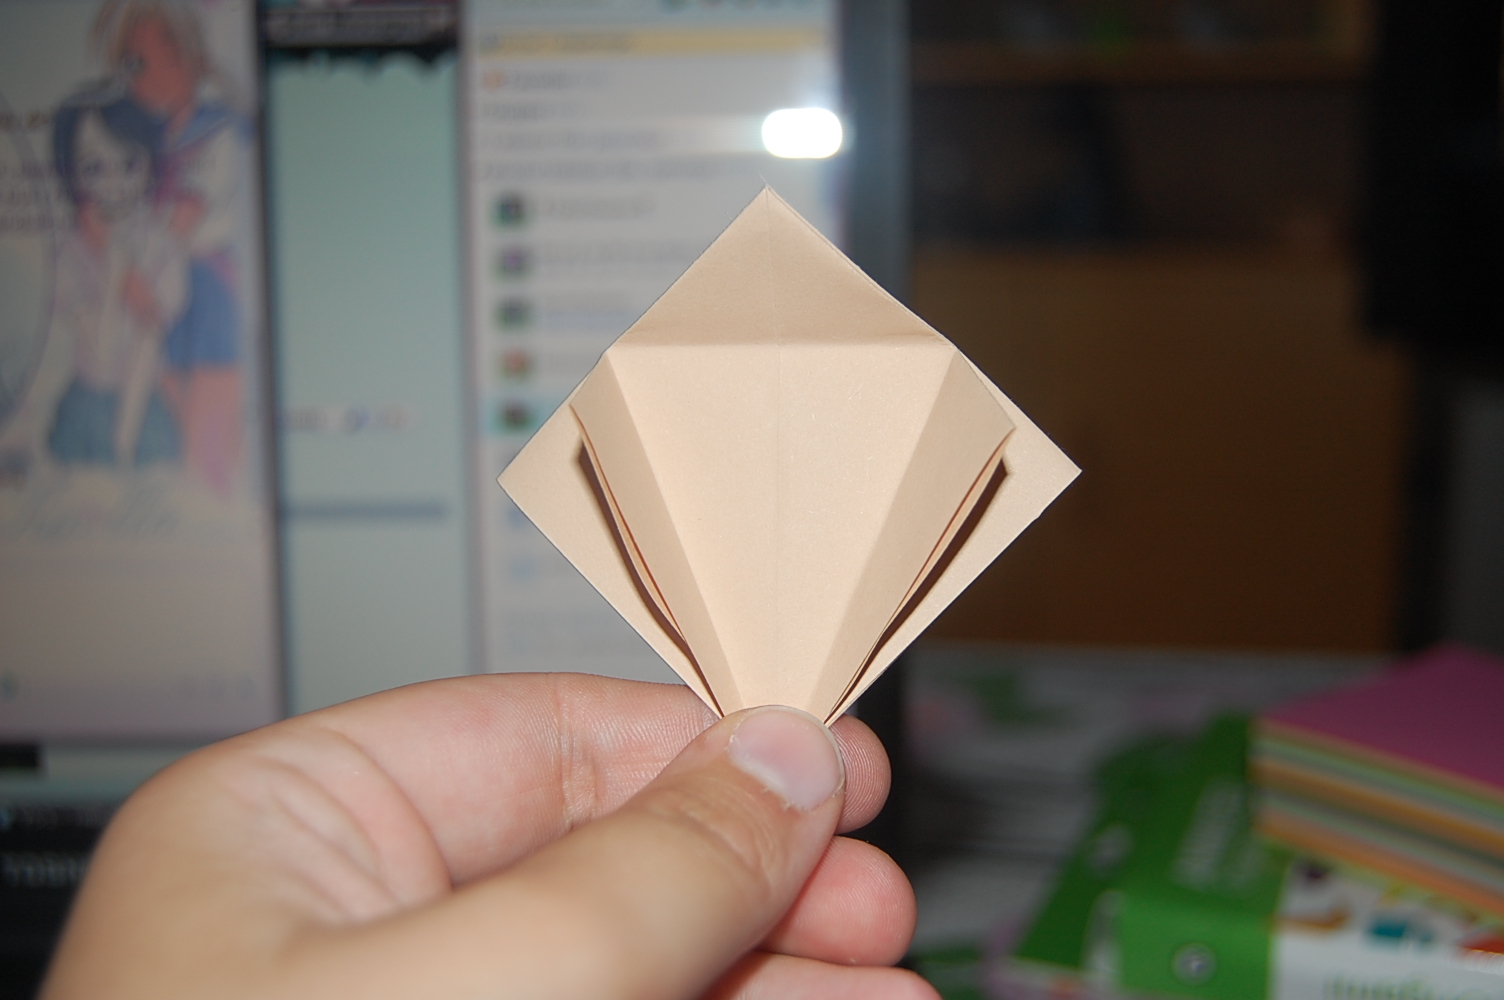
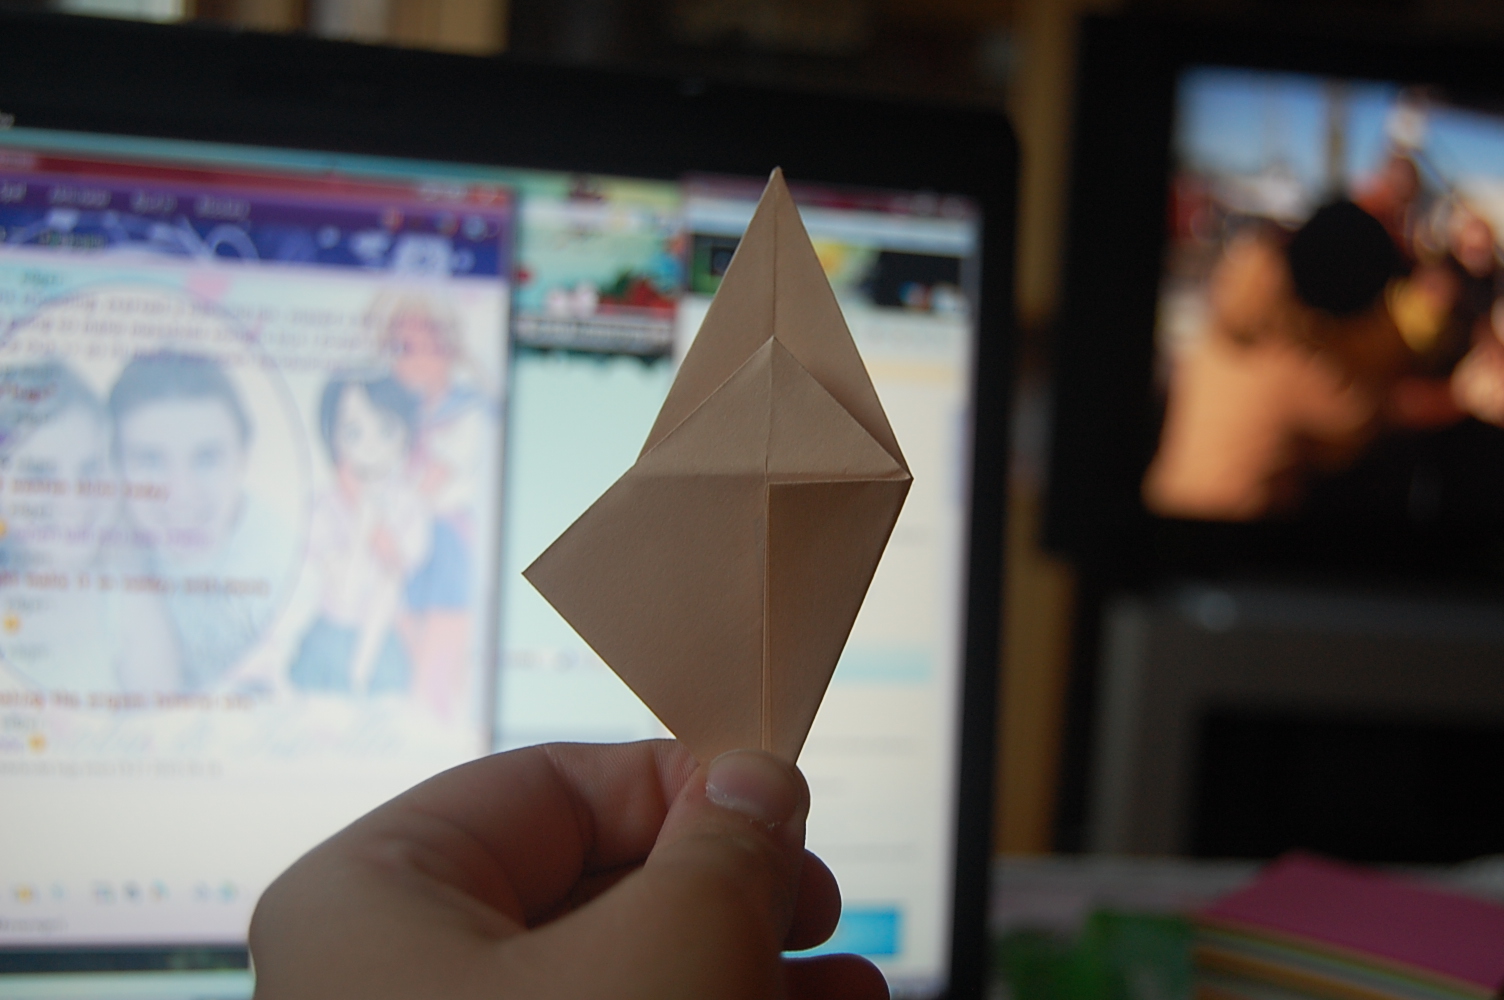
9.Now fold the little triangle that you can see on the top.
<img300*200:stuff/Bird_base_step_ten%3a.jpg>
10.Now unfold the triangle that you folded in step nine.
<img300*200:stuff/Bird_base_step_eleven.jpg>
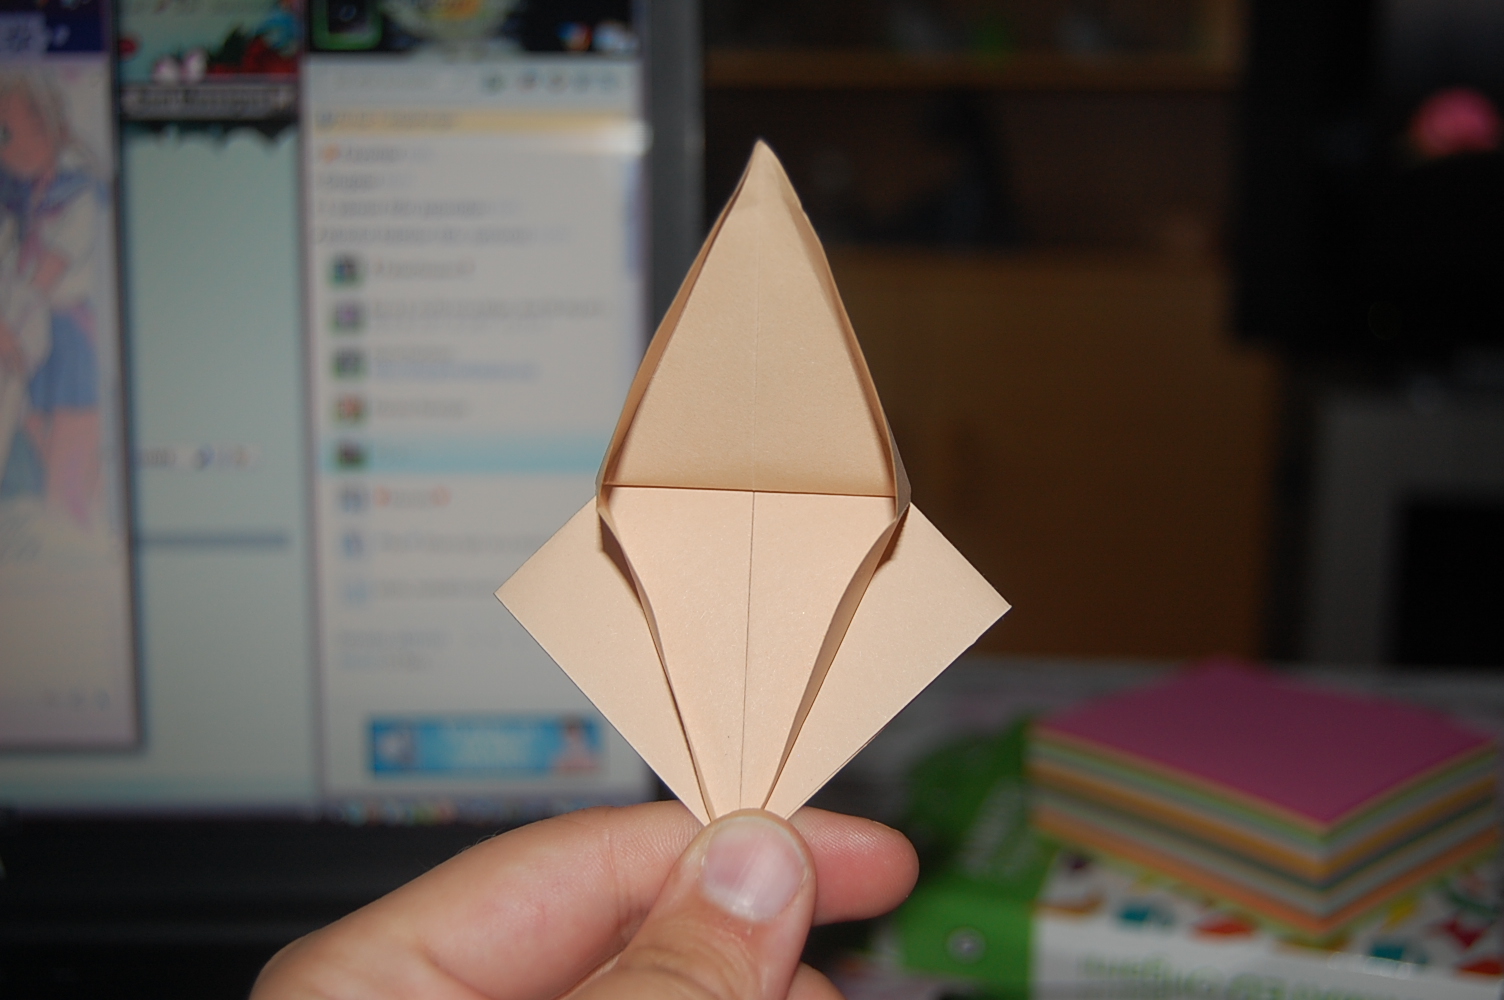
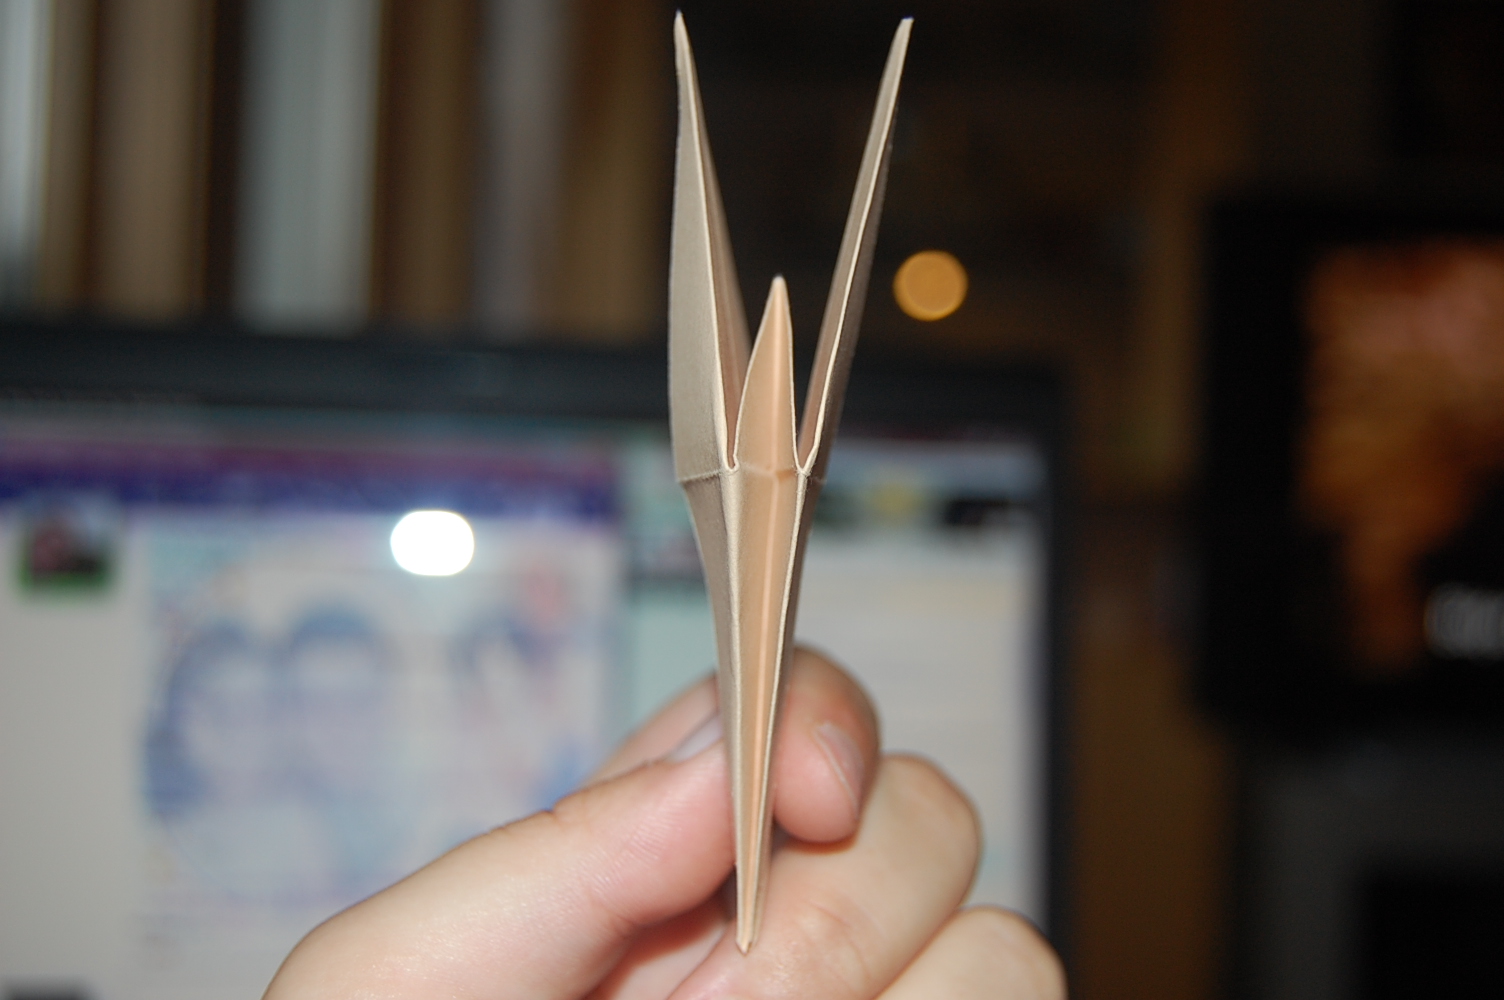
11.Unfold what you did in step seven and eight.
<img300*200:stuff/Bird_base_step_twelve%3a.jpg>
12.Now unfold the absolute top layer of the paper it'll look a bit strange at first.
<img300*200:stuff/Bird_base_step_thirteen%3a.jpg>
13.This will come naturally when you do step twelve but it might need some help, it might also be a bit tricky but have patience and you'll be rewarded. Remember everything is a bit harder the first time you make something.
<img300*200:stuff/z/62304/Origami%2520birdbase%252c%2520crane%2520and%2520dinosaur%2520tutorial/DSC_0305.JPG>
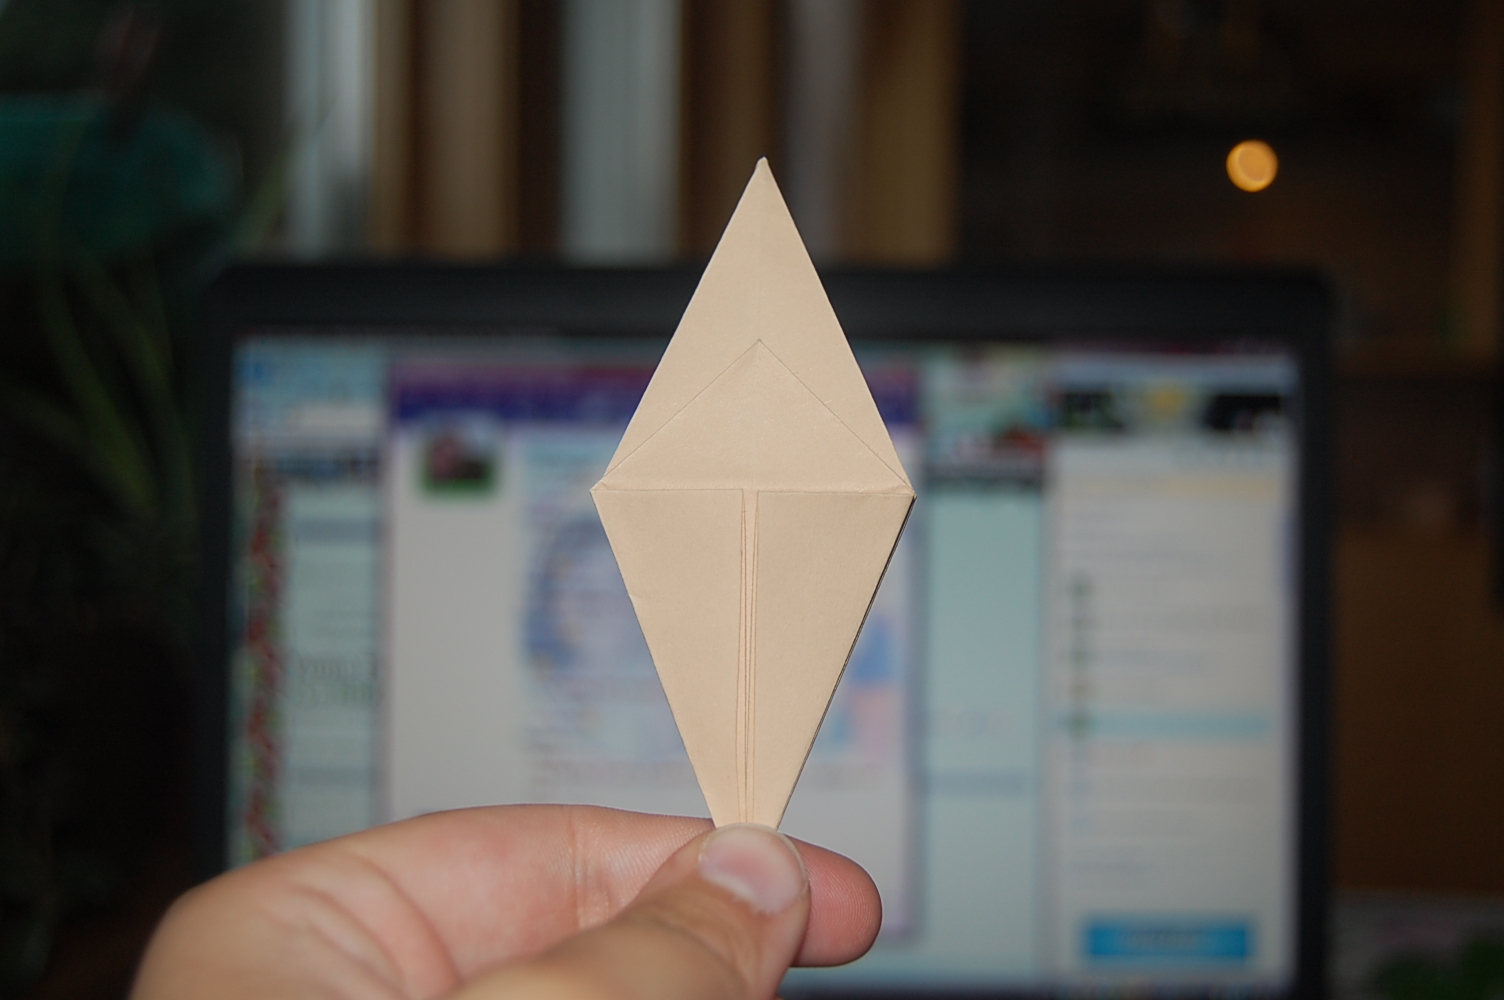
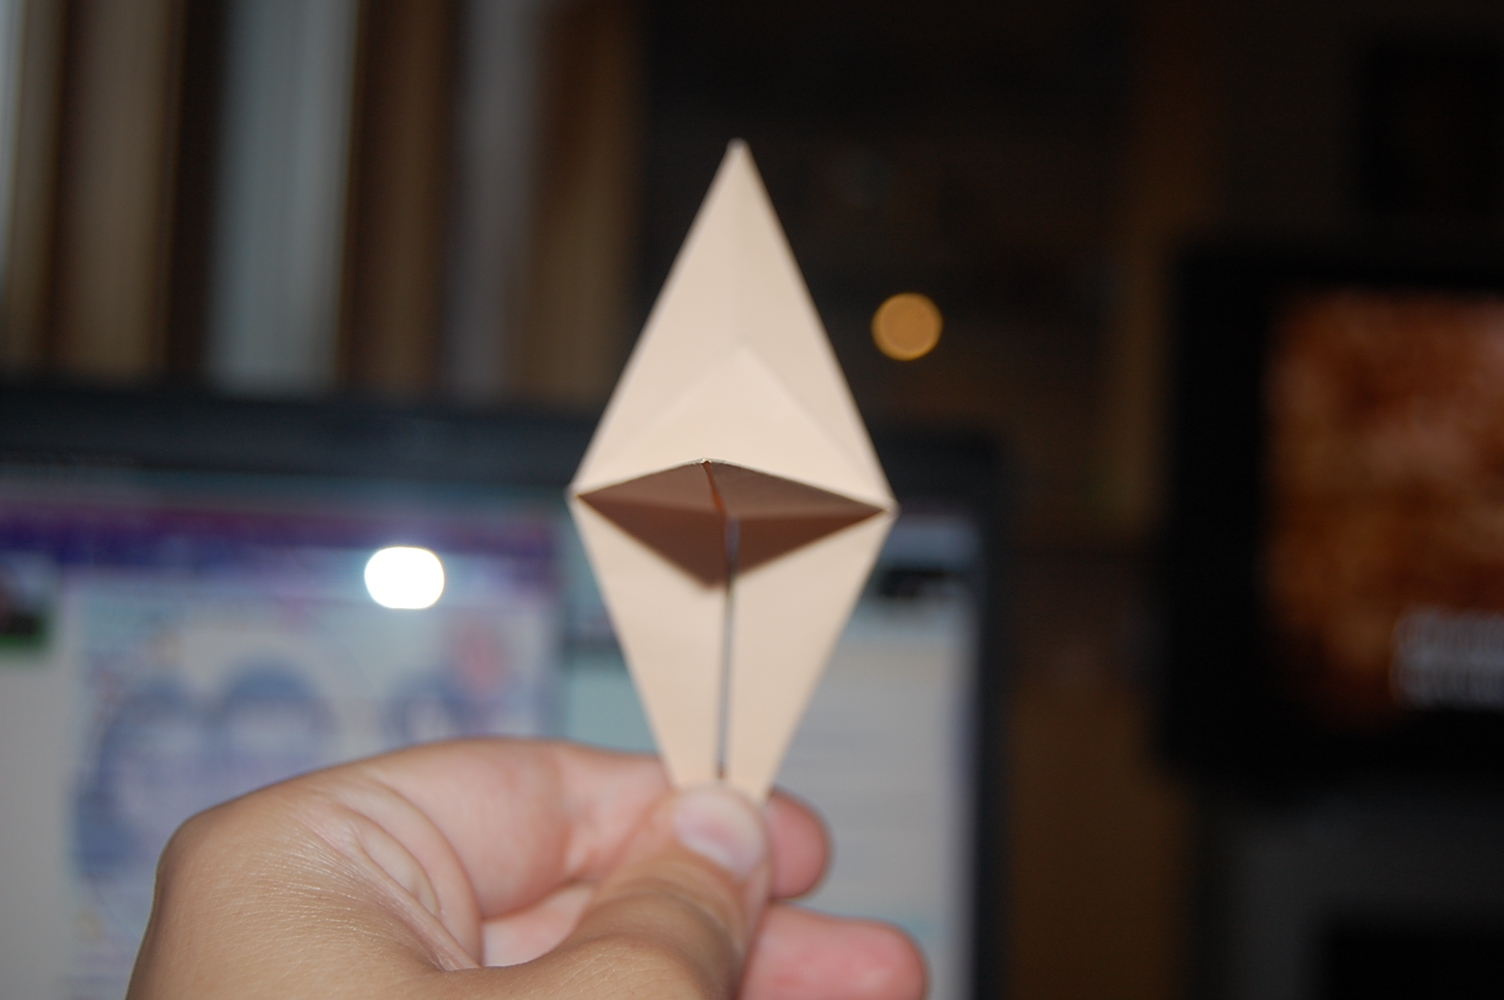
This is how it should look like when it's finieshed.
<img300*200:stuff/Bird_base_step_fifteen%3a.jpg>
14.Now flip your work over and repeat step seven to thirteen.
<img300*200:stuff/z/62304/Origami%2520birdbase%252c%2520crane%2520and%2520dinosaur%2520tutorial/DSC_0307.JPG>
Repeat step seven to thirteen
<img300*200:stuff/z/62304/Origami%2520birdbase%252c%2520crane%2520and%2520dinosaur%2520tutorial/DSC_0308.JPG>
Repeat step seven to thirteen
<img300*200:stuff/z/62304/Origami%2520birdbase%252c%2520crane%2520and%2520dinosaur%2520tutorial/DSC_0309.JPG>
Repeat step seven to thirteen
<img300*200:stuff/Bird_base_step_fifteen.jpg>
Repeat step seven to thirteen
<img300*200:stuff/z/62304/Origami%2520birdbase%252c%2520crane%2520and%2520dinosaur%2520tutorial/DSC_0311.JPG>
Repeat step seven to thirteen
<img300*200:stuff/z/62304/Origami%2520birdbase%252c%2520crane%2520and%2520dinosaur%2520tutorial/DSC_0312.JPG>
Repeat step seven to thirteen
<img300*200:stuff/Bird_base_step_sixteen%3a.jpg>
15.This is how it should look like when you've finished step fifteen.
<img300*200:stuff/Bird_base_step_seventeen%3a.jpg>
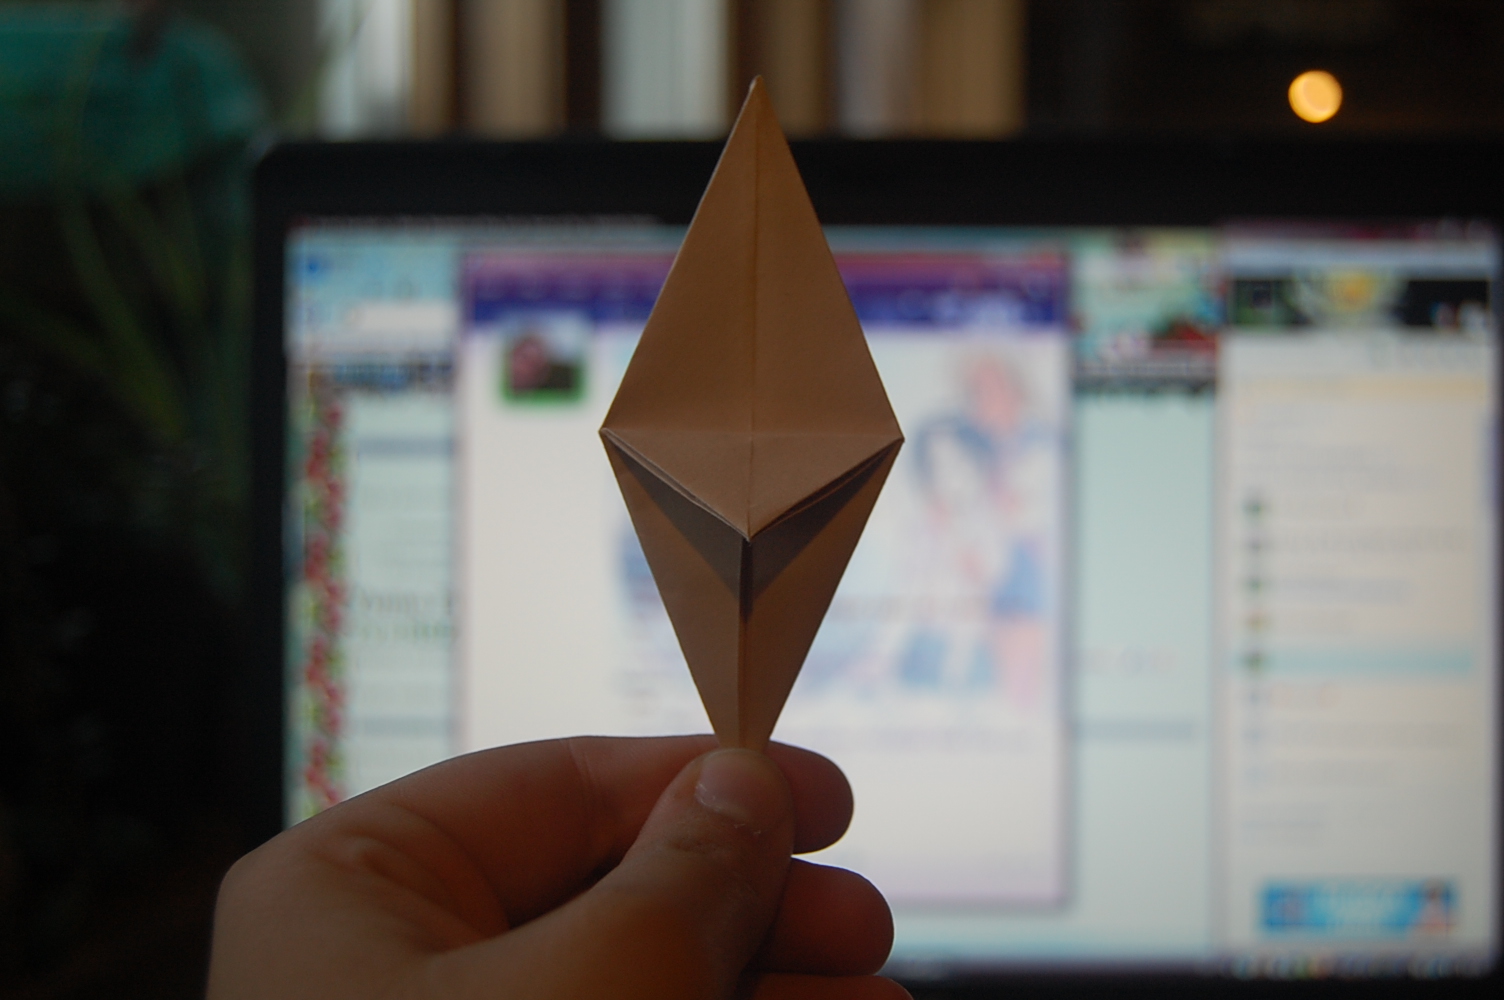
16.Now fold down the flaps and you should have a kite shaped piece of paper and that's how the bird base should look like when it's finished. The bird base is made the same way wither you use Origami paper or other kind of paper, just remember that ticker paper makes it harder to fold.


This is the same base just with a different kind of paper.

<img300*200:stuff/z/62304/Origami%2520birdbase%252c%2520crane%2520and%2520dinosaur%2520tutorial/DSC_0315.JPG>
<img300*200:stuff/z/62304/Origami%2520birdbase%252c%2520crane%2520and%2520dinosaur%2520tutorial/DSC_0316.JPG>
<img300*200:stuff/z/62304/Origami%2520birdbase%252c%2520crane%2520and%2520dinosaur%2520tutorial/DSC_0317.JPG>
<img300*200:stuff/z/62304/Origami%2520birdbase%252c%2520crane%2520and%2520dinosaur%2520tutorial/DSC_0318.JPG>
<img300*200:stuff/z/62304/Origami%2520birdbase%252c%2520crane%2520and%2520dinosaur%2520tutorial/DSC_0319.JPG>
<img300*200:stuff/z/62304/Origami%2520birdbase%252c%2520crane%2520and%2520dinosaur%2520tutorial/DSC_0320.JPG>
<img300*200:stuff/z/62304/Origami%2520birdbase%252c%2520crane%2520and%2520dinosaur%2520tutorial/DSC_0321.JPG>
<img300*200:stuff/z/62304/Origami%2520birdbase%252c%2520crane%2520and%2520dinosaur%2520tutorial/DSC_0322.JPG>
<img300*200:stuff/z/62304/Origami%2520birdbase%252c%2520crane%2520and%2520dinosaur%2520tutorial/DSC_0323.JPG>
<img300*200:stuff/z/62304/Origami%2520birdbase%252c%2520crane%2520and%2520dinosaur%2520tutorial/DSC_0324.JPG>
<img300*200:stuff/z/62304/Origami%2520birdbase%252c%2520crane%2520and%2520dinosaur%2520tutorial/DSC_0325.JPG>
<img300*200:stuff/z/62304/Origami%2520birdbase%252c%2520crane%2520and%2520dinosaur%2520tutorial/DSC_0326.JPG>
<img300*200:stuff/z/62304/Origami%2520birdbase%252c%2520crane%2520and%2520dinosaur%2520tutorial/DSC_0327.JPG>
<img300*200:stuff/z/62304/Origami%2520birdbase%252c%2520crane%2520and%2520dinosaur%2520tutorial/DSC_0328.JPG>
<img300*200:stuff/z/62304/Origami%2520birdbase%252c%2520crane%2520and%2520dinosaur%2520tutorial/DSC_0329.JPG>
<img300*200:stuff/z/62304/Origami%2520birdbase%252c%2520crane%2520and%2520dinosaur%2520tutorial/DSC_0330.JPG>
<img300*200:stuff/z/62304/Origami%2520birdbase%252c%2520crane%2520and%2520dinosaur%2520tutorial/DSC_0331.JPG>
<img300*200:stuff/z/62304/Origami%2520birdbase%252c%2520crane%2520and%2520dinosaur%2520tutorial/DSC_0332.JPG>
<img300*200:stuff/z/62304/Origami%2520birdbase%252c%2520crane%2520and%2520dinosaur%2520tutorial/DSC_0333.JPG>
<img300*200:stuff/z/62304/Origami%2520birdbase%252c%2520crane%2520and%2520dinosaur%2520tutorial/DSC_0334.JPG>
<img300*200:stuff/z/62304/Origami%2520birdbase%252c%2520crane%2520and%2520dinosaur%2520tutorial/DSC_0335.JPG>
<img300*200:stuff/z/62304/Origami%2520birdbase%252c%2520crane%2520and%2520dinosaur%2520tutorial/DSC_0336.JPG>

Crane

<img300*200:stuff/Crane_step_one%3a.jpg>
1.Start by folding the bird base.
<img300*200:stuff/Crane_step_two%3a.jpg>
2.Now flip up the flaps so it looks like a diamond in a set of cards(the sign for the diamonds in a game of card i mean).
<img300*200:stuff/Crane_step_three%3a.jpg>
3.now take the top layer of the side that has two "legs" and fold it to the middle.
<img300*200:stuff/z/62304/Origami%2520birdbase%252c%2520crane%2520and%2520dinosaur%2520tutorial/DSC_0340.JPG>
This is how it looks in the middle of folding the fold.
<img300*200:stuff/z/62304/Origami%2520birdbase%252c%2520crane%2520and%2520dinosaur%2520tutorial/DSC_0341.JPG>
This is how it should look when the fold is finished.
<img300*200:stuff/Crane_step_four%3a.jpg>
4.Repeat step three on the other side then flip your work over.
<img300*200:stuff/z/62304/Origami%2520birdbase%252c%2520crane%2520and%2520dinosaur%2520tutorial/DSC_0343.JPG>
Repeat step three on the other side then flip your work over.
<img300*200:stuff/z/62304/Origami%2520birdbase%252c%2520crane%2520and%2520dinosaur%2520tutorial/DSC_0344.JPG>
Repeat step three on the other side then flip your work over.
<img300*200:stuff/Crane_step_five%3a.jpg>
5.When you've flipped it over you have to repeat step three and four.
<img300*200:stuff/z/62304/Origami%2520birdbase%252c%2520crane%2520and%2520dinosaur%2520tutorial/DSC_0346.JPG>
When you've flipped it over you have to repeat step three and four.
<img300*200:stuff/z/62304/Origami%2520birdbase%252c%2520crane%2520and%2520dinosaur%2520tutorial/DSC_0347.JPG>
When you've flipped it over you have to repeat step three and four.
<img300*200:stuff/z/62304/Origami%2520birdbase%252c%2520crane%2520and%2520dinosaur%2520tutorial/DSC_0348.JPG>
When you've flipped it over you have to repeat step three and four. This is how it should look when you've finished step three to five.
<img300*200:stuff/Crane_step_six%3a.jpg>
6.Now you have to fold the "legs" up so that they meet the top witch will become wings when we've finished.
<img300*200:stuff/z/62304/Origami%2520birdbase%252c%2520crane%2520and%2520dinosaur%2520tutorial/DSC_0350.JPG>
We're half way done with this step when it looks like this.
<img300*200:stuff/z/62304/Origami%2520birdbase%252c%2520crane%2520and%2520dinosaur%2520tutorial/DSC_0351.JPG>
Folding the other "leg" up is the other half of this step.
<img300*200:stuff/z/62304/Origami%2520birdbase%252c%2520crane%2520and%2520dinosaur%2520tutorial/DSC_0352.JPG>
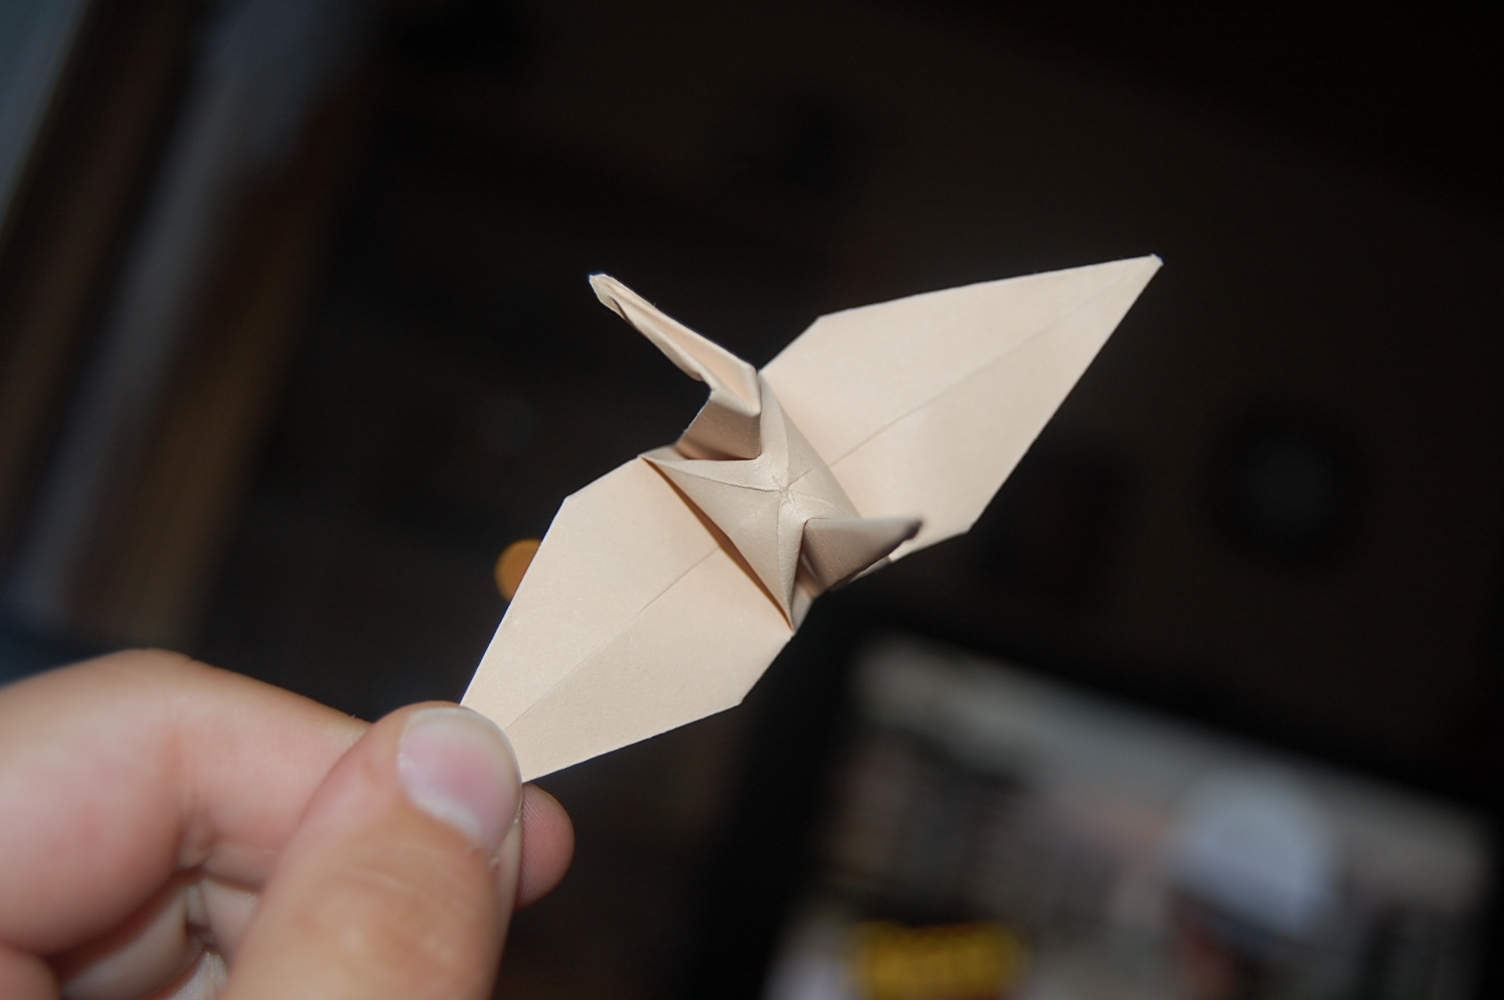
This is how it'll look from both the front and the back when step six is finished.
<img300*200:stuff/z/62304/Origami%2520birdbase%252c%2520crane%2520and%2520dinosaur%2520tutorial/DSC_0353.JPG>
And this is how it'll look from the side.
<img300*200:stuff/Crane_step_seven%3a.jpg>
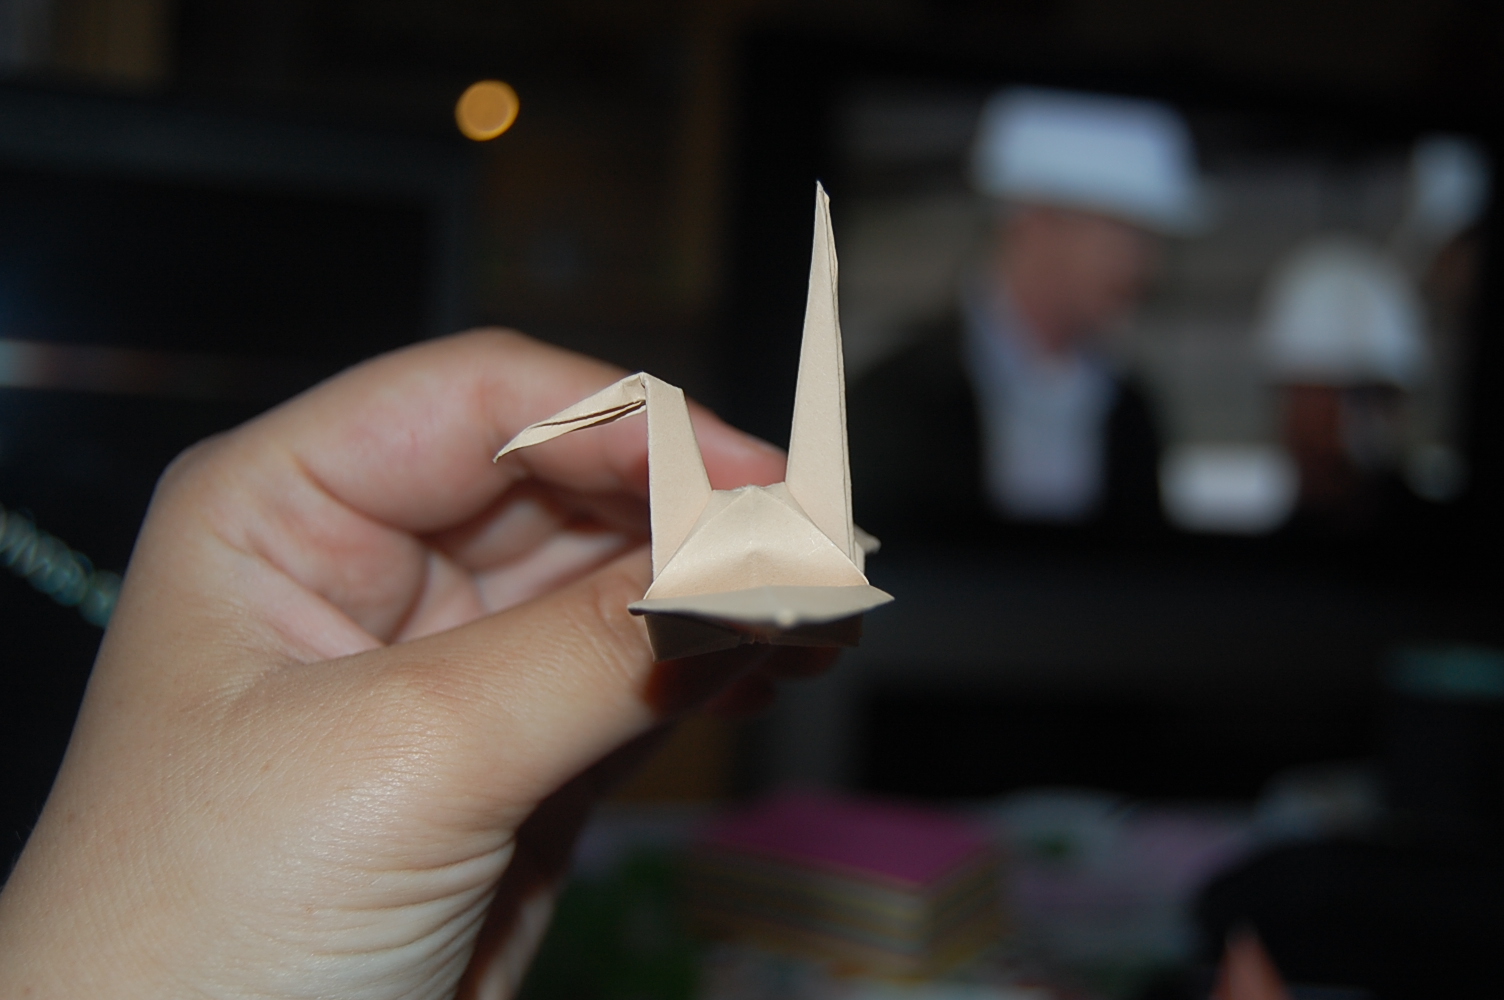
7.Now you need to decide witch of the former "legs" that will be the head and witch one will be the tail. it don't really matter witch one you choose.
<img300*200:stuff/Crane_step_seven.jpg>
This is how it will look like when you have made the head and beak.
<img300*200:stuff/z/62304/Origami%2520birdbase%252c%2520crane%2520and%2520dinosaur%2520tutorial/DSC_0356.JPG>
This is how it'll look like just before we do the final step.
<img300*200:stuff/Crane_step_eight%3a.jpg>
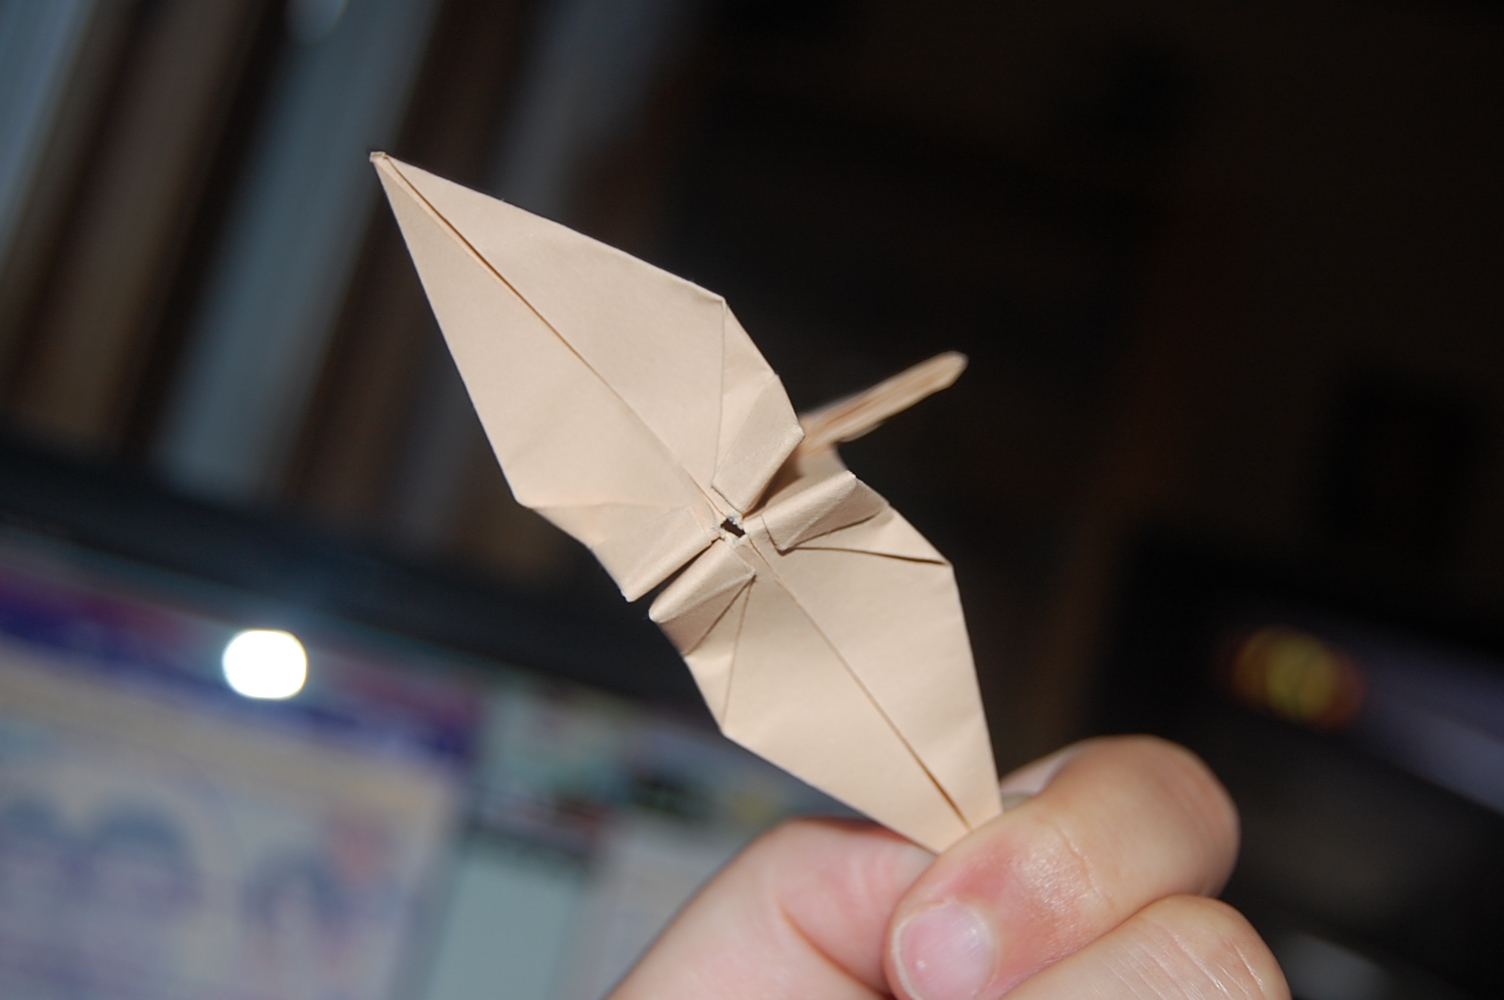
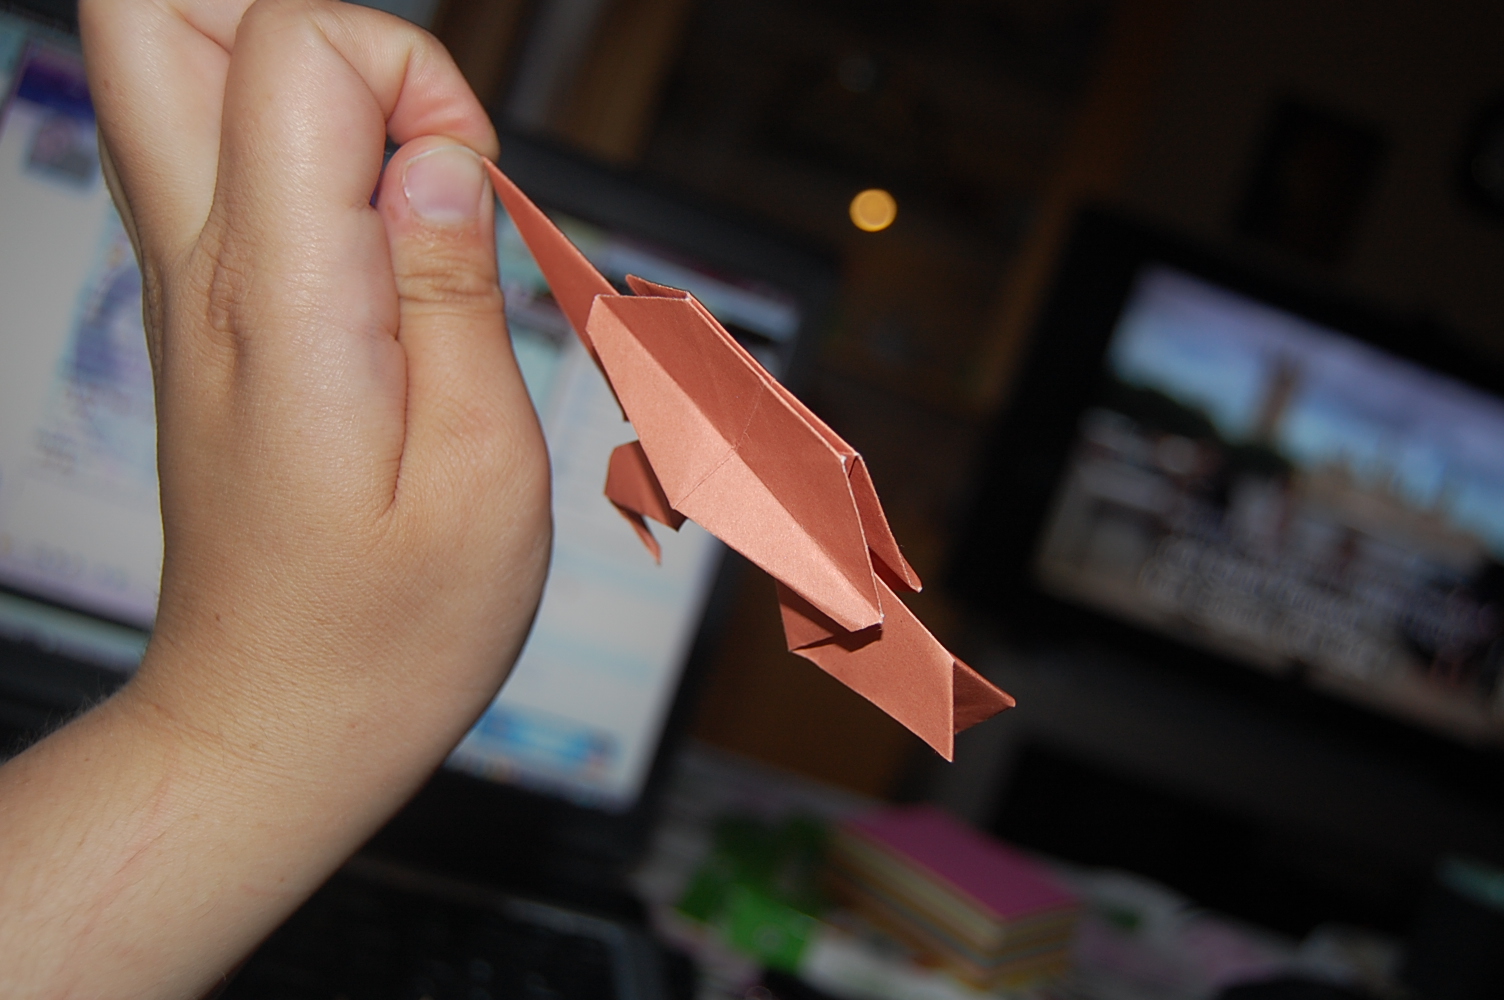
8.Now we just need to get the wings to stay down if we want to. gently pull the wings apart but be careful if you pull too hard or too much the crane will break.
<img300*200:stuff/Crane_step_nine%3a.jpg>
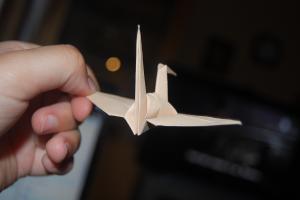
9.This is how it'll look like when it's finished.
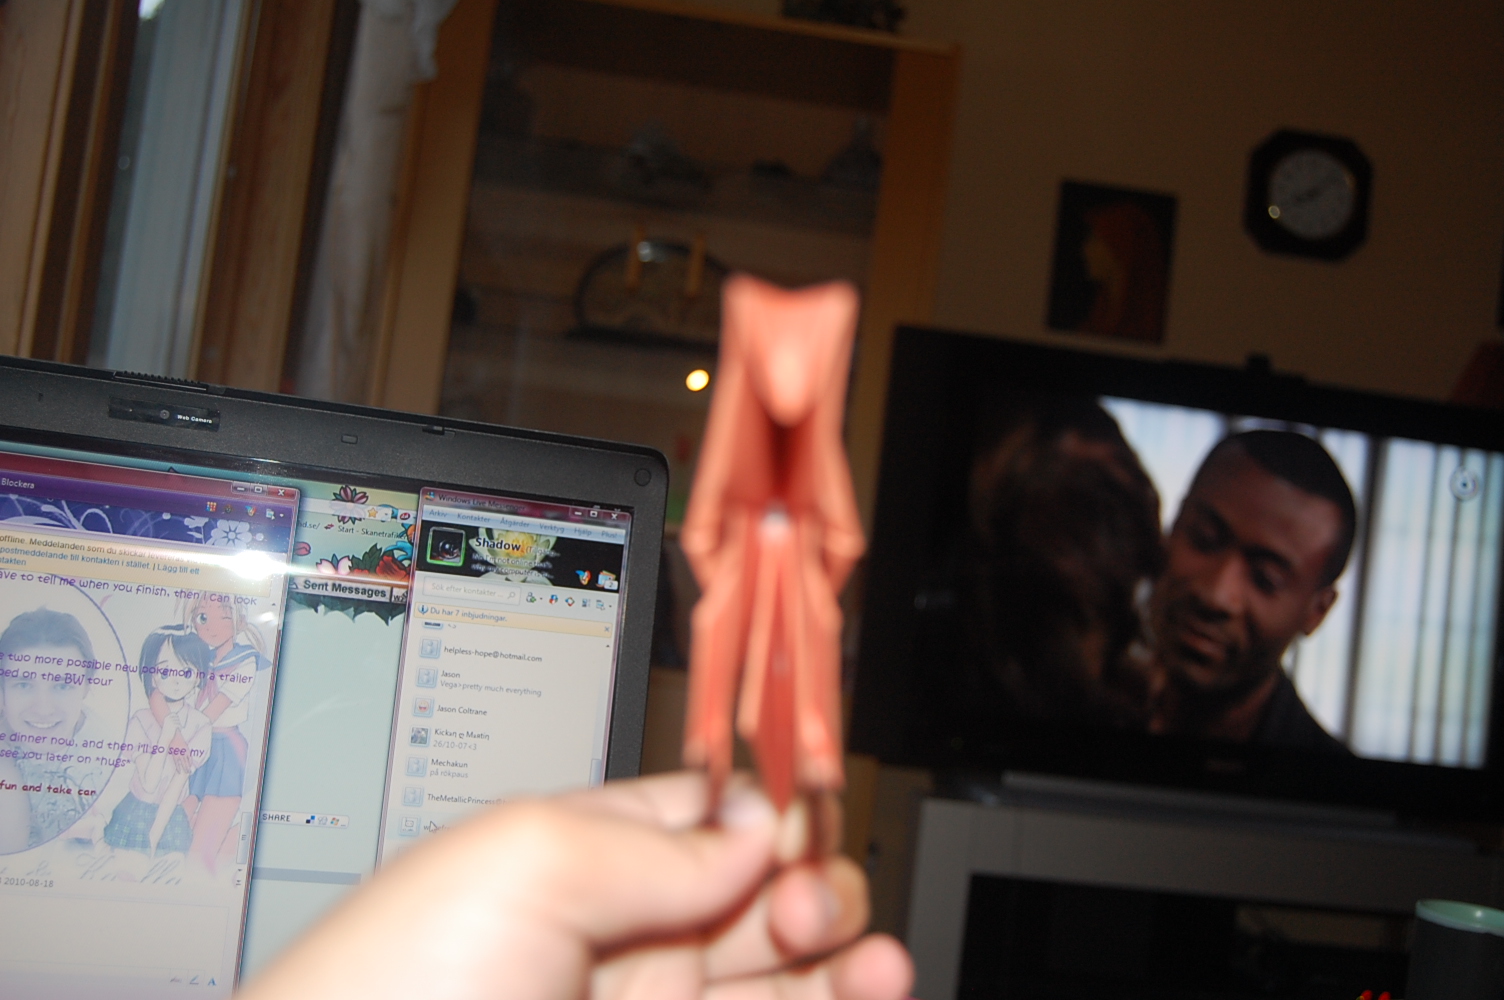
<img300*200:stuff/z/62304/Origami%2520birdbase%252c%2520crane%2520and%2520dinosaur%2520tutorial/DSC_0359.JPG>
<img300*200:stuff/z/62304/Origami%2520birdbase%252c%2520crane%2520and%2520dinosaur%2520tutorial/DSC_0360.JPG>
<img300*200:stuff/z/62304/Origami%2520birdbase%252c%2520crane%2520and%2520dinosaur%2520tutorial/DSC_0361.JPG>
<img300*200:stuff/z/62304/Origami%2520birdbase%252c%2520crane%2520and%2520dinosaur%2520tutorial/DSC_0362.JPG>

Dinosaur

<img300*200:stuff/Dinosaur_step_one%3a.jpg>
1.Start from the kite shape and fold down a little triangle, i usually let the point of the triangle meet the line that is there from when you folded the bird base.
<img300*200:stuff/z/62304/Origami%2520birdbase%252c%2520crane%2520and%2520dinosaur%2520tutorial/DSC_0364.JPG>
This is how it'll look like when you've done the triangle.
<img300*200:stuff/Dinosaur_step_two%3a.jpg>
2.Now here comes the tricky part you need to flatten the top where you just made the triangle, I do this by unfolding it a bit and then flatten the top and then refold it, but find the way that works the best for you.
<img300*200:stuff/z/62304/Origami%2520birdbase%252c%2520crane%2520and%2520dinosaur%2520tutorial/DSC_0366.JPG>
When step two is finished it should look something like this. This step might take some time to master.
<img300*200:stuff/Dinosaur_step_three%3a.jpg>
3.Now push up the flap and it'll look like a kite with the top cut of.
<img300*200:stuff/Dinosaur_step_four%3a.jpg>
4.You now got a little fold you now have to fold so that the "leg" meets the underside of the fold that is there.
<img300*200:stuff/z/62304/Origami%2520birdbase%252c%2520crane%2520and%2520dinosaur%2520tutorial/DSC_0369.JPG>
This is how it should look like when the kite shape is intact and you've made the fold.
<img300*200:stuff/Dinosaur_step_four.jpg>
This is how it should look like underneath.
<img300*200:stuff/Dinosaur_step_five%3a.jpg>
5.Repeat step four with the other "leg"
<img300*200:stuff/z/62304/Origami%2520birdbase%252c%2520crane%2520and%2520dinosaur%2520tutorial/DSC_0372.JPG>
Repeat step four with the other "leg"
<img300*200:stuff/z/62304/Origami%2520birdbase%252c%2520crane%2520and%2520dinosaur%2520tutorial/DSC_0373.JPG>
Repeat step four with the other "leg"
<img300*200:stuff/Dinosaur_step_six%3a.jpg>
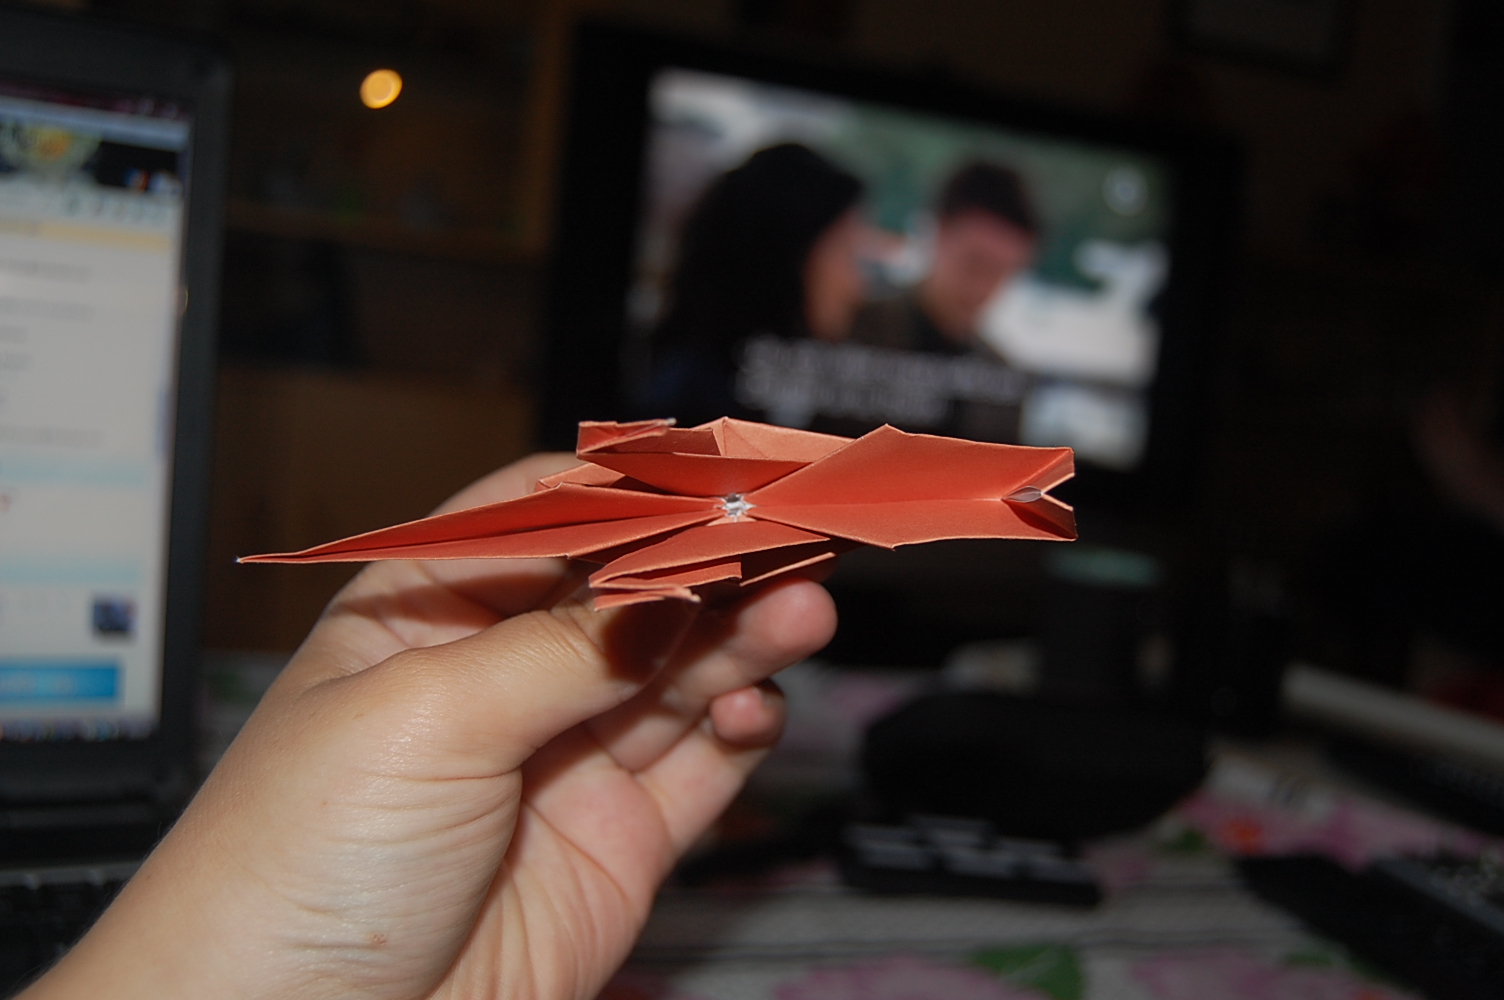
6.Now you have to use the flaps to create legs for the dinosaur since the two previous steps actually was how to create the head and tail. Fold the flaps diagonally as shown in the picture.
<img300*200:stuff/Dinosaur_step_seven%3a.jpg>
7.Unfold and fold a fold in the opposite direction still diagonally
<img300*200:stuff/Dinosaur_step_eight%3a.jpg>
8.Now you should be able to get a fold like this. You need to decide witch way the head is now.
<img300*200:stuff/z/62304/Origami%2520birdbase%252c%2520crane%2520and%2520dinosaur%2520tutorial/DSC_0377.JPG>
when you've decided you gently pushes the legs that way and then make sure that there's a fold that keeps the legs where you want it to be.
<img300*200:stuff/z/62304/Origami%2520birdbase%252c%2520crane%2520and%2520dinosaur%2520tutorial/DSC_0378.JPG>
This is how it should look like when step eight is finished. now turn the work over.
<img300*200:stuff/Dinosaur_step_nine%3a.jpg>
9.Now repeat step six to eight but remember that the leg is supposed to face the opposite direction than the first one.
<img300*200:stuff/z/62304/Origami%2520birdbase%252c%2520crane%2520and%2520dinosaur%2520tutorial/DSC_0380.JPG>
Now repeat step six to eight but remember that the leg is supposed to face the opposite direction than the first one.
<img300*200:stuff/z/62304/Origami%2520birdbase%252c%2520crane%2520and%2520dinosaur%2520tutorial/DSC_0381.JPG>
Now repeat step six to eight but remember that the leg is supposed to face the opposite direction than the first one.
<img300*200:stuff/z/62304/Origami%2520birdbase%252c%2520crane%2520and%2520dinosaur%2520tutorial/DSC_0382.JPG>
Now repeat step six to eight but remember that the leg is supposed to face the opposite direction than the first one.
<img300*200:stuff/z/62304/Origami%2520birdbase%252c%2520crane%2520and%2520dinosaur%2520tutorial/DSC_0383.JPG>
Now repeat step six to eight but remember that the leg is supposed to face the opposite direction than the first one.
<img300*200:stuff/Dinosaur_step_ten%3a.jpg>
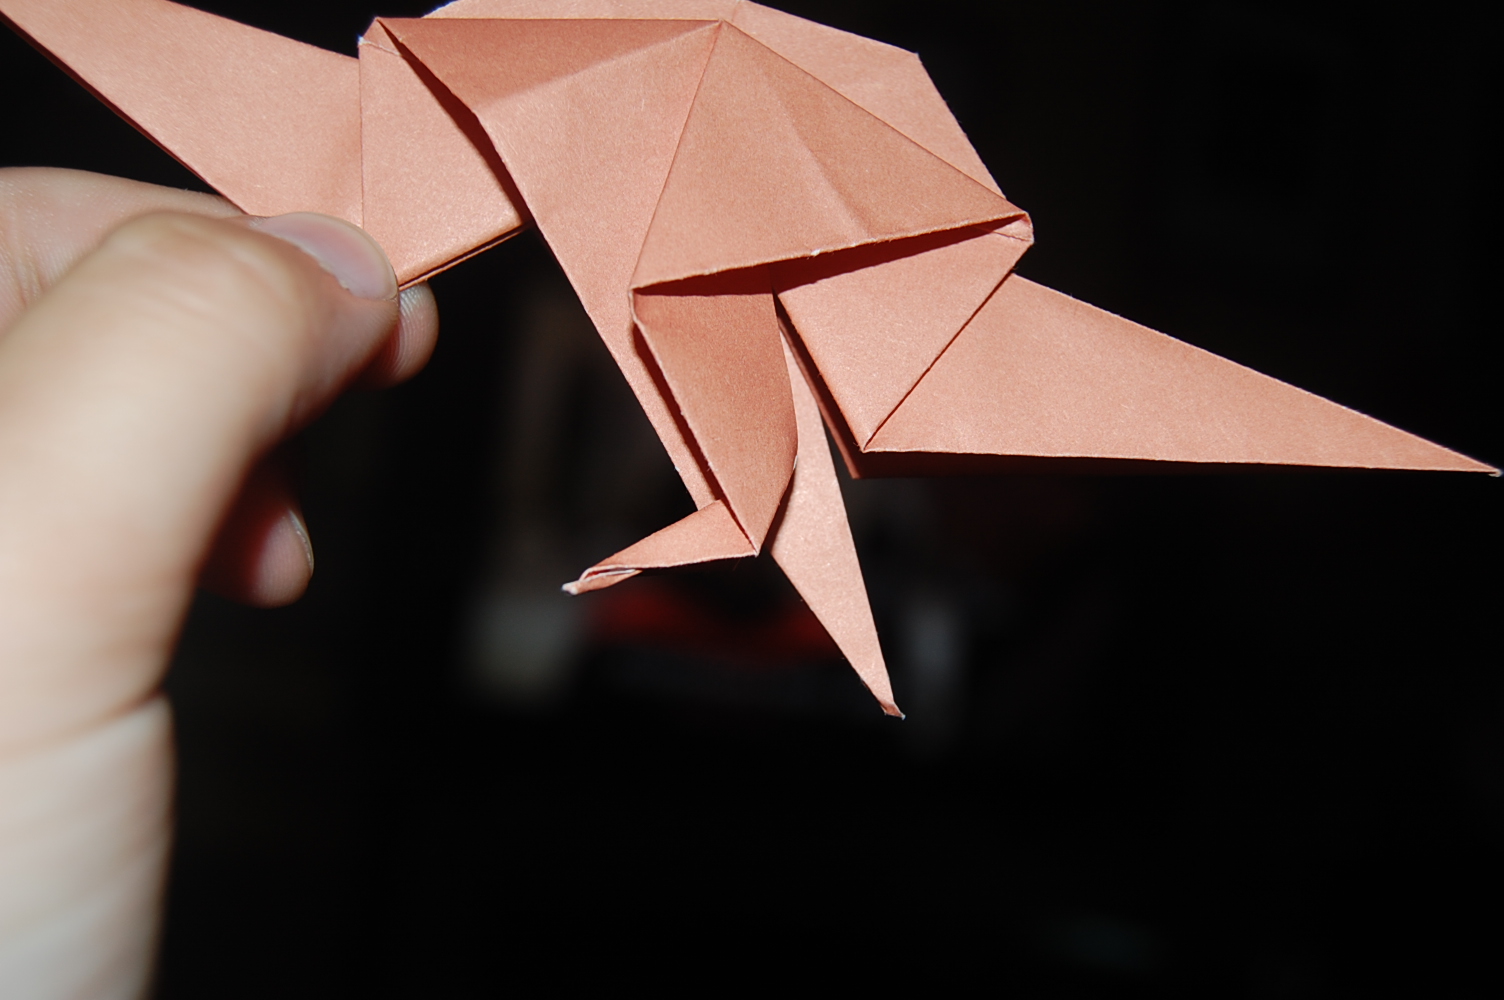
10.Now fold the feet. you do a reversed fold meaning that you reverse the wold that is already there. Much like you do when you make the beak for the crane
<img300*200:stuff/z/62304/Origami%2520birdbase%252c%2520crane%2520and%2520dinosaur%2520tutorial/DSC_0385.JPG>
This is how it should look like when the first foot is folded.
<img300*200:stuff/z/62304/Origami%2520birdbase%252c%2520crane%2520and%2520dinosaur%2520tutorial/DSC_0386.JPG>
<img300*200:stuff/z/62304/Origami%2520birdbase%252c%2520crane%2520and%2520dinosaur%2520tutorial/DSC_0387.JPG>
<img300*200:stuff/z/62304/Origami%2520birdbase%252c%2520crane%2520and%2520dinosaur%2520tutorial/DSC_0388.JPG>
Do the same thing to the other leg and you have the feet so that the dinosaur can stand up.
<img300*200:stuff/z/62304/Origami%2520birdbase%252c%2520crane%2520and%2520dinosaur%2520tutorial/DSC_0389.JPG>
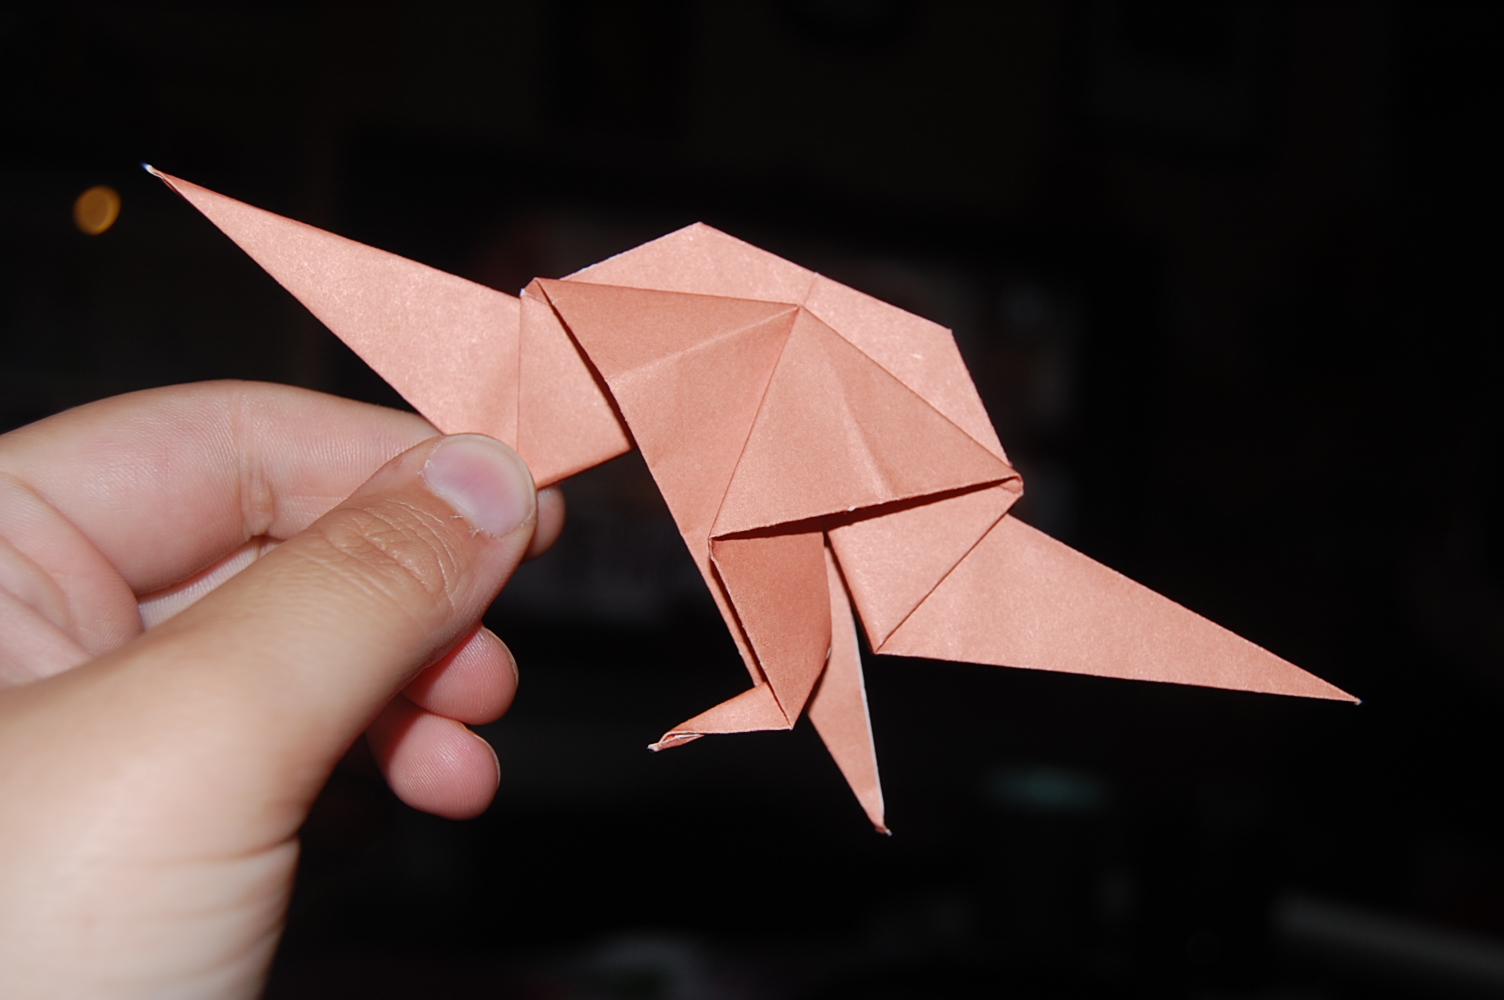
This is how it'll look like from the front.
<img300*200:stuff/z/62304/Origami%2520birdbase%252c%2520crane%2520and%2520dinosaur%2520tutorial/DSC_0390.JPG>
and from the side.
<img300*200:stuff/Dinosaur_step_eleven%3a.jpg>
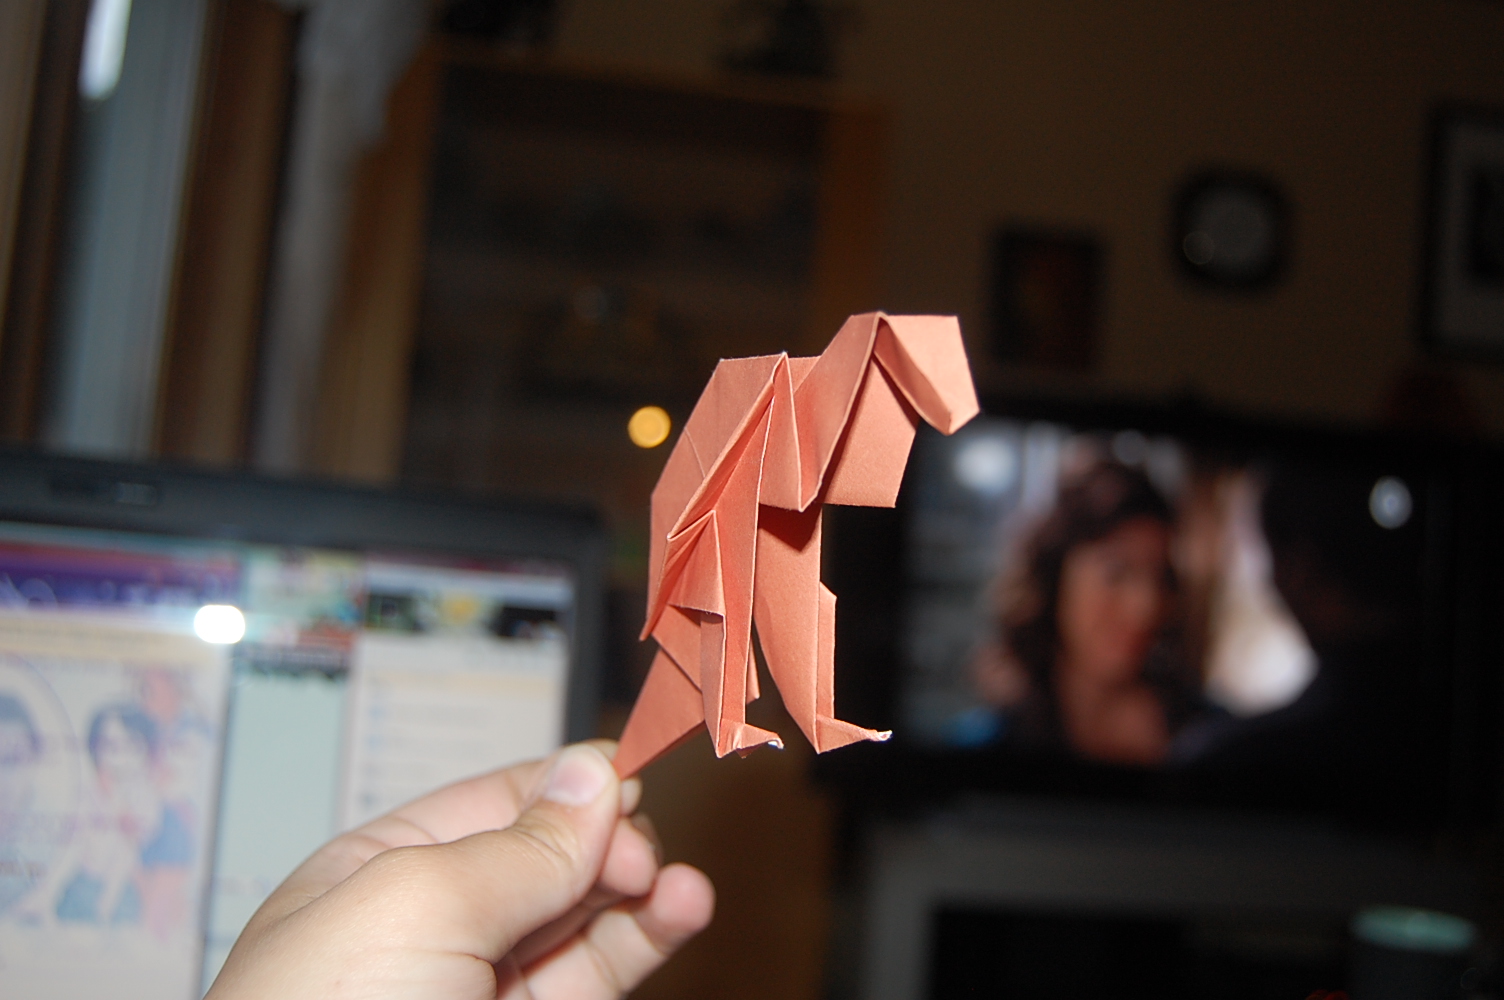
11.Now you take the the fold that you automatically made when you made the legs and fold down to keep the legs where they should be, it also steadies the dinosaur when it stands. You'll have to make it on both sides.
<img300*200:stuff/z/62304/Origami%2520birdbase%252c%2520crane%2520and%2520dinosaur%2520tutorial/DSC_0392.JPG>
Now you take the the fold that you automatically made when you made the legs and fold down to keep the legs where they should be, it also steadies the dinosaur when it stands. You'll have to make it on both sides.
<img300*200:stuff/z/62304/Origami%2520birdbase%252c%2520crane%2520and%2520dinosaur%2520tutorial/DSC_0393.JPG>
Now you take the the fold that you automatically made when you made the legs and fold down to keep the legs where they should be, it also steadies the dinosaur when it stands. You'll have to make it on both sides.
<img300*200:stuff/z/62304/Origami%2520birdbase%252c%2520crane%2520and%2520dinosaur%2520tutorial/DSC_0394.JPG>
Now you take the the fold that you automatically made when you made the legs and fold down to keep the legs where they should be, it also steadies the dinosaur when it stands. You'll have to make it on both sides.
<img300*200:stuff/Dinosaur_step_twelve%3a.jpg>
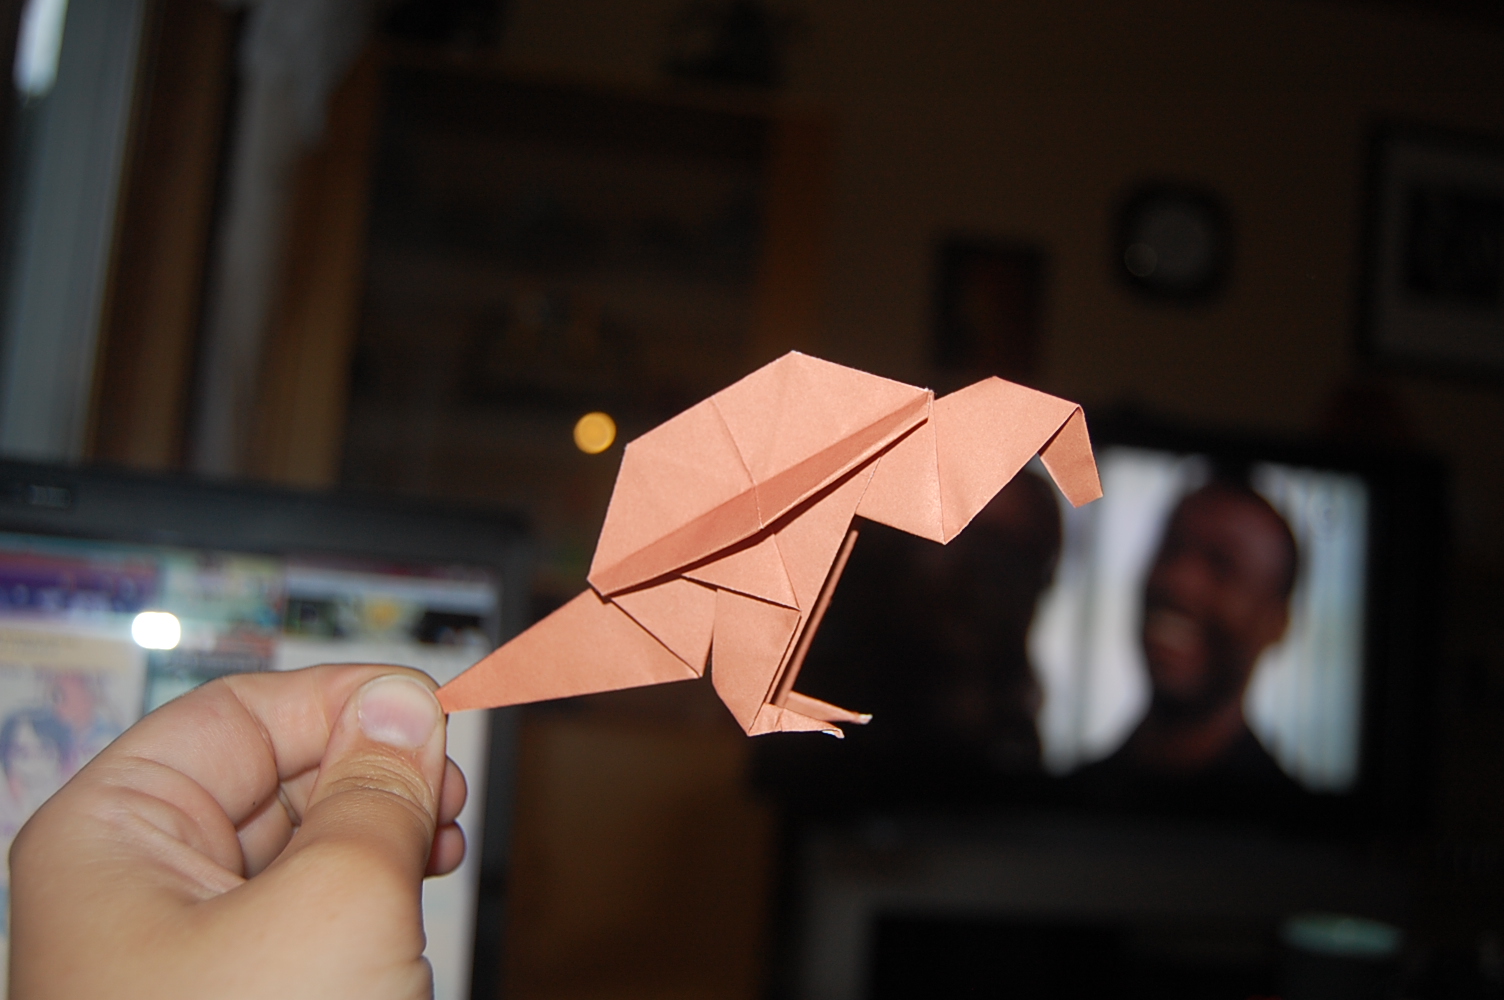
12.We're nearly there, just the head left. You have to do a reversed fold on the upper long part of the paper now the neck, this reversed fold will make the head.
<img300*200:stuff/z/62304/Origami%2520birdbase%252c%2520crane%2520and%2520dinosaur%2520tutorial/DSC_0396.JPG>
This is how the step should look like when it's finished.
<img300*200:stuff/Dinosaur_step_thirteen%3a.jpg>
13.Now you have to decide how long the face of your dinosaur should be, when you've done that open up the head a bit and fold where you want the head should end, this will be the snout of the dinosaur.
<img300*200:stuff/z/62304/Origami%2520birdbase%252c%2520crane%2520and%2520dinosaur%2520tutorial/DSC_0398.JPG>
Now you have to decide how long the face of your dinosaur should be, when you've done that open up the head a bit and fold where you want the head should end, this will be the snout of the dinosaur.
<img300*200:stuff/z/62304/Origami%2520birdbase%252c%2520crane%2520and%2520dinosaur%2520tutorial/DSC_0399.JPG>
This is how the step should look look when it's finished.
<img300*200:stuff/Finished_dinosaur.jpg>
<img300*200:stuff/Finished_crane.jpg>
<img300*200:stuff/Finished__dinosaur_and_crane_together..jpg>
<img300*200:stuff/z/62304/Origami%2520birdbase%252c%2520crane%2520and%2520dinosaur%2520tutorial/DSC_0403.JPG>
<img300*200:stuff/z/62304/Origami%2520birdbase%252c%2520crane%2520and%2520dinosaur%2520tutorial/DSC_0404.JPG>
<img300*200:stuff/z/62304/Origami%2520birdbase%252c%2520crane%2520and%2520dinosaur%2520tutorial/DSC_0405.JPG>
<img300*200:stuff/z/62304/Origami%2520birdbase%252c%2520crane%2520and%2520dinosaur%2520tutorial/DSC_0406.JPG>
<img300*200:stuff/z/62304/Origami%2520birdbase%252c%2520crane%2520and%2520dinosaur%2520tutorial/DSC_0407.JPG>
<img300*200:stuff/z/62304/Origami%2520birdbase%252c%2520crane%2520and%2520dinosaur%2520tutorial/DSC_0408.JPG>


/ [Ghost the Hybrid]

Username (or number or email):

Password:

2010-08-19 [Chimes]: You should submit this to Elftown Tutorials. :] *so hopes she got the link right*

2010-08-19 [Ghost the Hybrid]: is it good enough you think?

2010-08-19 [Chimes]: I think so. :)

2010-08-19 [Ghost the Hybrid]: i left a comment on the page now let's see what'll happen

2010-08-28 [Veltzeh]: Accepted! I got one suggestion though, could you label some important boxes (like Step 7 or Step 4) so they're easier to find?

2010-08-28 [Ghost the Hybrid]: gotcha i'll do it asap

2010-08-28 [Veltzeh]: Great. :)

2010-08-28 [Ghost the Hybrid]: updates done now. if anyone finds something else that need to be changed or needs to make clearer just let me know

2011-05-17 [Ghost the Hybrid]: Is anyone interested of more origami tutorials? because i'm thinking about doing some more of them

2011-05-18 [PureEvilDemon]: I am, I am! I love origami tutorials, always trying to give children new projects to work on! =D

2011-05-18 [Ghost the Hybrid]: then i'll make a tutorial of three of my favourite origami things

2012-09-20 [The Crimsonwolf of the Hidden Leaf]: i`m looking for one over the origami swan

Show these comments on your site

Elftown - Wiki, forums, community and friendship.