Page name:
angel bunny walkthrough 8 [Logged in view]
[RSS] 2004-07-20 00:42:08
|
# of watchers: 1
|
Fans: 0
| D20: 20 |
Back to
angel bunny walkthrough 7 - bunny color and lighting
Back to
angel bunny walkthrough - index
On to
angel bunny walkthrough 9 - bunny gets some fur
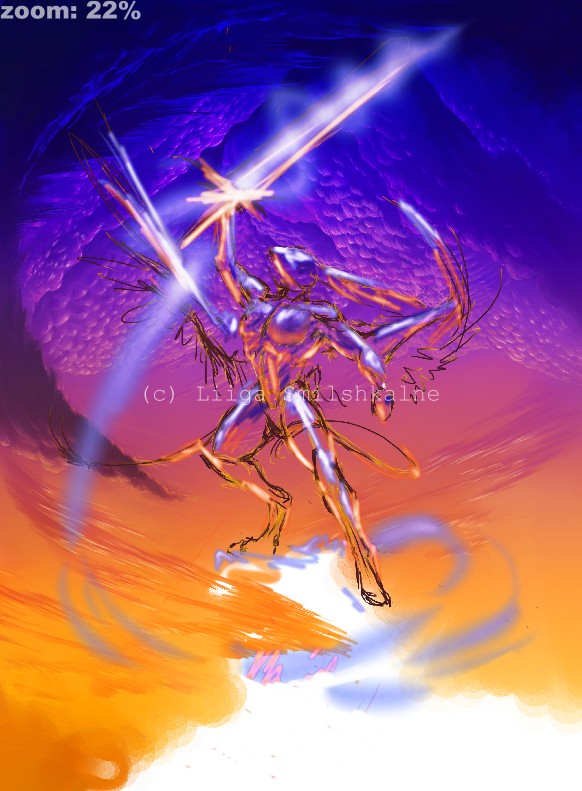
8. Er so yeah, I got bored. My main concern was that the background had a very limited palette, and I desperately wanted some blues on that bunny - have a bunch of reasons for that. So I got rid of the hill entirely, dropped all clouds on a single layer, hid all layers but the clouds, saved as .bmp, and opened in Photoimpact. Then, I selected it all and converted to an object. On this new object, I changed the hue almost 180 degrees, till it all became rather violet. Now, so far it all could be done in Painter as well, but I wanted the bottom part of the image to still remain orange/yellow/
red, to keep the feel of a sunset - therefore, I used the Effect - Creative - Type Effect, and selected Effect: Gradient (it's the first one in the row, and it's automatically selected when you first open that window). Parameters were set to Linear, From 255 To 0. What it does, is retain the upper part of the selection as it is, with increasing transparency until it reaches 0 (or whatever else was selected in 'To') at the bottom. I applied this effect a few times, until I got the transition the way I wanted it. This effect makes it very smooth, without killing color variations as a gradient on a new layer might've done, so that's exactly what I wanted. :)
Back to angel bunny walkthrough 7 - bunny color and lighting
Back to angel bunny walkthrough - index
On to angel bunny walkthrough 9 - bunny gets some fur
| Show these comments on your site |
 Stumble!