Page name:
create an old picture [Exported view]
[RSS] 2007-06-30 13:41:50
|
# of watchers: 2
|
Fans: 0
| D20: 8 |
Creating an old picture
Hello everyone. This tutorial was made by [
Vampire Akis] because she wanted to help you make one of your pictures look just like an old one! ^^ Let's start.
1. We open the photo we've taken on photoshop. We're gonna make it look like an old one throughout a complicated but not difficult tutorial.
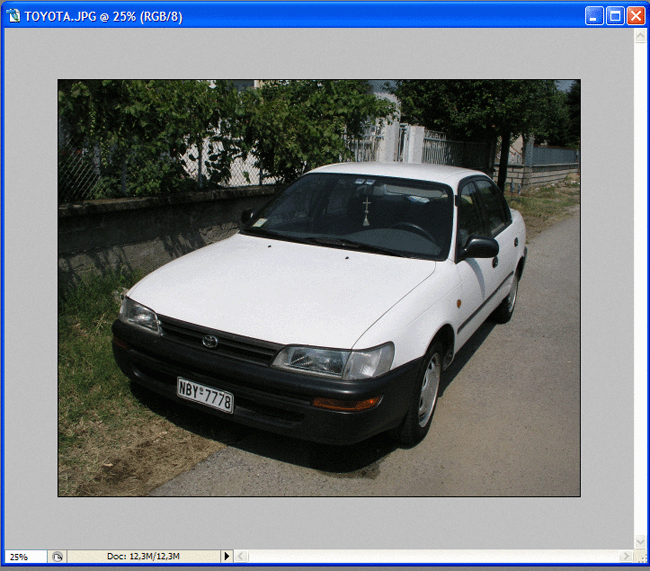
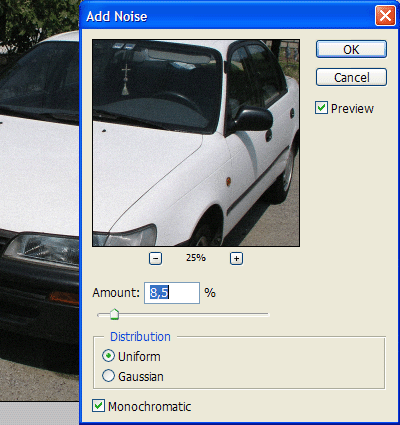
2. First of all, we must add some "noise" to the picture, since all old pics have a small or larger amound of "noise". click on the menu 'Filter' at the top, then on 'noise...' and then on 'Add Noise'. We don't need very much noise. Drag the little triangle and select approximately (8,5%). See where it says 'Distribution'
? Check the square next to (Uniform). Also click on the square next to 'Monochromatic'. Click on 'OK' button.
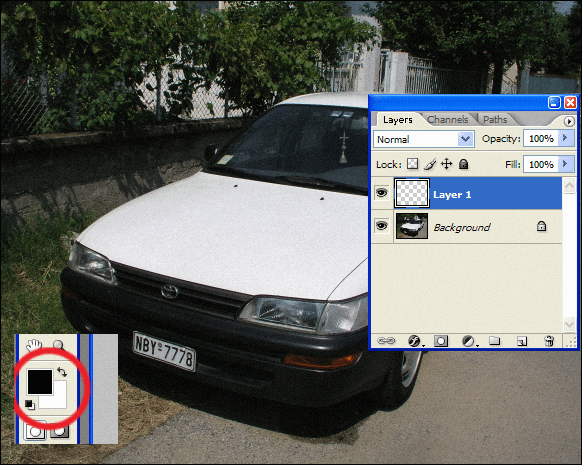
3. Now we're gonna create a new layer. Click on the menu 'Layers', then on 'new' and then on 'layer'. Click on 'ok' on the dialogue box that appears. Remember! Your foreground colour must be black and your background colour must be white!
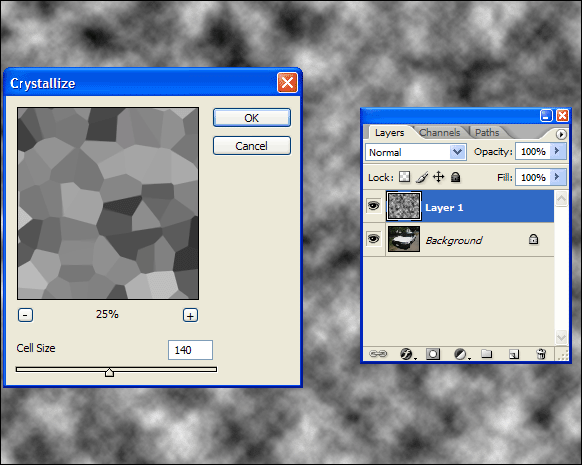
4. Layer 1 is selected. Now go on this: menu 'Filter', then click on 'Render', and then on 'clouds'. Click on 'ok'. Now: 'Filter' again, then 'pixelate', and then 'crystallize'. Be careful, your cell size on the 'crystallize' dialogue box, depends on how big the picture is. The bigger the picture is, the bigger the cells should be. You can drag the little triangle to 140 though, like I did. Click on 'ok'.
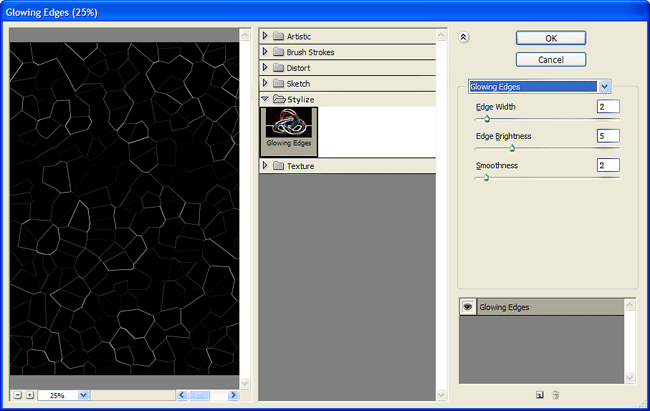
5. Layer 1 is still selected. Now go on this: menu 'Filter', then go on 'Stylize', and then on 'Glowing Edges'. We have to do some changes now, on this dialogue box; 'Edge width': 2. 'edge brightness': 5. 'smoothness': 2. All those changes depend on the resolution of the picture.
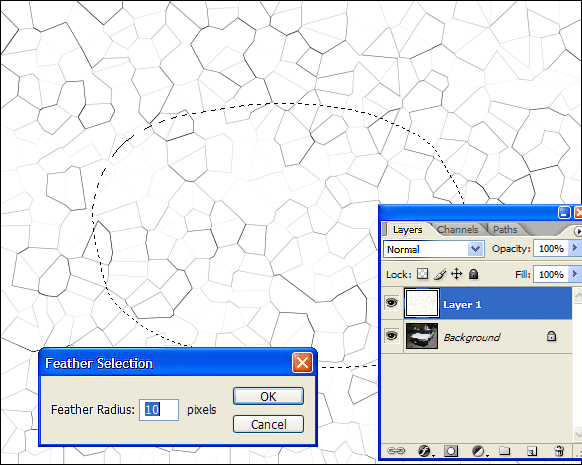
6. No, we didn't just ruin your pic! Click on the menu 'Image', then on 'adjust' and then on 'invert'. Now black is white, and white is black. See the tools board on the left? Take the 'lasso' (it's the second tool of the first column). Using the 'lasso', select the middle area of the picture, as you can see on the image below. Click on the menu 'Select' and then on 'Feather'. On the 'Feather' dialogue box, select '10 pixels' as the 'Feather Radius'. Click on 'ok'. Now click on the menu 'Edit' and click on 'Fill'. Can you see where it says 'contents' on the dialogue box? Select white from the 'Use' list, if it is not already selected. Click on 'Ok'.
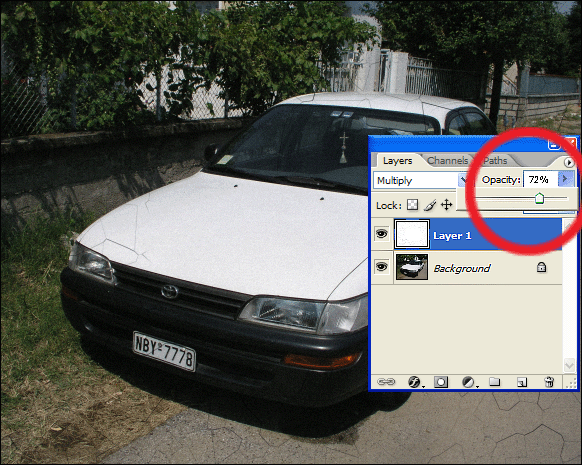
7. Layer 1 is selected. Now click on the menu 'Layers' and then on 'blending modes'. We don't need 'Normal' anymore. Choose 'Multiply' from the list. The pic now looks older... But the lasso-selected area is just fine. If you want to make the picture look even more realistic, you can reduce its 'Opacity' on the dialogue box. Click on 'ok'. Now click on the menu 'Layers' again and then on 'Flatten image'. Now we've got only one layer.
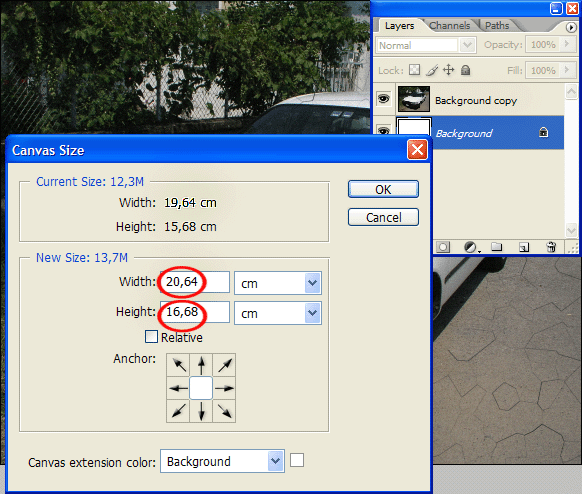
8. Click on the menu 'Layers' once more and then on 'Duplicate layer...'. Click on 'ok'. Now we see that a copy of our background is created! Make sure that the layer named 'background' is selected, and not 'background copy' instead. Now click on the menu 'Edit' and then on 'Fill'. Select white colour from the 'Use' list. Click on 'ok'. Now click on the menu 'Image' and then on 'canvas size'. Activate the little square of the 'Anchor', so that the pic will grow bigger. Adjust the size of the pic by making it 1, 2 or 3 cm bigger. Click on 'ok'.
9. Select 'background copy' as your layer. We'll make the picture look even older. Choose 'background copy' as your layer. Take the 'Lasso' tool and select the areas you can see in the following picture. Press 'Delete' to delete what is selected.
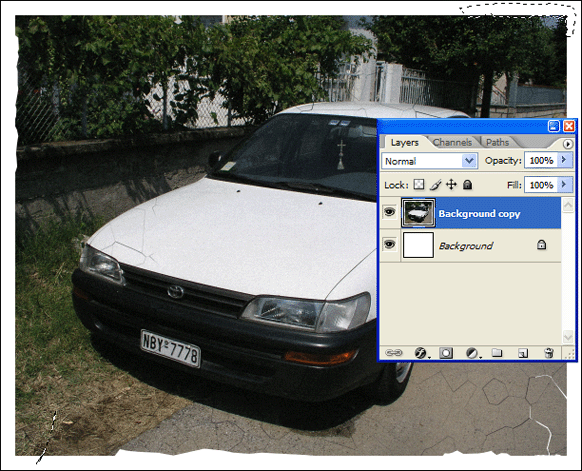
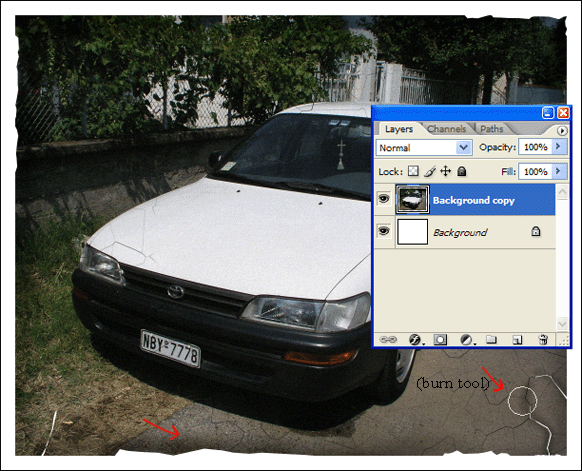
10. In order to have a more realistic effect, we need to darken the areas around the picture. Take the 'Burn' tool from the tools board. You can darken those areas simply by dragging with the tool like painting. In the 'Range:' square choose Midtones and in the 'Exposure' square choose 50%. You can use different brush sizes to burn the areas you want.
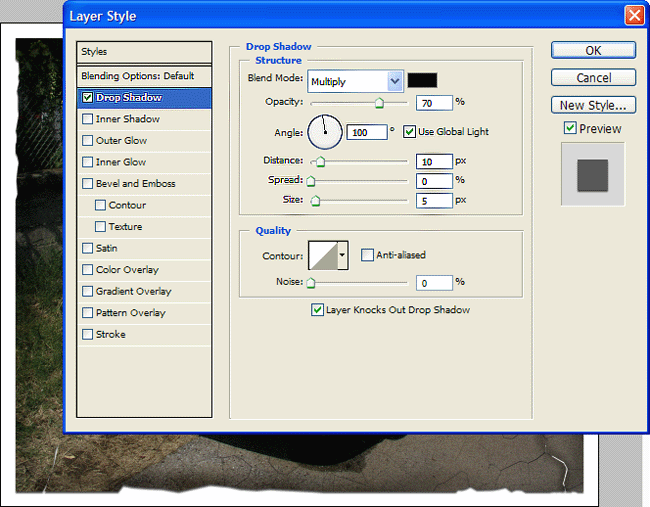
11. Now choose Backgroung Copy as your layer. Click on the menu 'layers', then 'Layer Style' and then 'Drop Shadow'. Make sure 'Drop Shadow' is selected. Choose black as your colour, 'Multiply' as your opacity and 100 as the Angle. Also; Distance: 10 pixels, Size: 5 pixels. Click on Ok.
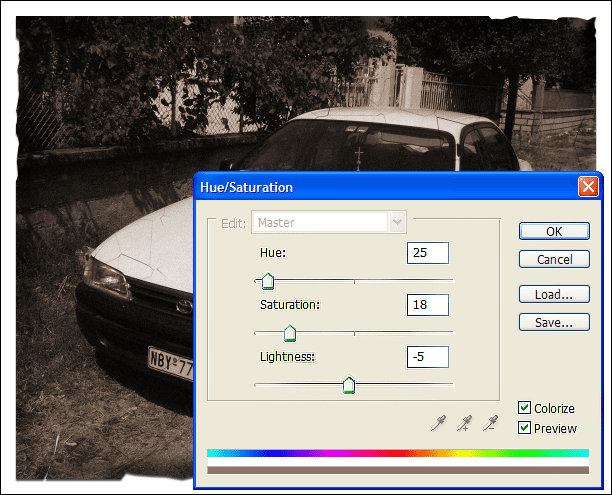
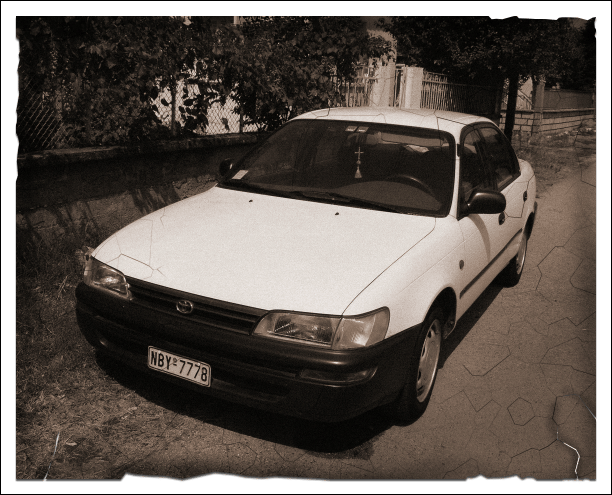
12. Finally, we need to give the picture a sepia colour. Click on 'Image', then 'Adjustments' and then 'Hue/Saturation'. Activate Colorize by clicking on the little square right next to it. Drag the little triangle in Saturation and then in Lightness in order to find a sepia colour for your picture. click on Ok. We're done! Congratutlations!
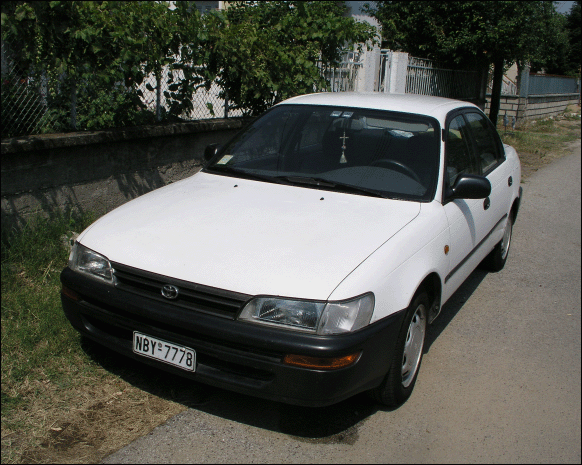
Before:
After:
| Show these comments on your site |
 Stumble!


