 My way of painting with acrylic paint. I don't say it's the right way, or the only way, but it's a way. ;)
I've made like..2 paintings with this method now..XD One of them is the one in this tutorial. So if you try it, you'll surely find out more stuff on your own and become better than this. :P
Also, I won't go into shading or where to put highlights, here are loads of coloring tutorials for that. (Example: http://www.itchy-animation.co.uk/tutorials/light01.htm ) Or you can use a reference and see where the highlights and shadows are on that image.:) This is just to explain how to solve the biggest problem I had with painting; the colours didn't mend as I wanted and the contrast was way too big. Everywhere. :)

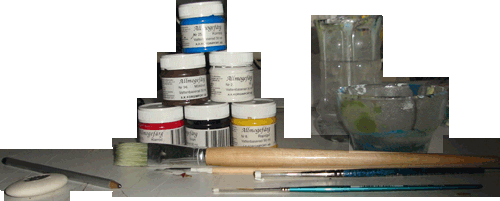
OK. First you need some tools. For this one I used:
Paint.
It's not acrylic paint, but as good as. It's cheaper and I bought it in a place selling..err..cheap stuff..x)
Brushes.
I used three for this, the big flat one, the small flat one, and the big round one. The flat ones shouldn't be too expencive, I think the method wears down on them a lot. But they should be quite hard.
A pencil & eraser.
To draw the helplines/sketch.
Something to mix the colours in.
I used a glass bowl.
Water.
Not that I used it much at all. Mostly to clean the brush after using it. And for the mane.
Something to paint on; canvas.
But I had none, so I used a piece of black leather I had at home. The only thing you need is something that can stand having paint on it (not too good with paper) and something with a little texture, like the canvas.
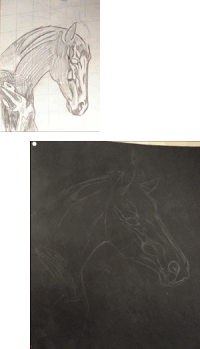
I made a reference on paper that I didn't really follow on the leather. I just used it for guidance. Both the paper and the canvas got nailed up on my wall. I'm not too careful with my walls.
The first thing I would do, is to paint the entire horsehead in a dark colour (the darkest I'll have on it at all), or if the background is dark, that's enough, before I draw where the highligts will be with the pencil. I'll do that even if the horse will become white. But the leather here are already black, so..:P
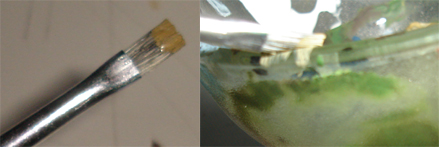
OK, the big secret with this method is to use very dry brushes. I take very little paint on them, and to get them even dryer I flick them over the edge on my glass bowl. A lot. When you think there is no paint left on the brush, then it's dry enough. x) (the brush on the picture is way to wet, still).
I've never been told to use this on normal paintings; I learnt it when I painted claymodels with a friend. The dry paint will work more like a powder and it will mend with the background color. You'll brush on the same spot over and over again, and it will be lighter. The more paint you use, the less it will mend and the more contrast it will give.
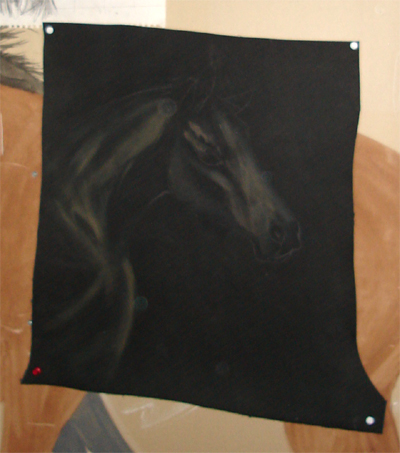
Sorry for the bad photo quality. Here I've used the big, flat brush, very dry, and painted the main highligts and structure. Very brief and messy, no detail. I try not to paint outside the siluette of the horse head tho, that might be hard to fix from looking blurry since the black paint almost never matches the black leather. As you can see.. I stopped caring much about the reference.
You might have noticed that I don't have a huge amount of different colours to chose from? I mix the colours instead. ;) I put some white and yellow in the brown to make it lighter, the paint I use here is the same as the highlights, pretty much, but the brush is so dry that you can see the black through the paint. I sometimes add a bit more of one or the other colours I had in the mix in the start, just to make the painting more alive, but basicly it's the same colour.
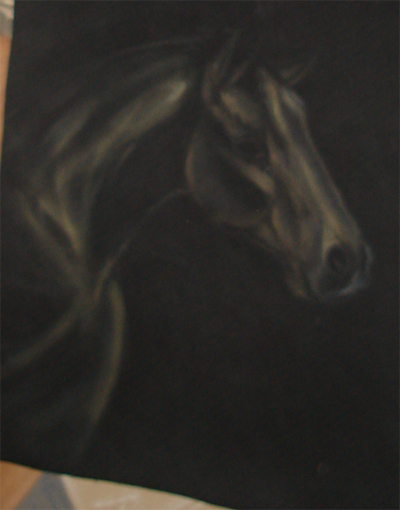
Now I switched to the small, flat brush. Still the same, dry way of painting tho. I focus mainly on the highligts now, painting over them again and again untill they stand out enough and look good to me.
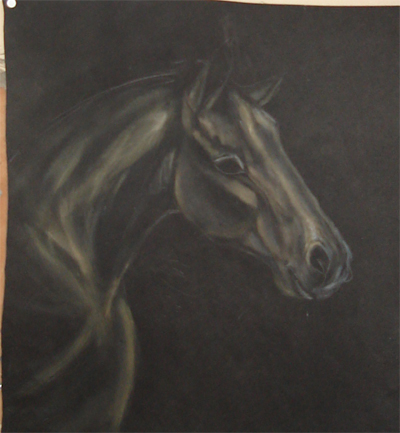
Now I use the black colour (or the colour you used when you painted the siluette of the horse, before you started with dry brushes). It's still the dry, small flat brush, I use the black on the parts that has become too light, to make structure and define the shape. To give depth, if you wish. Now you can start experimenting with using a little more paint on the brush, and make it more wet. It's still supposed to be very dry, but sometimes it's nice to have a little more paint on it. The more paint, the more contrast and sharper lines.
I've also added a tad bit more highligts with a lighter colour on some places.
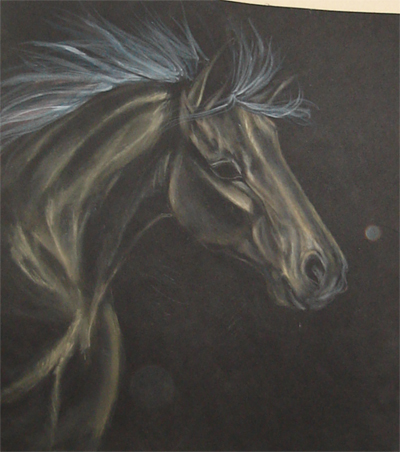
Even more highligts added, and some shadows. The brush just a tad bit wet, still mostly dry.
And I made the mane; for this I used the big round brush, quite roughly at first with a dark colour. Now I use really wet paint, I even added quite a bit water to it. This means that I have to wait and let the paint dry, once in a while.
As the mane started to show, I used lighter colours and only the tip of the brush to make it thin. Then some dark strands, lighter again, more dark etc untill I was fairly pleased.
I had no idea what colour I wanted the mane to bewhen I started, the paint was mostly blue. But I added more white and some black, and it all ended up in a nice grey colour that I think looks good on the horse. :P
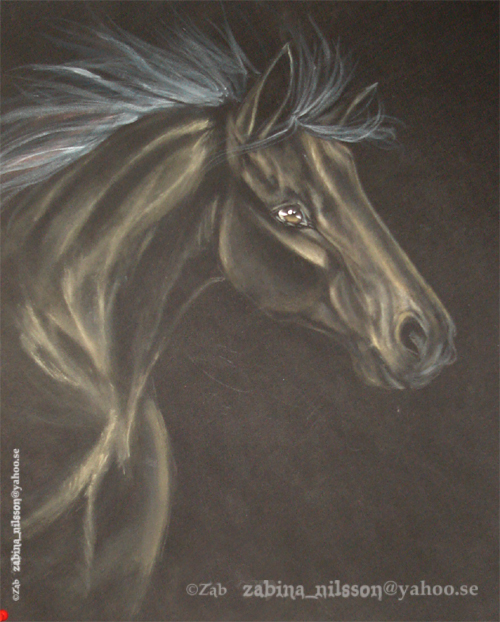
Finished!
I made the eye, using the wet, round brush. The highlight in the eye is the only thing on the entire image that is purely white. It gives a nice effect. :P
I also worked some on the highlights with the round brush, not too much paint. Because I'm never satisfied with the highlights..x) I also tried to make the siluette/conto
ur on the nose and neck a bit sharper to the background. :)
I hope you enjoyed this. :D
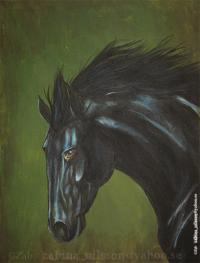
Same method, but on normal canvas. The differense is that I painted the first highlights with a wet brush, before I got to think of using it almost dry to mend it, and had trouble with getting that right.:P

Back to Zabs Tutorials

 Stumble!


