Wiki:
Page name: ECGTD Transparent GIFs [Logged in view] [RSS]
2004-11-04 23:53:04
Last author: Sunrose
Owner: 65tyjvw45b
# of watchers: 13
Fans: 0
D20: 10
Bookmark and Share
<img:stuff/2237_wiki_help_9y7vcgcflr5.jpg>

<img:stuff/ECGTD_Transparent_GIFs_00.jpg>

ECGTD Transparent GIFs

<img:stuff/2237_wiki_help_9y7vcgcflr5.jpg>


Return to Elftown CG Tutorials.
Return to ECGT Adobe Photoshop.
Return to ECGT Deiscorides Photoshop Tutorials.

<img:stuff/2237_wiki_help_9y7vcgcflr5.jpg>

Click on link to view full image.

<img:stuff/2237_wiki_help_9y7vcgcflr5.jpg>


Part A - Creating the file:


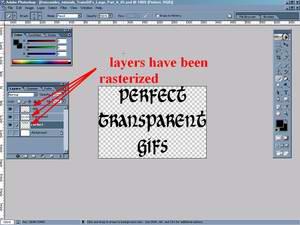
Creating a transparent GIF image file for use on the web so that it will appear on any background is easy. I will be showing you the easiest way to make a transparent GIF image file. I won't bore you with the details behind Alpha channels and all that, but instead I'll just flat out tell you how to do it. I'll be using plain text as an image so, one extra step to rasterize the text layer will be needed. I do not show that step, but all you have to do is try to draw or erase on the text layer and it will ask you if you want to rasterize it. Take note that I am not showing how to create a fading transparent GIF or an image that has contained several layers each using a different Layer Style which would cause you to Flatten the image instead of Merge the layers. That requires more steps, forcing you to erase the areas which you want transparent.

Steps 1 and 2
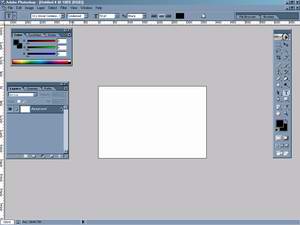
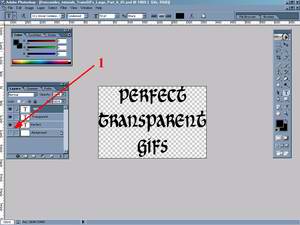
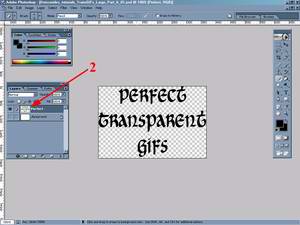
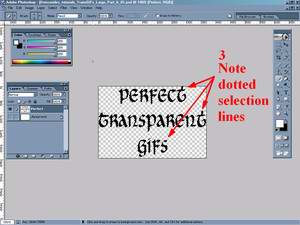
Determine how big you want your image to be and create a New image file with the dimensions needed. Create a new layer or paste something into your image, which will create the new layer. Hide the background by clicking on the Eye to the left of the layer in the layer window. Then create your image with no background. When you are done, make sure that you merge all layers except the hidden background layer. To merge them you can click on the top most layer to highlight it, then press Ctrl+E on your keyboard. That layer will then merge down to the next layer. Do this for all the layers except the hidden layer. If you want you can completely delete the hidden layer. It is not needed.

<img:stuff/Deiscorides_tutorials_TransGIFs_Thumbs_Part_A_01.jpg>
<URL:stuff/Deiscorides_tutorials_TransGIFs_Large_Part_A_01.jpg>

<img:stuff/Deiscorides_tutorials_TransGIFs_Thumbs_Part_A_02.jpg>
<URL:stuff/Deiscorides_tutorials_TransGIFs_Large_Part_A_02.jpg>

<img:stuff/Deiscorides_tutorials_TransGIFs_Thumbs_Part_A_03.jpg>
<URL:stuff/Deiscorides_tutorials_TransGIFs_Large_Part_A_03.jpg>

<img:stuff/Deiscorides_tutorials_TransGIFs_Thumbs_Part_A_04.jpg>
<URL:stuff/Deiscorides_tutorials_TransGIFs_Large_Part_A_04.jpg>

Steps 3-10
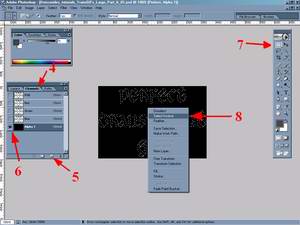
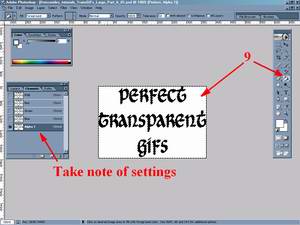
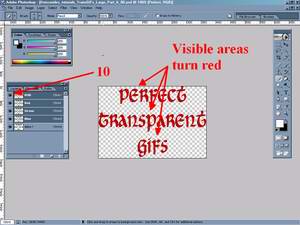
Now, press and hold down the Ctrl key on your keyboard while clicking on the main layer that has your image on it. This action will select everything in that layer and nothing else. Click on your Channels tab to see the RGB channels. Click on the "Create New Channel" button shown in step 5. Make sure that the newly created Alpha channel is the only thing visible. Your image should turn a solid colour like black with the dotted selection lines still in place. Once you have done that you can click on one of the Marquee tools. With a Marquee tool right-click on the image itself. In the menu that pops up click on, "Inverse Selection". This will select everything on that layer that is not a part of your image and will be transparent. Use the Paint Bucket Tool, select the colour White and click on the areas that are to be transparent. Make sure all areas that are to be transparent are White and all areas that are to be seen are Black. When you are done with that, unhide the RGB, R,G,B channels. Your image should now turn an odd red colour and its outer areas that are to be transparent should be transparent.

<img:stuff/Deiscorides_tutorials_TransGIFs_Thumbs_Part_A_05.jpg>
<URL:stuff/Deiscorides_tutorials_TransGIFs_Large_Part_A_05.jpg>

<img:stuff/Deiscorides_tutorials_TransGIFs_Thumbs_Part_A_06.jpg>
<URL:stuff/Deiscorides_tutorials_TransGIFs_Large_Part_A_06.jpg>

<img:stuff/Deiscorides_tutorials_TransGIFs_Thumbs_Part_A_07.jpg>
<URL:stuff/Deiscorides_tutorials_TransGIFs_Large_Part_A_07.jpg>

<img:stuff/Deiscorides_tutorials_TransGIFs_Thumbs_Part_A_08.jpg>
<URL:stuff/Deiscorides_tutorials_TransGIFs_Large_Part_A_08.jpg>

<img:stuff/2237_wiki_help_9y7vcgcflr5.jpg>

Part B - Saving the image as a Transparent GIF file:


Steps 1-4:
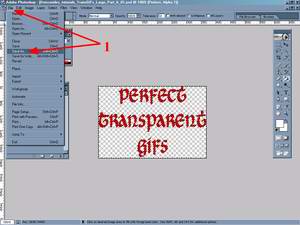
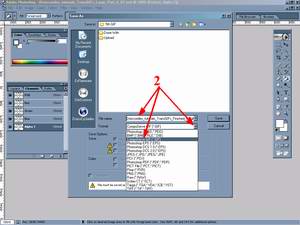
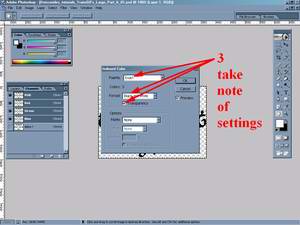
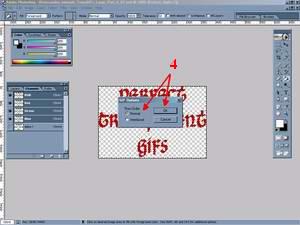
Now to save your file as a Transparent GIF file. Simply click on File in the top left of the screen and then click on "Save As". In the Save window, make sure to select the "CompuServe GIF (*.GIF)" file type Format, using the drop down box labeled "Format". Type in your filename and click on the Save button. Next a new window will pop up. Please, take note of the settings I am using in the step 3 image, below. The check box "Transparency" is the most important and must be checked otherwise you won't have a transparent GIF when you are done. Click on OK when you are done changing the settings. A very small window will open and all you need to do is click on OK again. You should now have a transparent GIF image to use.

<img:stuff/Deiscorides_tutorials_TransGIFs_Thumbs_Part_B_01.jpg>
<URL:stuff/Deiscorides_tutorials_TransGIFs_Large_Part_B_01.jpg>

<img:stuff/Deiscorides_tutorials_TransGIFs_Thumbs_Part_B_02.jpg>
<URL:stuff/Deiscorides_tutorials_TransGIFs_Large_Part_B_02.jpg>

<img:stuff/Deiscorides_tutorials_TransGIFs_Thumbs_Part_B_03.jpg>
<URL:stuff/Deiscorides_tutorials_TransGIFs_Large_Part_B_03.jpg>

<img:stuff/Deiscorides_tutorials_TransGIFs_Thumbs_Part_B_04.jpg>
<URL:stuff/Deiscorides_tutorials_TransGIFs_Large_Part_B_04.jpg>

Finished Image:
<img:stuff/Deiscorides_tutorials_TransGIFs_Finished_00.gif>

<img:stuff/2237_wiki_help_9y7vcgcflr5.jpg>


Return to Elftown CG Tutorials.
Return to ECGT Adobe Photoshop.
Return to ECGT Deiscorides Photoshop Tutorials.

<img:stuff/2237_wiki_help_9y7vcgcflr5.jpg>

<img:http://www.pro-counter.com/cgi-bin/gd-count.cgi?page=DPS7Tutorial&style=blushdw&nbdigits=10&reloads=1>
http://www.pro-counter.com/signup.htm - get your own site-counter.

Username (or number or email):

Password:

2005-09-26 [dew_farie]: um, i like your tutoral and all, but i dont have that program. Do you know how to do it in Photoshop 2000 SE? Or do you know someone that does?

2005-09-27 [irulan]: To my knowledge, there is no such version of Photoshop... :/

2005-09-27 [dew_farie]: mm. i was asking because its what i have on my computer

2005-09-27 [irulan]: You probably have Windows 2000 SE as your operating system, but there is only Photoshop 1-7 & CS & CS2.

2005-09-27 [dew_farie]: windows xp, home edition

2005-09-27 [dew_farie]: opps, i cant type, its photostudio, i feel stupid....

2005-10-05 [dew_farie]: Anyone know how this works on Photostudio 2000?

2005-10-28 [Konobi]: Well.. I think Paint people are out of luck...

2005-12-13 [AshAsphyxiation]: yeah. i have paint and it sucks that i cant do transpartent backgrounds!

2006-05-24 [eyes of frost]: When doing this to a colored image...it comes out kind of funky and not the colors you colored it...

2006-09-08 [Pip]: Ive done exactly what you sed but i cant get it on to elftown without it becoming a white background
Any tips

2006-09-09 [The Scarlet Pumpernickle]: Do you have Wiki uploading privs? Or are you uploading it to your house?

2006-09-10 [The Fuzzily Psychotic Llama is Dead]: I can make transparent backgrounds in the newest version of Microsoft Word. (XP I think) It might be slightly different for Windows computers because I have an Apple Mac but I'd be happy to make a tutorial for anyone who doesn't have imaging software.

2006-09-10 [Pip]: what are wiki uploading privs?? im loading it into my house thats the only way i no how to

2006-09-10 [The Scarlet Pumpernickle]: Ya... ask one of the guards and they'll probably tell you how to get them. That's the only way you can upload transparent gifs. :)

2006-09-11 [ally]: You already have the privs [Pip]. At the bottom of every wiki page there's a place where you can upload images straight from your computer to the wiki.

2006-09-11 [Pip]: Oh i never knew that, thankies very much [ally]

2006-09-11 [ally]: Welcome :)

2006-09-14 [Pip]: Thankyou i got it all working now! thanks a lot

2007-10-02 [Lady of Lore]: Thanks so much for this wiki! It's ever so helpful ^__^

2011-06-10 [Eyonic]: zomg I'm having the same prob that pip was having. either it comes out with a white background or is says there is something wrong with it >.<

Number of comments: 38
Older comments: (Last 200) 1 .0.

Show these comments on your site

Elftown - Wiki, forums, community and friendship.