Hands
Okay so I've discovered a lot of people have issues with hands. So hopefully this will help.
And as for the bone structure and stuff, most of it was learned from poking at my hands. Though that does work to some extent it's porbably a good idea to check out a diagrahm too.

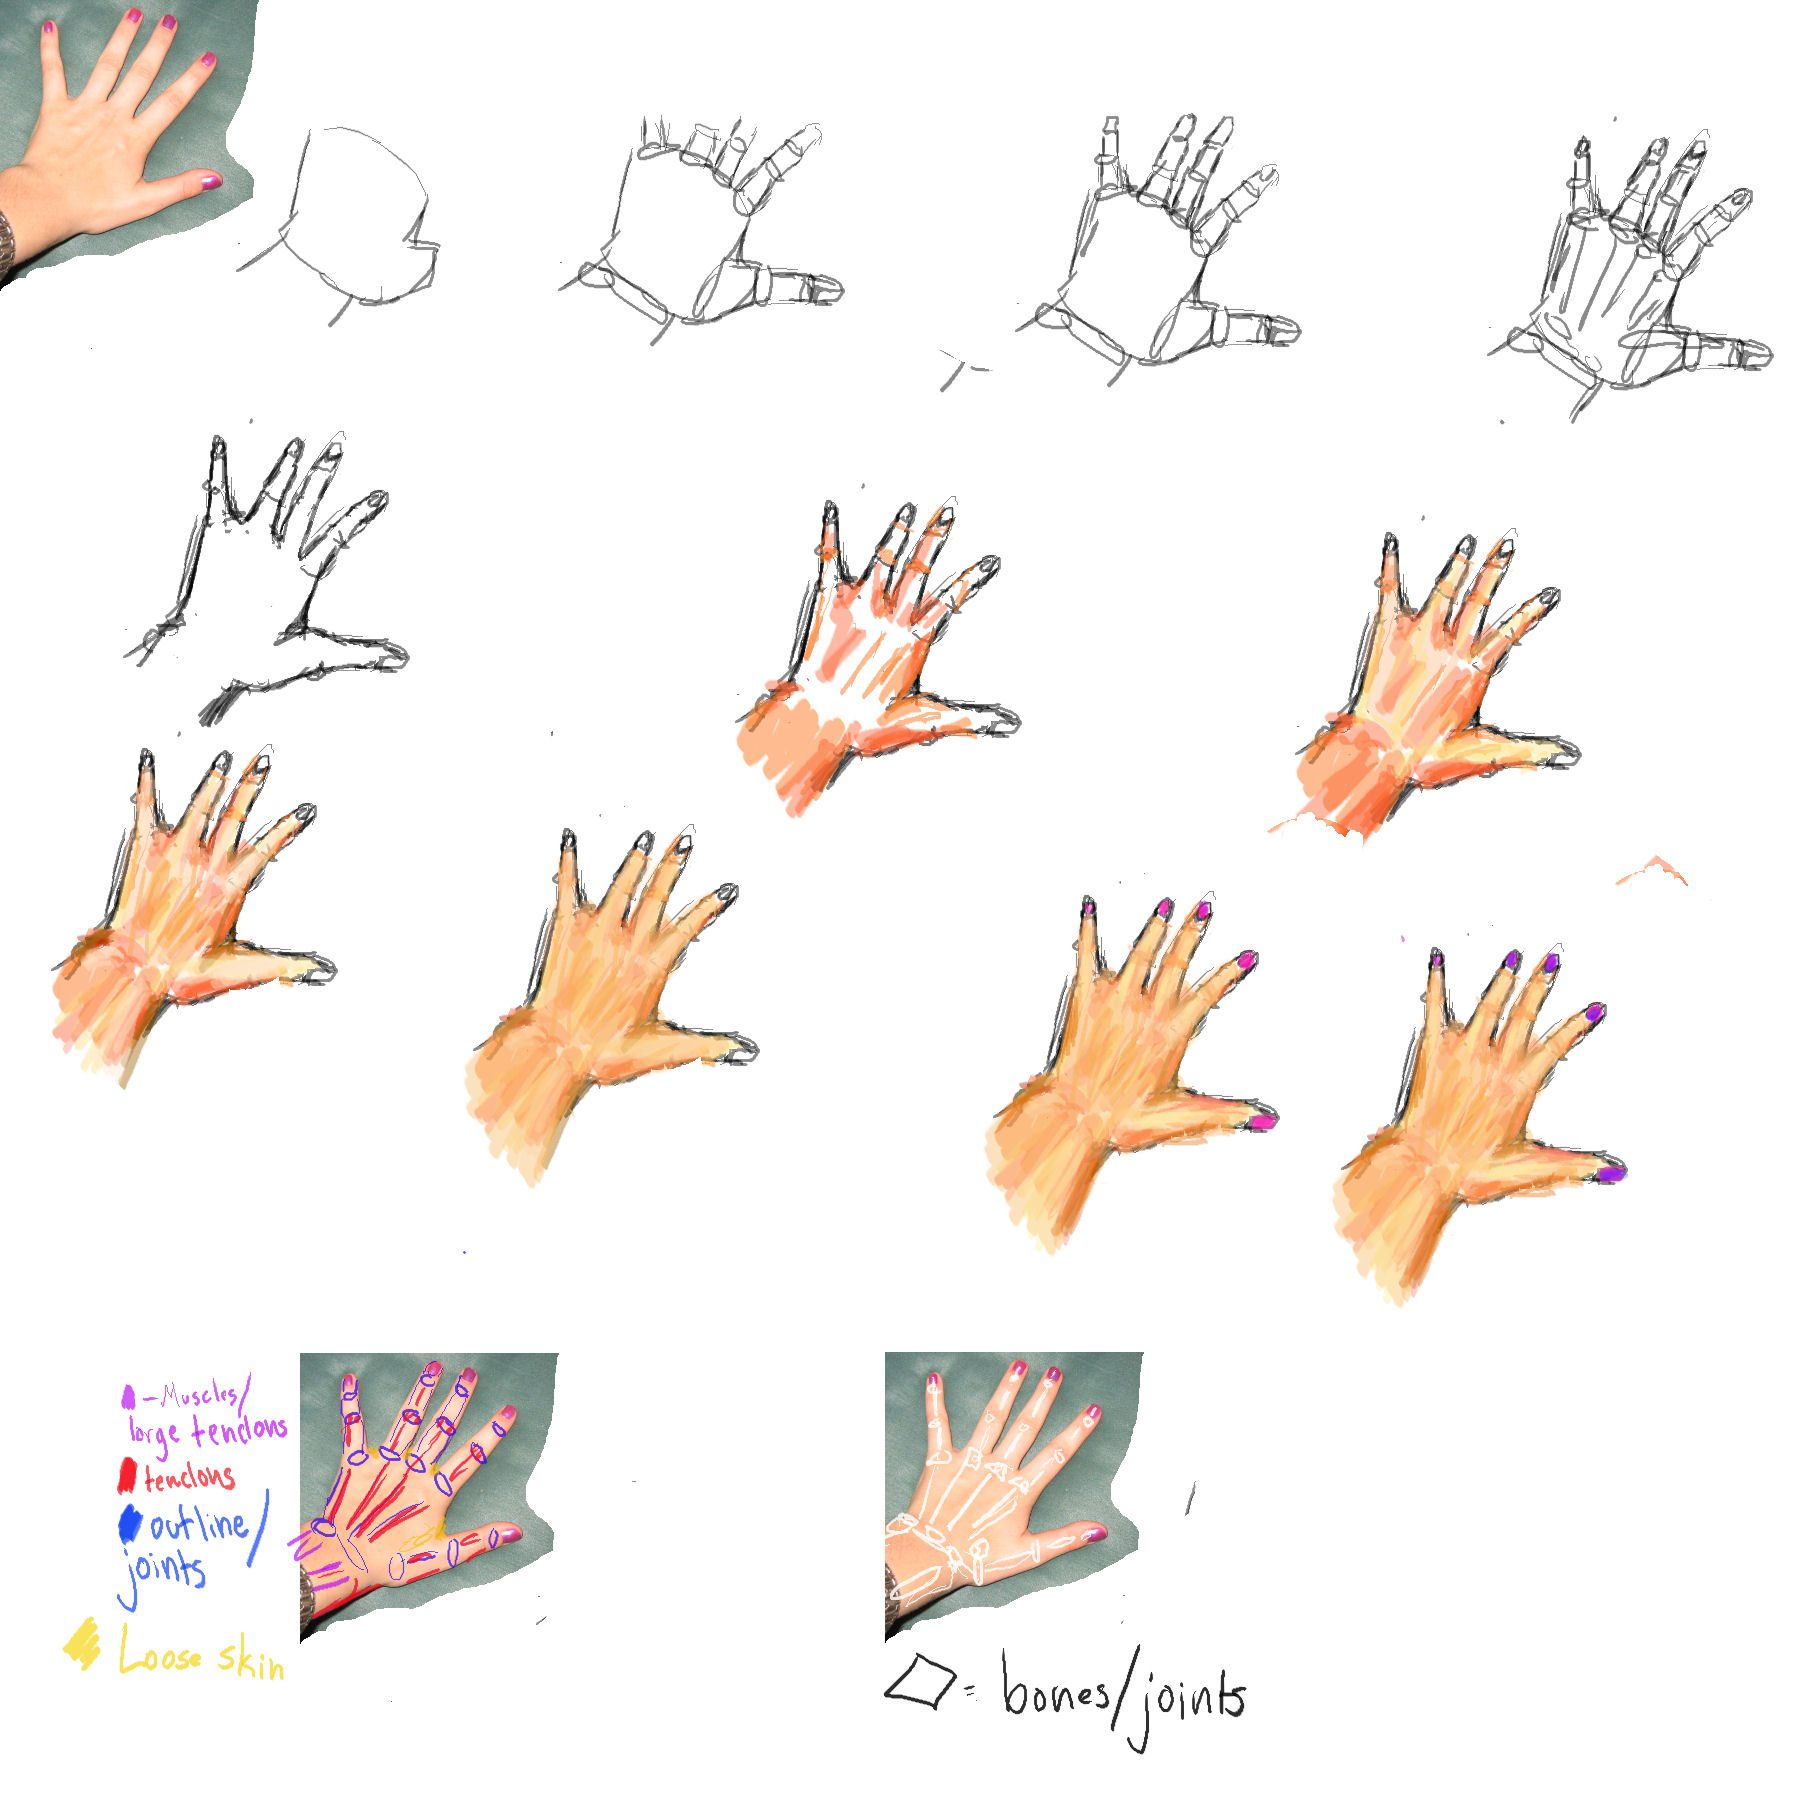
The first image is my left hand. It's a good idea to start this way since just about everyone here has a pair of hands.
Step 1. This is just the outline. Very basic, not detail yet.
Step 2. A bit more detail. As you can see, I'm using ovals to represent the joints and knuckles. You want to start with the knuckles and then work your way out. I normally finish each finger, then move to the next one, but for the sake of showing you, the finger go from least finished to most.
Step 3. Now all the fingers are finished. You'll note how the drawing differs from the photo in that the fingers are a little more bent. That's okay as long as it lookes like a hand.
Step 4. Now I'm putting in lines to represent the tendons. I've also put in some shapes representing shadows and highlights. NOTE: you could also do this with color.
Step 5. Erase most of the inside lines. I do this a lot on colored pencil work, because I use prisma colors and they magnify the pencils lines.
Step 6. Begin blocking in the color. Skin isn't just a fleshy tone, there's a lot of oranges, browns, yellows, pinks, blues, and purples.
Step 7. Is a continuation of 6. The highlights are white, but to give them more depth I've used a light yellow.
Step 8. I've added a few shadows and some highlights. And I've covered some of the previously white areas with yellow.
Step 9. I've taken a low opacity flesh tone and have cover the hand with it. If you're using colored pencils, go over the whole thing, lighly with a flesh colored pencil. This workes best with prisma colors, because they are wax and like to blend.
Step 10. I've added some shadows and highlights. Nothing much. For the nails, since I painted them in real life, I know something you don't. I don't have that shade. I painted them first with a pinkish color, then went over them with a thin, metallic purple-blue. So for the picture I did the same thing, starting with the pinkish color.
Step 11. I've covered the nails with purple, using a blue for the shadows.
back to Kitty's Tutorials
 Stumble!