
Help with Banners for your House/wiki
 NOTE: This tutorial is mainly for a higher end graphic program like Photoshop. It should be about the same no matter what version you have. If you are using a different program, It MAY have some similarities, but I don't know how to use any other programs as efficiently as I do Photoshop. The basic concepts are the same, but how to get there may be different.
I will TRY to help you guys come up with your own banners that do not break the Elftown rules, and look spiffy and maybe even uniform so that your house doesn't look like a cluttered pile of tossed banners. :)
By using some simple guidelines, you too can create eye catching if not simple banners to aid in advertising your wiki, or house.
Step one:
Try to decide on a basic banner size. I try to keep mine at 400x100 Pixels @72dpi (standard dpi for internet). I have found this size to be not too big, and not too small, and if you have a bunch of them, they look all spiffyfied.

If this size is too short, the most you should make it is 700 pixels wide. More than that, will not fit in the normal settings of your browser, and you will have to scroll all the way down to see your banner and the start of your page. It will also overlap past the darker area of your house, and it looks kind of unsightly. Sometimes, the title of your wiki can be 700 pix wide and it fills up the top pretty nicely.
 Feel Free to use these for your own banners.
 Just click and drag the image to your desktop, or right click and 'save as'
The trouble with 'square' shaped banners is that it takes up so much room.. You want everyone to see all your nifty banners without having to scroll down for 5 minutes past one banner. Set your size first, then we can start working on making them spiffy.
Step 2:
After you have done this, Decide on a background to put in there. I like to use portions of my own art or something I created as my background. Maybe part of an image as long as it is not too bright or loud, or whatever.. This will keep you from having a plain one color background. It keeps things interesting! Now. I've decided to use some of my Crow art. Adding the images, (and they don't have to fit) I arrange them in layers how I want them to be.

I used all three images, (you don't have to use that many, it's just to show you what the possibilities are. One is plenty if you like) Which were all in seperate layers. I then click the boxes right next to each layer to the right of the 'eyeball'. This links all three images together. In the "layers" window, there is a little arrow at the top right corner. It opens a dropdown menu. Look for 'Merge Linked", and select it. Your three images are now one image and one layer.
Now for the meat of the banner...
Step 3:
The text is next. Select a font you like..I have many many fonts, after surfing free font sites like
www.acidfonts.com (my fav)
After you get the font you want, type the main title of it and size it how you want it. I like to leave some room so you can see some of the background, and also enough room to add more text, like say, a catch phrase. I always make the 'catch phrase' smaller than the 'title'. It makes for a nice break between letters. Pick your colors, and whatnot and arrange them the way you want.
HINT: If you double click the font layer, it will open up a window that gives you a TON of options on how to decorate your letters. It takes a little playing with, but you can add highlights, drop shadows, glows, colors, textures, and bevels (3D Look) that really make your letters jump...
<-----Click Thumbnail To see what I'm talking about.
After You've played around with the sizes and placement and adornments of your letters, sit back and give it a good look over.. Sometimes you see things you might want to change.

HINT: Don't be scared to play with all the little features. This is how you figure it out. By experimenting and trial and error.
Rule of thumb: Try not to let any of your letters get cut off by the edges of your banner. And always leave at least SOME space between them so it's readable. Also.. don't be afraid to switch to different fonts for different parts. This adds to the aestheticness. Choose colors that show up good.. ie, dark with light, light with dark etc. Try to stay away from dark letters on a dark background, or light on light.. make sure that from a distance, you can still read your letters.
Step four:
Once you have arranged everything the way you want it to be, go back to the layers section, back to the little arrow thingy on the right, back to the pulldown menu, and this time select 'Flatten Image'. This will turn all your layers and Text into one layer.
After this has been done, go to the File pulldown and select 'Save for Web'. Name it (make sure you remember where!) and upload it to your house! BAM you got a spiffy banner!
This tutorial applies to most every size banner, not just the ones I've supplied. This is the simplest way I can think of to explain it without going into ALL the different ways to make them.
Bannermaking is fun and can be very useful. I hope this helps you in some way. :)
Rogue
If you know how to make banners, and are willing to help some of the Elftowners with their banners, You can add your name below this line, for people to be able to contact you.
1.[
AccountKiller]
2.[
spiritee]
3. [
Erestor]
4.[
Danboo]
5. [
Duke Devlin]
It may be an outdated wiki now, but I'm still willing to help.
6.
7.
8.
9.
10.
If this tutorial helped you, or inspired you in some way to make a banner, or if you used the templates supplied, feel free to post them here for others to enjoy. :)
 Stumble!
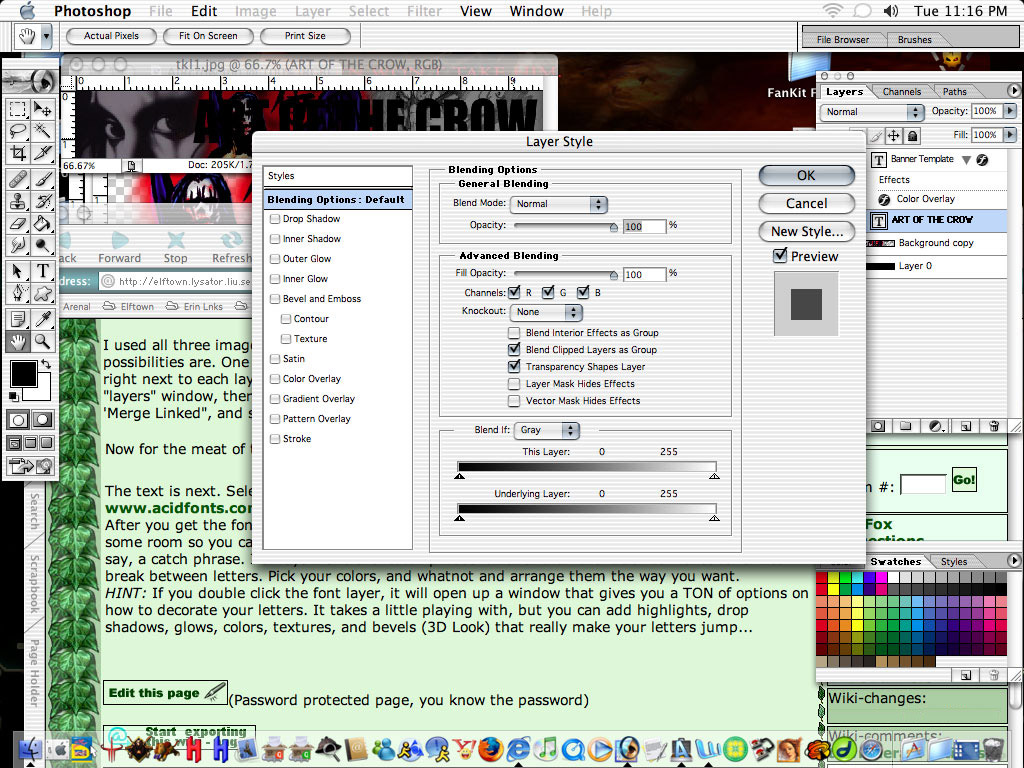 <-----Click Thumbnail To see what I'm talking about.