Making paper is a hobby I have only recently started. It’s nice to have this paper for scrapbooking and also for unique cards. Maybe one day if I get decent at it, I will make journals, etc. and sell the stuff! For now though, it’s just for fun and it’s really easy! It can be a little time consuming and a little messy, but it’s still an easy project.
Items needed:
Paper – including card stock, copy paper, colored paper, construction paper, even paper towels or toilet paper (it’s up to you)
Blender
A tub or tote
Sponge
Newspapers
Felt or some other kind of absorbent material to “couch” your paper on
A mold (I will give you ideas for this below)
Rolling pin
Cornstarch (powdered or liquid)
Add-ins (optional) – can be anything from cut up embroidery floss, shredded veggies, flower petals, dryer lint, feathers, foil, mylar – get creative, there are tons of things you can add to make your paper unique
Heavy books or weights – this will be used for flattening your paper
What I used/where I got it:
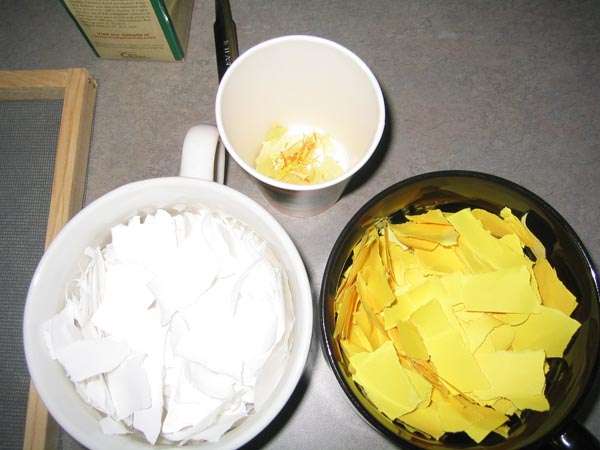
White copy paper, construction paper, card stock (for this specific project I used 6 sheets of white paper, 3 sheets of dark yellow card stock, 1/2 sheet of bright yellow construction paper)
A small Rubbermaid tote
For the felt: I went to Hobby Lobby – by the scrapbooking stuff they have pre-cut paper size sheets of felt that are like .07/ea. I went this route because I didn’t want to spend 3.99/yd on felt fabric. To be honest though, it’s better if the felt is a few inches longer/wider than the size of paper you are trying to make
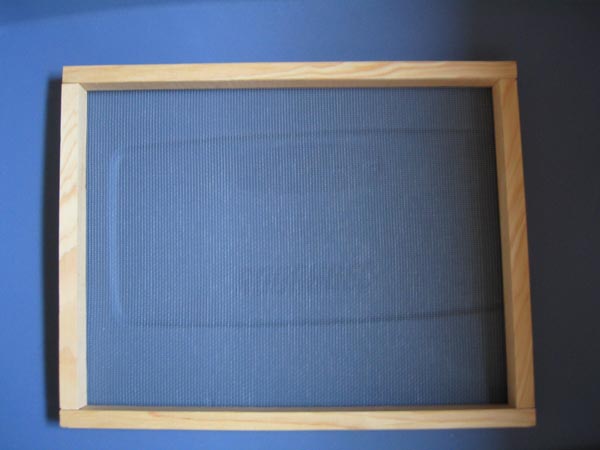
For the mold: I bought a 8x10 wood frame from the dollar store and a roll of aluminum screening from Home Depot. Unfortunately, the smallest roll I could find was 36x84 – it was $5.97. I cut out a piece of aluminum slightly larger than the frame, then using a staple gun I attached it. It works okay, but I will be trying nylon screening soon. Aluminum wasn’t the greatest choice either because it will rust and the edges are rough. I couldn’t find nylon screening at Home Depot though, and I really wanted to make paper so I settled for aluminum!
Tada - I have now a mold with fiberglass screen. It is much better and is the same price as aluminum. I also bought a .58 piece of door trim, had Lowe's cut it, and then nailed it together to make my new mold! One of the problems with the fiberglass screen I am having though is that it tends to pull away from the staples when I am getting the paper off the mold.

You can also buy kits that have a more professional mold as well. And if you want to go really cheap and easy, you can just use an embroidery hoop as your mold. Keep in mind you will also have circle-shaped paper though. The size of the mold is of course up to you.
Once you have gathered the necessary items, then the fun begins!
Step 1: Tear all the paper up you want to use into pieces no bigger than 1 inch square. I advise keeping colors separate. You will need to tear up more of whatever you want your base color to be. I advise soaking your paper in cool water overnight. I've tried it both ways, and soaking the paper makes a big difference in the pulp texture and also it will go easier on your blender!
This is also a good time to get any add-ins that you may want to use ready. I usually set these aside in a cup. For this paper I am using cut up embroidery floss in three different shades of yellow and some tiny bits of yellow construction paper.
 Step 2:
 Lay everything out that you will be needing for this project. If you are working indoors, I recommended putting a towel down on the floor.
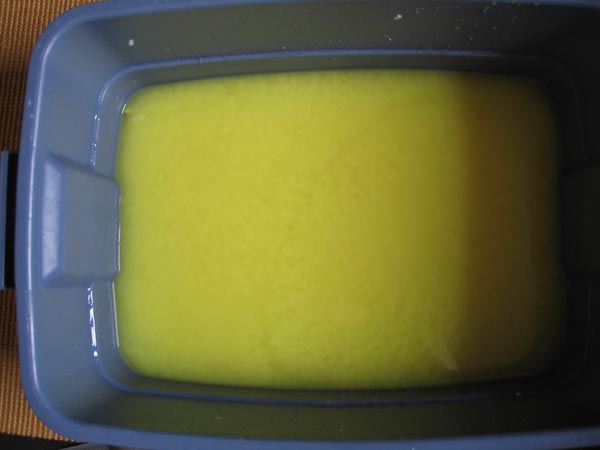
Step 3: Fill your tote not quite half full with warm water.
Step 4: Fill your blender about halfway with warm water. Add one handful of your base color and add half of that of your secondary color (if you have one). Put the lid on; blend it until no big paper scraps are visible. The paper will have the consistency of lumpy oatmeal. Do NOT put your add-ins in the blender; you will only piss your blender off.
 Step 5:
 To your tote, add 1 tbsp of cornstarch (use 1 ½ tsp if using liquid cornstarch). This will “size” the paper so that it’s suitable for writing on. Also take your cup of add-ins (if you have any) and put them in the tote. Swirl the water around with your hands. Add the pulp from the blender and swirl the water with your hands again.
 Step 6:
 Test the screen to make sure that water can run through and the pulp is retained. Take your mold and enter it vertically into the tote until you are holding the screen horizontally at the bottom of the tote. Slowly lift it up and swish it from side to side a little; there should be pulp covering it. Hold it over the tub for a minute so as much water as possible can drip off.
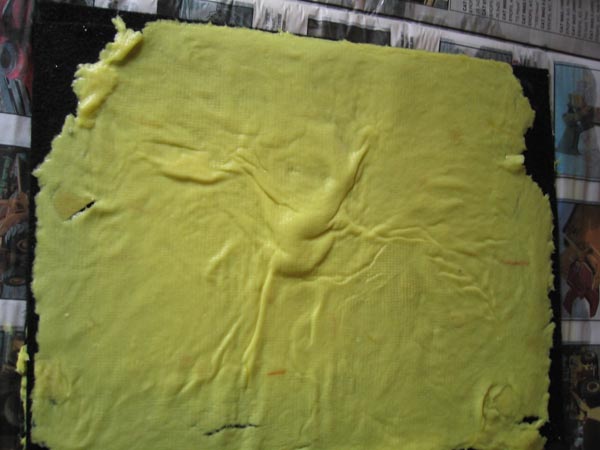
Step 7: Now for the hard part (for me anyway). Take the mold and put it so the paper is face down on your felt. Take a sponge and gently dab the screen to soak up as much water as you can. I do this until I can no longer wring any water from the sponge. Then you need to get the paper off the screen. I stink at this part; I kind of tap the back of the screen until it starts to peel off and then I carefully lift the screen up. If you rip it, just peel it off of the felt and toss it back into the tub. If the sheet seems thin to you, make another blender of pulp and add it in. If it’s too thick then just remove pulp from the tote.
 Step 8:
 Once the sheet is on the felt, lay another piece of felt on top of it, and take a rolling pin over the felt. This is to remove more excess water.
Step 9: Repeat process to make as many sheets of paper as you want. Remember to always swirl the water with your hands before dipping the mold in.
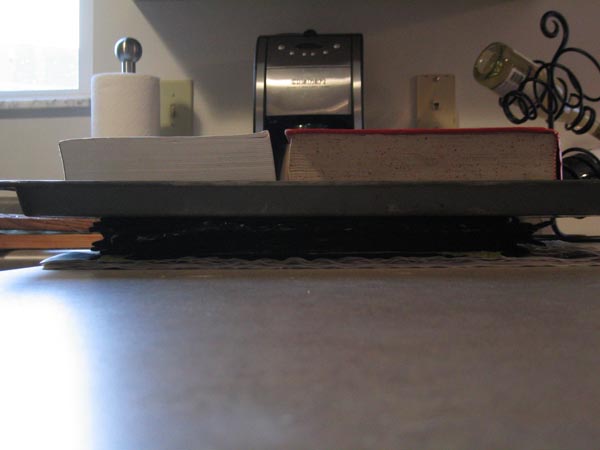
Step 10: Once you are finished and all of your paper is stacked, place a cookie sheet on top and place a couple of heavy books or weights on top. If it’s warm outside, I recommend putting the stack out there. After these have dried a little, peel off the top layer of felt and separate the stack out
keeping the felt with the paper After they dry, carefully peel the paper off of the felt. You can put a book on them again if you want to flatten the paper further.

Now you have your very own paper! If you want to make colored paper, remember that when it dries it is much lighter than the pulp.
If you have any leftover pulp, do
NOT put it down the drain. Instead run it through a strainer (or your mold over a strainer in the sink). Collect the leftover pulp and either put it in a plastic baggie to store or throw it away. You can store pulp in the fridge for about two months or you can freeze it for an indefinite amount of time. Just set it out to thaw the night before you want to use it!
I will post a picture of the finished product from the above pictures when it dries!
 Stumble!