Hi all, [
smakeupfx] here,
Since several people have shown interest in making silicone molds, I put together this little tutorial. I'm using the 12" figure I just finished for the HBO series The Entourage. The sculpt had to be cast in a few different ridged materials so silicone was the best choice for the molds. Nothing sticks to silicone, you can cast plaster, chocolate, resin, cement, epoxy... even silicone but you'll need to use a release agent for that since silicone will stick only to silicone. You can heat the molds too and some kinds can be used to cook in (check instructions as to the temperature limits of the particular kind of silicone you use).
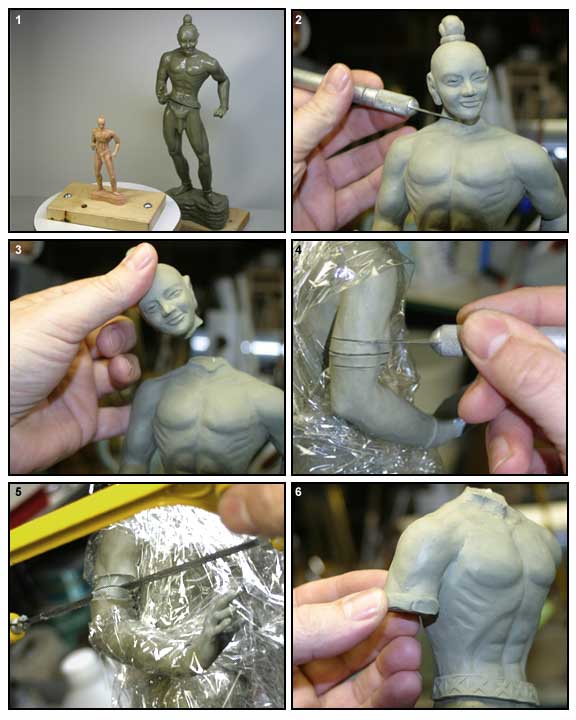
1: This job went through a lot of design changes. The tall figure is what they wanted at the start but as the script changed they asked for one only 5 inches high. I used the same steps to cast the small figure. The large Mongol was sculpted in Roma Plastilina clay... an oil/sulfur based non-hardening clay that is well suited for this kind of work. It's not rubbery, seams together better than any other clay I've used and comes in four different grades of hardness. His armature is aluminum wire with 20 minute epoxy putty over it and cooked at low temperature to de-gas it as much as possible. The clay sticks much better to epoxy than the bare wire and it gives you a solid surface to sculpt on. The smaller figure is on the same type of armature but because of the small size I used Super Sculpy instead of an oil based clay. It's a bit rubbery and doesn't seam very well but it can be cured, added too and cured again so I could harden finished sections as I went along and not accidentally smear them.
2: The first thing to do is plan the best way to minimize problems when pouring your cast. You have to imagine the sculpt encased in silicone, where will you pour the casting material in? how will the air escape? how will you cut the mold apart? In this case, the figure would be in the mold upside down, pouring the casting material into the bottom. I was worried that I would get bubbles under his chin and in his arms. It would be likely I would never get a decent cast of his hands, or even his arms the way they would be situated. So to fix that, the sculpt is cut into parts, molded separately and once cast, reassembled. In this picture I'm cutting off his head with a knife. I only had one small armature wire inside and I cut that with wire cutters once the clay was sliced.
3: Once the head is removed, I put it back on gently and touch up the edges of both sides so the casts will line up perfectly.
4: With the arms, I had to cut thru a thick armature of wire and epoxy so first I wrapped the rest of the sculpt in plastic to protect it from dust. Then I made a center cut all around the clay down to the armature. I also made cuts above and below so i could carefully peel back the clay to save it to replace after the arm was separated.
5: Cutting through the armature.
6: The clay strips are put back on and smoothed. Just like the head was done, you need to hold the pieces together and work the seam until they fit perfectly together.
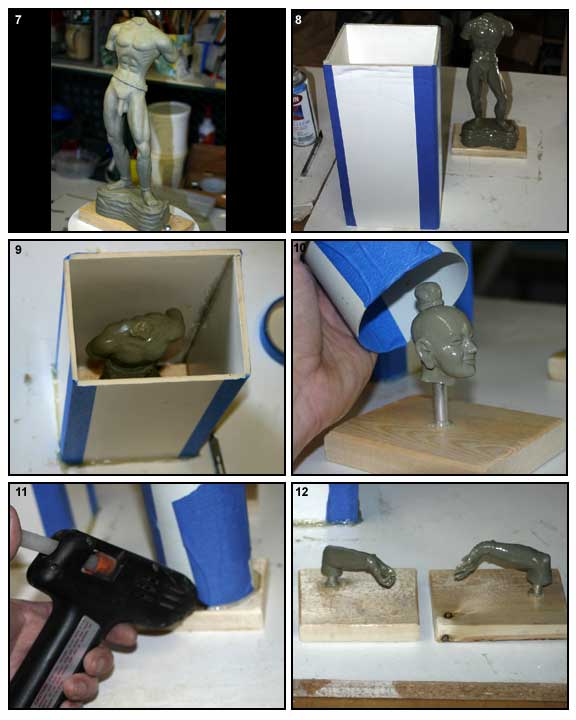
7: The arms and head are now removed and the seams are clean.
8: I sprayed the body with Krylon Crystal Acrylic spray to seal it (otherwise, the sulfur in the clay can effect the cure of the silicone). Next I made a box from a sheet of Foam Core to fit around the body leaving at least 1/2 inch (1.5cm) of space around it. (cardboard or plastic sheeting would would fine as well as FoamCore)
9: Make sure ALL the seams are sealed. Silicone will leak out of any little crack or hole, so I often will hot glue everything together and keep a ball of clay at hand and some tape to block up any leaks.
10: I inserted a tube into the head and dripped some hot glue down inside so it would stick to the bit of armature wire inside. Just like the body, I'm going to pour material into the mold from the bottom. The tube will leave a pour hole (I will cut the hole bigger after the silicone is cured so it's easier to pour). For the walls, I rolled a piece of styrene plastic into a tube, still leaving 1/5" between the clay and the wall.
11: This is hot glued down as well.
12: The arms have a tube glued to the joint too and that is hot glued down to a base.
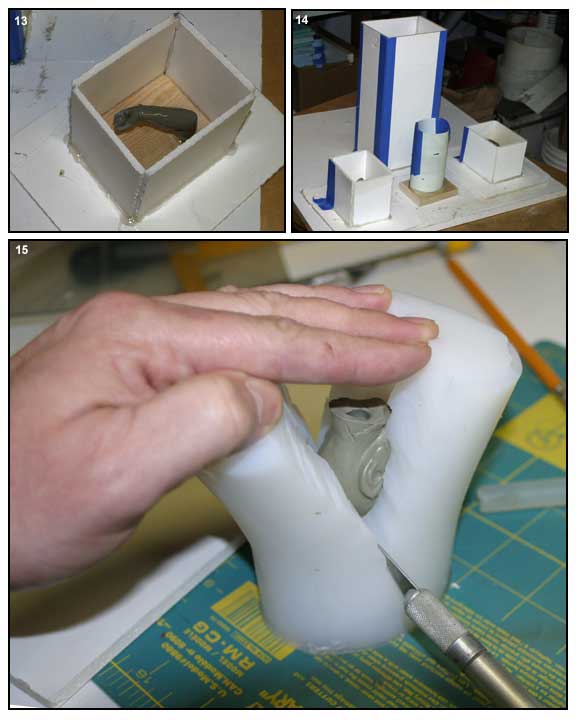
13: I made foam core boxes around the arms too and hot glued the seams.
14: All the pieces of the sculpt are now ready to mold. The torso, both arms and the head. Mix your silicone as per the instructions and slowly pour it into the boxes. I like to pour next to the edge not over the clay.. this way the level slowly rises and cuts down on any bubbles.
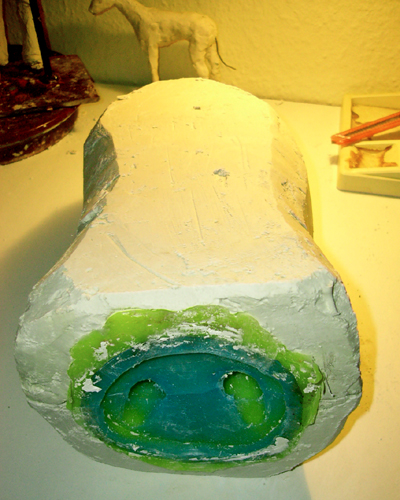
15: Once the silicone is cured (depends on what kind you are using) peal the foam core off and carefully cut the molds into. This is tricky, you don't want to leave any hanging bits, so cut it as clean as you can. I don't cut all the way thru either... leave the bottom together if you can so it will keep the two halves aligned and also cut down on leaks. I like to cut the opening where I'm going to pour the casting material into a funnel like shape but be careful not to cut where the clay was... just open it up a bit around where the rod was.
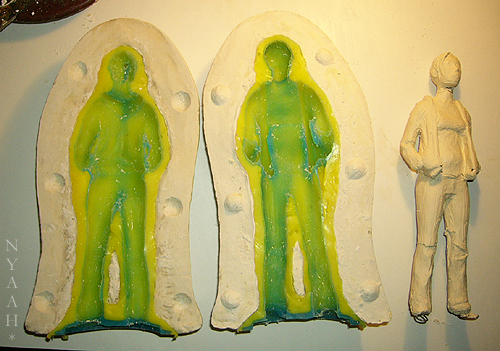
Once you have washed and dried the molds they are ready to pour. Molds this size don't really need Mother Molds.. that is a stiff mold around the silicone to help it keep it's shape when material is poured into it. If you think it will bow out or bend too much under the pressures of casting, make a mold around the silicone before you cut the sculpt out. I often use plaster bandage for this (any medical supply store will carry it). I made seven cement casts and one resin cast from these molds. I cleaned the casts and glued them back together with super glue or five minute epoxy. I used Krylon grey primer paint and then acrylics to pant them like bronze.
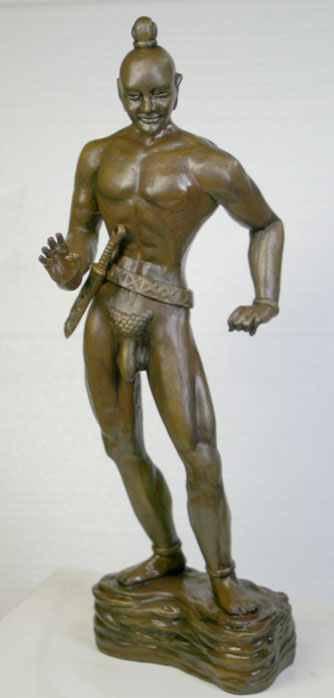
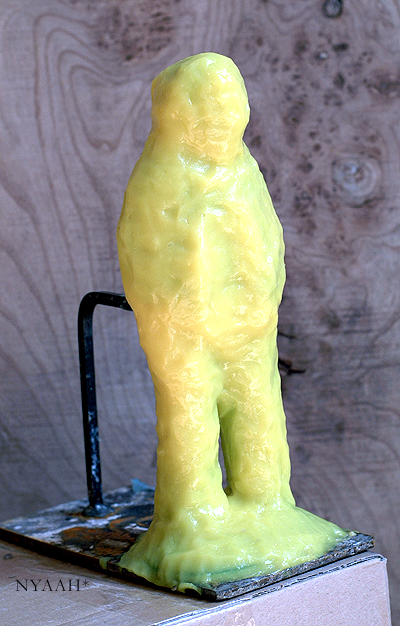
Here is the finished piece... hope this was helpful. If anyone has any questions feel free to ask.
Go forth and make stuff! :-)
 Stumble!