Page name:
Step 4 lighting effects (very important) [Logged in view]
[RSS] 2006-08-08 05:34:06
|
# of watchers: 1
|
Fans: 0
| D20: 18 |
Lighting Effects, it begins!
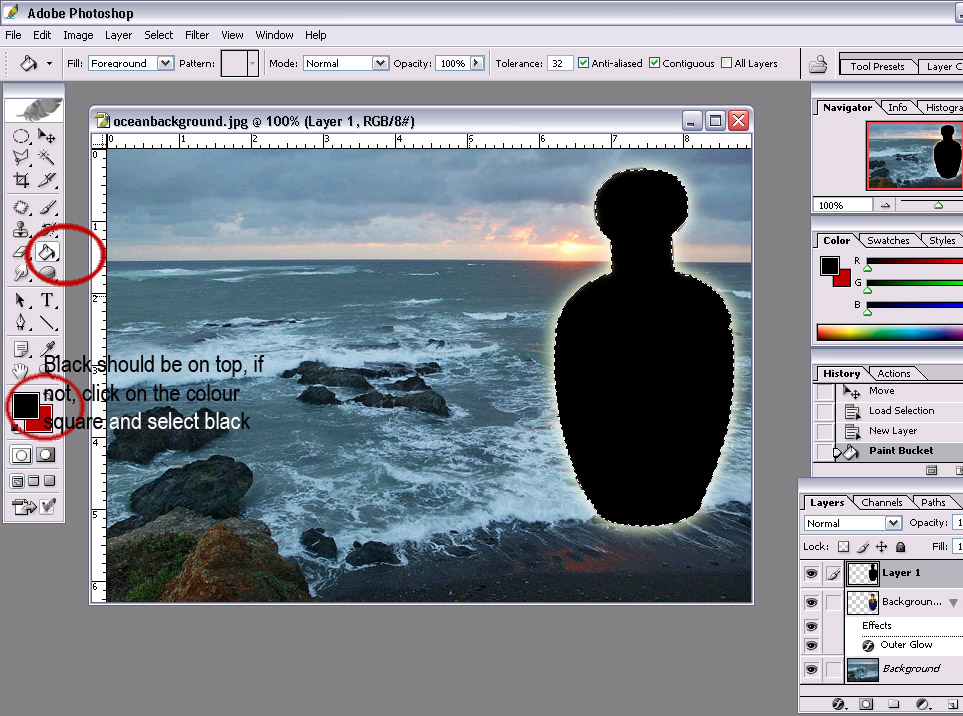
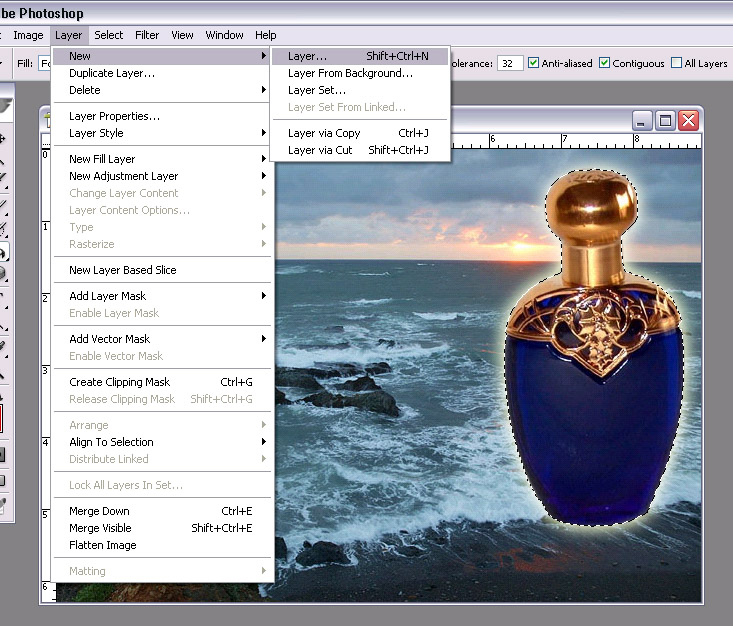
1. Hold the ctrl key and click the layer with the bottle in it, a selection box should appear around the bottle. While still having the bottle selected, create a new layer. (At the top: layer>new>layer)
2.In the layer palette, make sure you have the new layer selected. (we should still have selection box around the bottle). Get the paintbucket tool and select the colour black and click in the bottle shaped selection. There should now be a black bottle shape covering our perfume bottle. (don't worry! it's on a seperate layer!)

3.Select>Deselect (this dropdown menu was nex to the layers dropdown menu previous). The dotted lines around bottle should disappear. Then click on the layer dropdown menu in the bottom right and select screen (make sure you're still in the layer with the black bottle shape). The black shape should disappear.
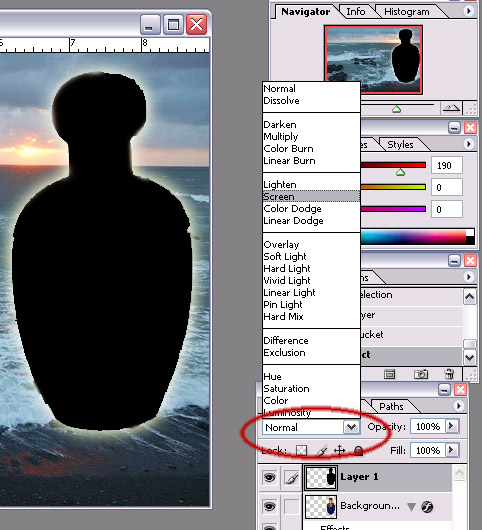
:::invisible black shape:::
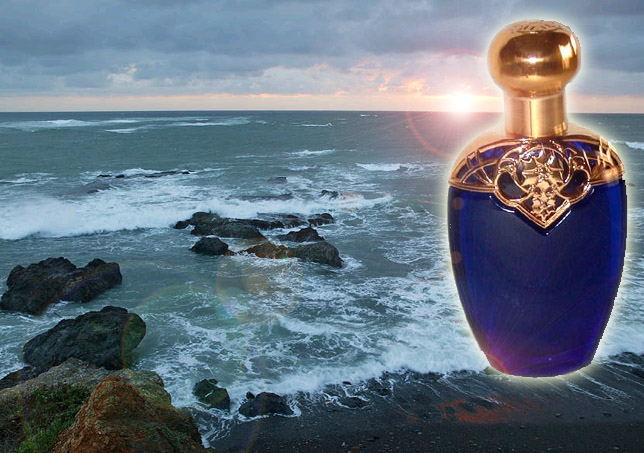
4. Filter>Render>lens flare
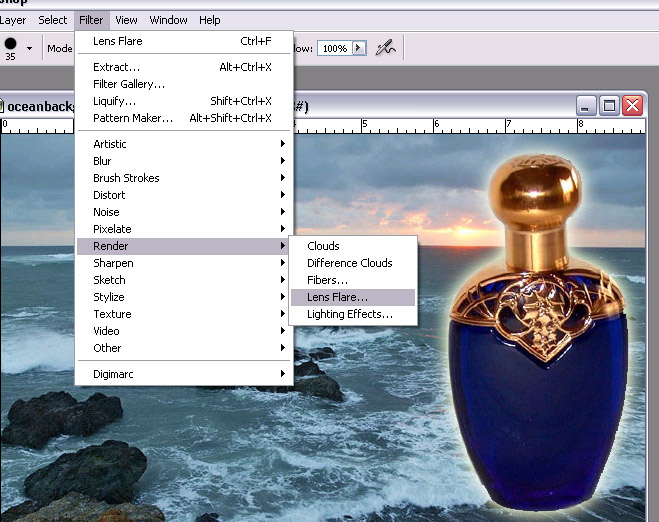
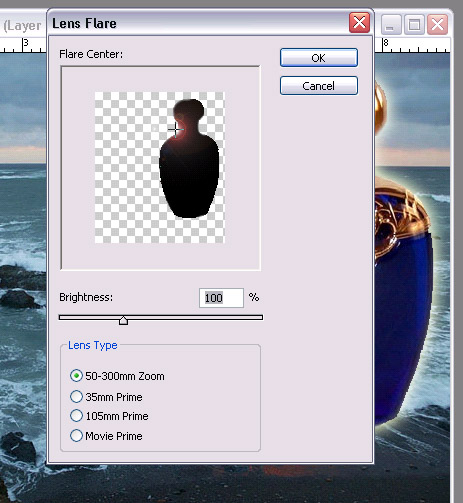
5. You should see a lense flare on a black shape of the bottle. Drag the lense flare with your curser to a suitable location (I choose the neck of the bottle where the natural light was coming in). Use lense flare subtley, lense flare can be easy to over-kill something. That's why I just put it on the edge of the bottle neck.
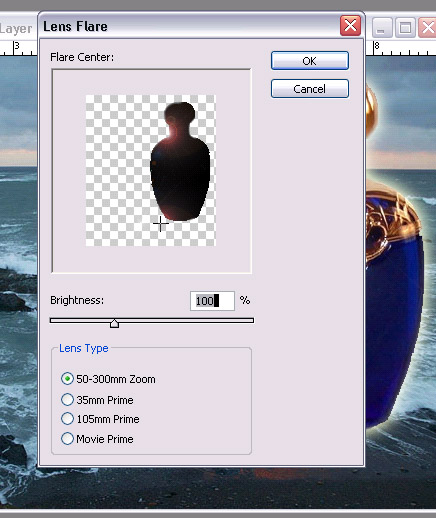
6.Repeat: Filter>render>lens flare, put it to the edges of the bottle for a subtle effect.
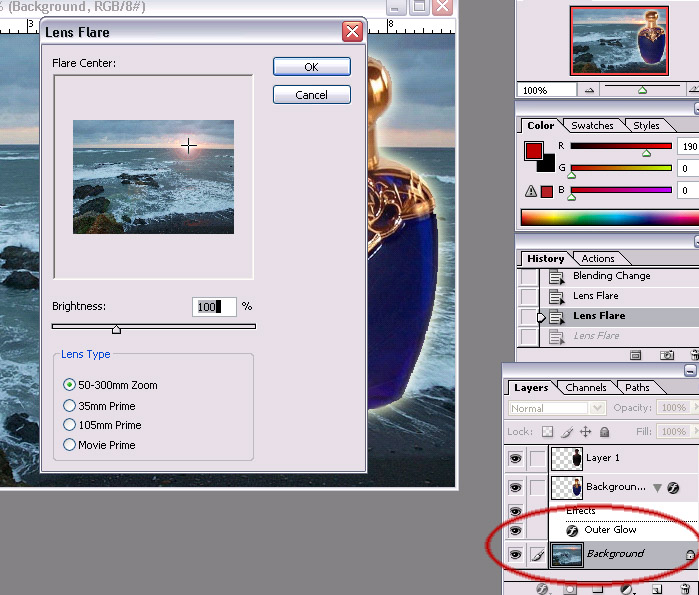
7.click on background layer in layer menu (bottom right box). Filter>render>lens flare (this time, drag lense flare light to where the light is coming from in the picture, where the sun is setting).
 Status Check:
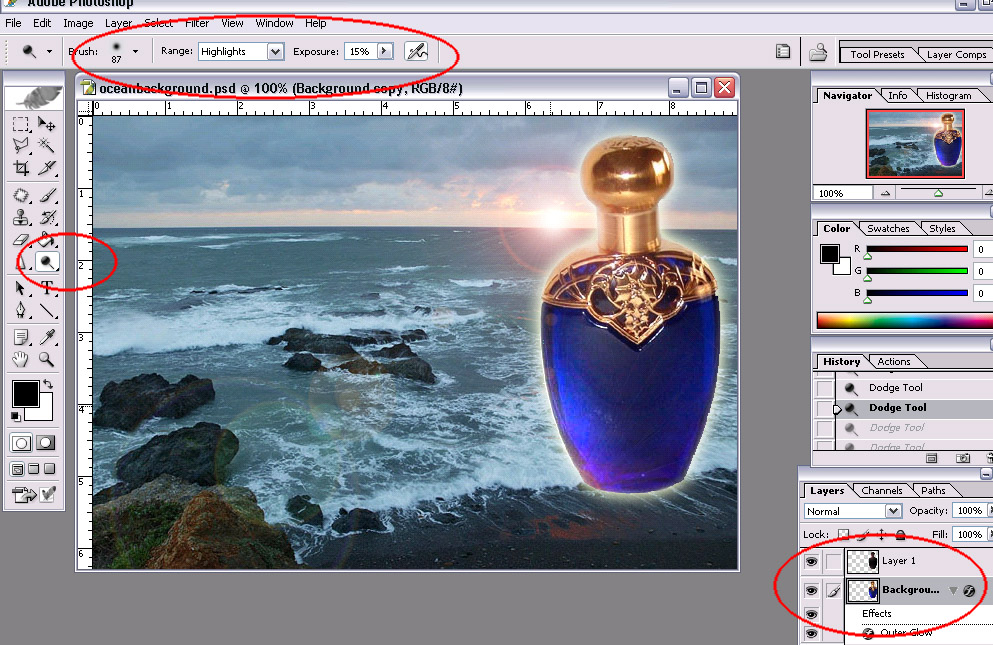
8.**optional** it's my picky preference. I think the bottle colour is too deep/flat. So we'll work on that in a step or two.
Select the dodge tool and put it on highlights (circled in red are the options for brushes and such). Use the airbrush carefully in select spots to bring out light spots.

>Step 5 letters and final touchups
>>perfume ad - photoshop tutorial
| Show these comments on your site |
 Stumble!