 This is a simple tutorial to get started with Gimp. I'll just tell you how to get the standard windows up and how to make a new layer and so. :)
Now, look at the screenshots. The text is in swedish, and I don't know all of the english terms. But the places are exactly the same in the menues, so look at the screenshots! ;)
I'll probably explain a little too much, with much basics and so,
but take it as you are very smart instead ;P
.
Gimp is a free art programme that can be downloaded on www.gimp.org

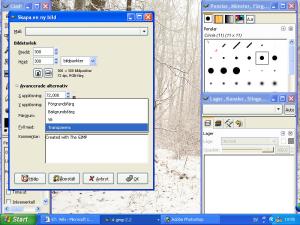
So. First you have to get a 'paper' up. Go to
file -> new. If you want, you can make it transparent and such, but for a normal, white paper, just press OK. (the pop-up window that comes will be smaller than on the screenshot; to get it like there you just press the + on 'advanced', but that's not nessessary now :)
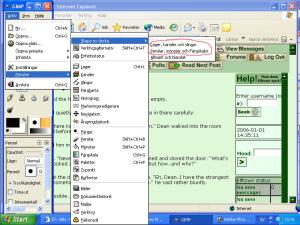
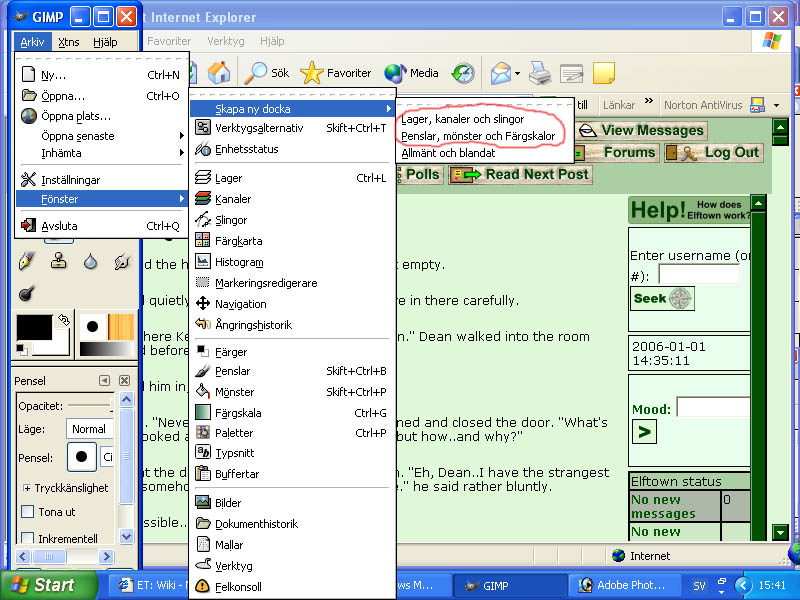
Now you have to get the layers and brushes up.
Look at the screenshot.
You go
file -> dialogs -> create new dock-> layers, channels and paths and then make the same thing again, but chose
brushes, patterns and gradients instead of layers and channels. :)
Now you have that up? Good!
I wont use any screenshot to show the brushes, it's easy enough. :) You chose tool on the mainmenue (the first one that pops up when you start Gimp) and chose how that tool you will use. Then chose how it will affect the image, by clicking on an image in the brush-window. E.g. chose brush, and then click the black round dot on th brush window. You'll draw usually lines, as thick as the dot you chosed. Even if you change tool, you'll have the same size and of 'brush' with that tool, so if you want a soft smudge brush but a hard dodge, you'll have to change the brush each time you change tool :) You chose colors in the lower part of the main menue.
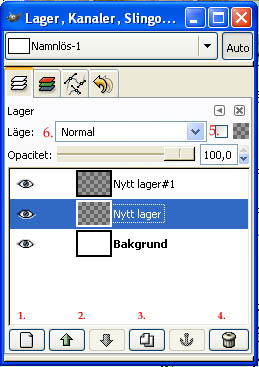
Now, what are all the images on the layers window? I'll show you. :)
1. Make new layer. It's exactly what it sais, press it, and then OK, and you have a new layer.
2. Move layer up and down. This only works if you have more than one layer, and it doesn't work on the original backgrounds layer. (you can duplicate background and delete the original, more on
gimp coloring)
3. Duplicate layer. Makes a copy of your layer.
4. Delete layer. It deletes your layer.
5. Lock transparency; locks the transparent pixels, so that you can re-color a part without messing with anything outside the part you've already colored on the layer. :D
6. Layer properties. Here you can chose different layerpropertie
s, like multiply (makes the white in a layer transparent when you color in a layer under it, but is not transparent if you try to make it a .gif).
Now, the big secret with Layers, is to remember which layer you are drawing on. :) mark the layer you want to work with by clicking on it. What you draw on that layer will stay on that layer and not affect anything on the other layers.
Back to Zabs Tutorials.
 Stumble!