This is a tutorial for Adobe Photoshop, but should work for most programs. (they need the filters ''add noise'' and ''motion blur'', as well as the lasso tool). It is for making short fur that can be used on eg horses or short haired dogs. It's a tutorial using filter, and you all know you should avoid these unless you alter them a lot:P And sometimes even if you alter them. But I like this one.^__^
 This tutorial is made by [Zab]
As usual when I make tutorials I take the sloppiest and easiest picture I can find. Like this time :P You, however, should take the most detailed and perfect image you can to start with, the more detail the better it will be. Since I'm only showing how to make the fur effect I'm not going to go through highlightning and such.

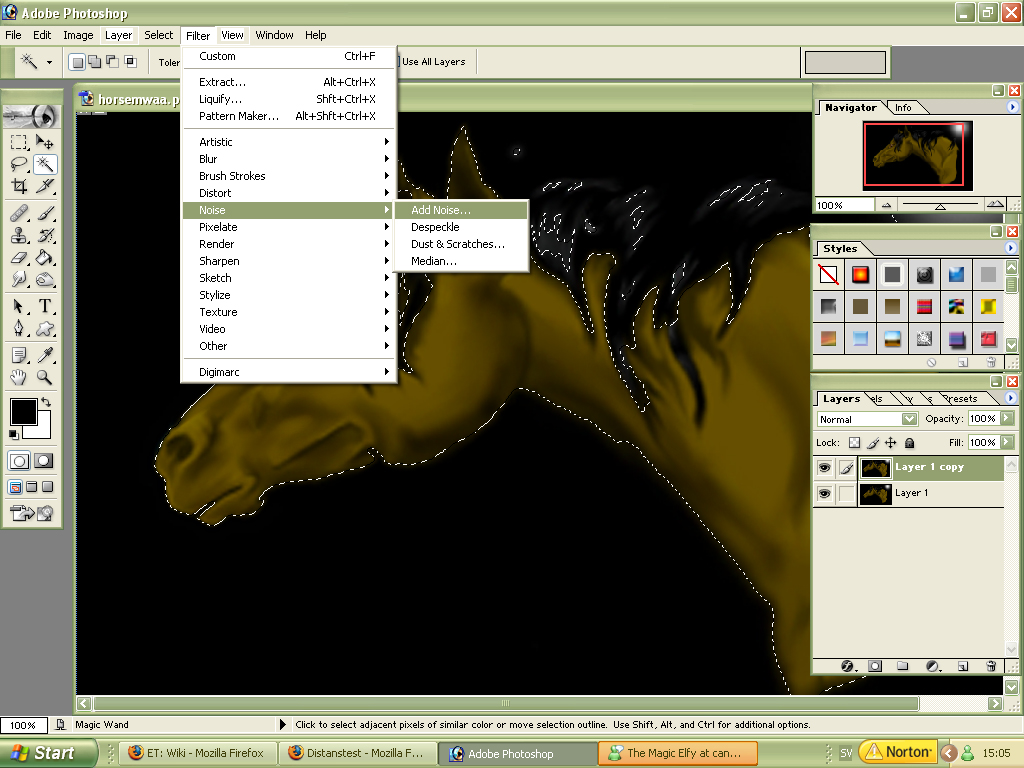
Alright; start with selecting the furry area, or if all of the fur is alone on one layer with nothing else there, chose that layer. Then add noise. Try it out for yourelf, the more noise you add the more rough the fur will be, and you will also loose more details. But without noise you won't get any effect.
To add noise: filters -> noise -> add noise

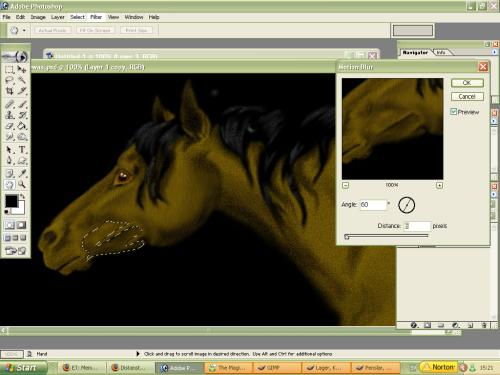
Done? Good. Now use the lasso-tool (it's selected in the upper left corner on the screen shot), use feather 1 or 2 px (top menue, beneth file and all that, when you've selected the tool). Mark the an area you want to make hairy.
Important: The area you chose should only contain fur that's going in the same direction! Look at a photo if you're insecure on how the fur is laid. It also change direction a bit to follow the shape of the object it covers (a horsehead in this case).
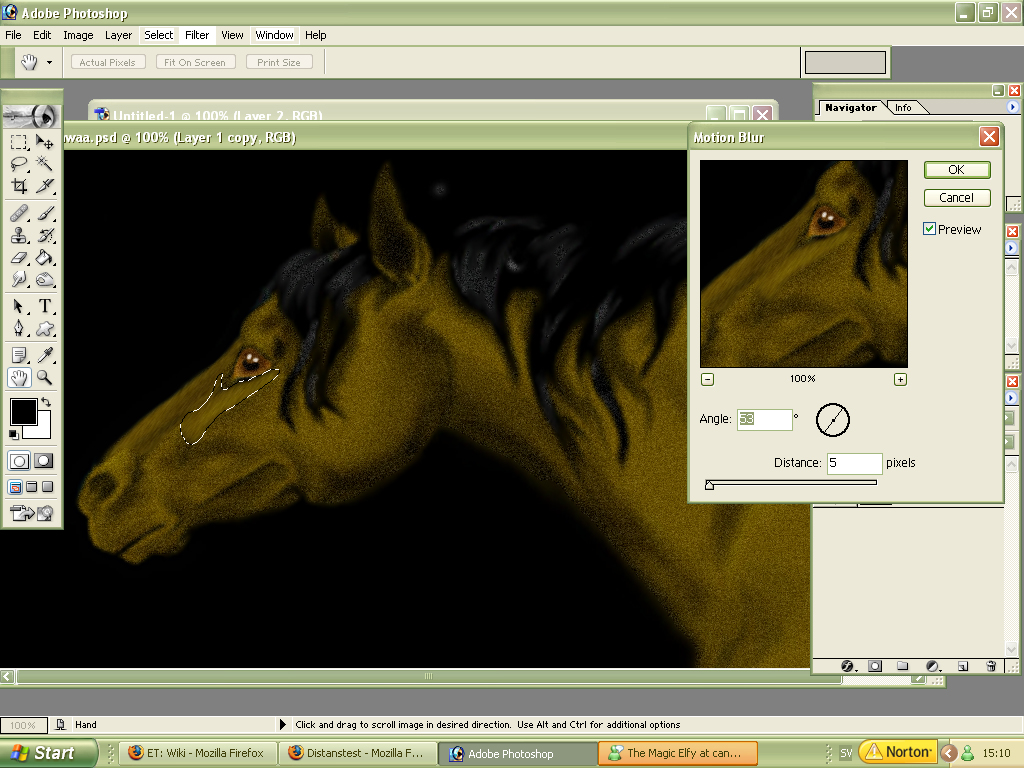
Now go to filters--> blur --> motion blur.
Look at the preview to get the right length, I'd suggest between 5 and 10 on the distance scale there. You can change the direction by clicking on the little circle under the preview. Play around!
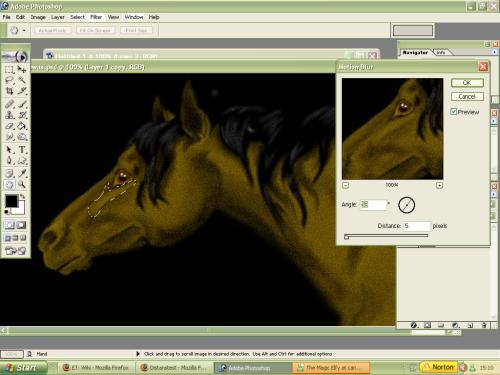
Another shot on how I chose the areas I select, I often take the shadows in one direction and the highlights in a slightly different one. You see how the cheek-fur is in other directions than the fur near the muzzle? This is what decides if the job is good or not; how accurate you make the directon of the fur (in which way it's lying).

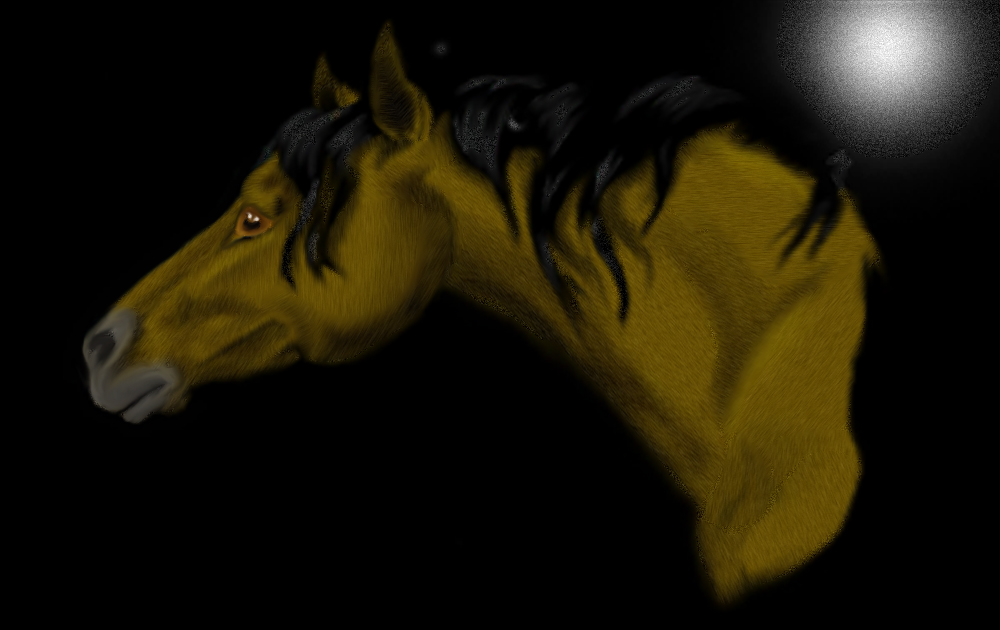
Now I'm done with the fur, and I used the sponge tool (you find it where you find the dodge and burn tools) to desaturate the muzzle. I've smudged the muzzle and the eye.
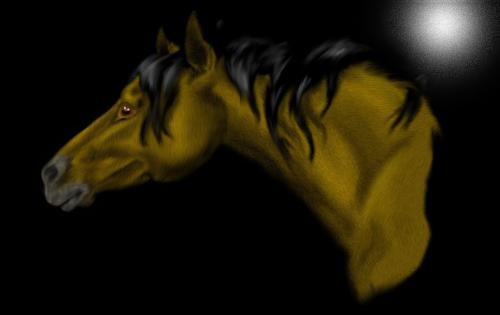
Done! I used the dodge and burn slightly on low exposure to make it more detailed; by increasing the highligts and shadows. I smudged the mane as well untill I thought it looked good.
I hope you try this now and I hope you will put more effort in it and make better pictures than this one! ;)
(
 More help to see what I mean with fur directions and the size of my selections. The white arrows follow the angle I chose when I made the motion blur for that selection. :) I hope I'm not making things complicated.)
Back to:
More help to see what I mean with fur directions and the size of my selections. The white arrows follow the angle I chose when I made the motion blur for that selection. :) I hope I'm not making things complicated.)
Back to:
Zabs Tutorials
Elftown Tutorials
 Stumble!