Page name:
Step 3 combining images and touchups [Logged in view]
[RSS] 2006-07-05 01:03:13
|
# of watchers: 1
|
Fans: 0
| D20: 12 |
Combining images and touchups
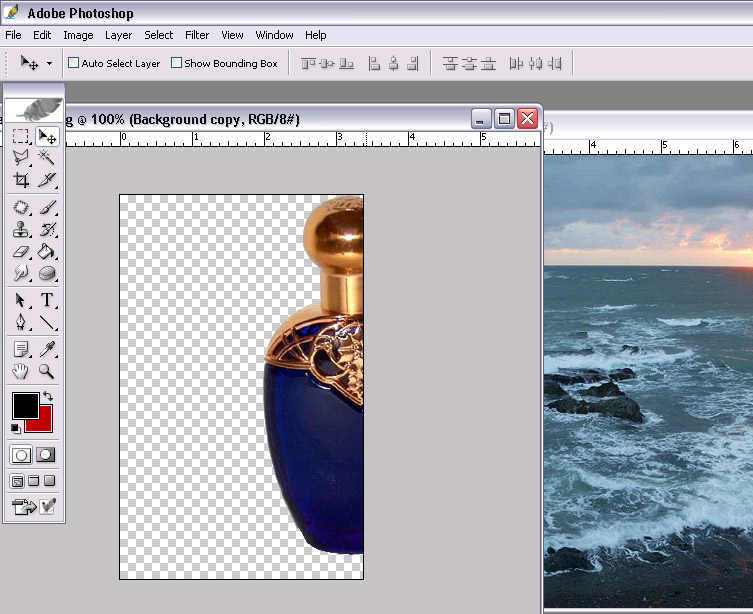
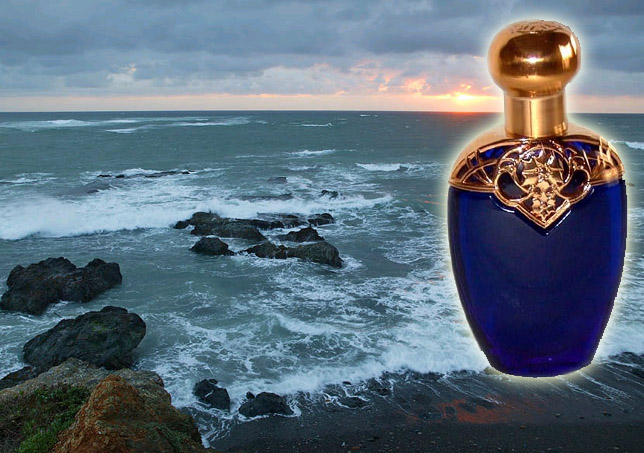
from step 2, you should still have your bottle image open with the background of the bottle cut out
1.File>Open>ocean image(the one we choose earlier)
Now we have two things open.
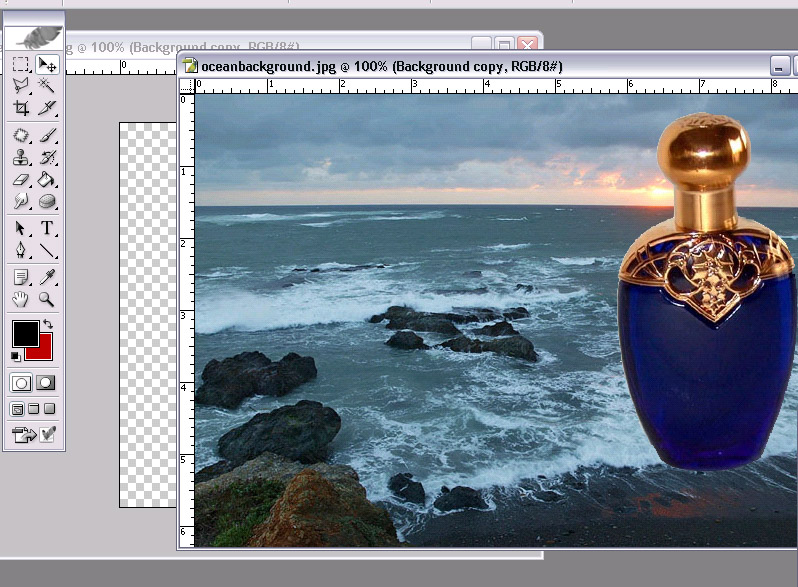
2.select the arrow tool from the left toolbar, click on bottle>hold click>drag bottle across onto ocean image (should be in another window)

3.Let go of mouse click when your curser is over the ocean image, bottle should drop right onto the ocean image.

4.airbrush with eraser tool if edges appear jagged (carefully, if you mess up there's always the history box on the right, just click the previous step and you'll be alright)

5.Small lighting effects step (threw this in because there's wayyy more lighting effects in the next step, this is just a starters tip). Go to the bottown right corner where it displays your layer's and click the black circle with the 'f' in it. You should get a menu that pops up.
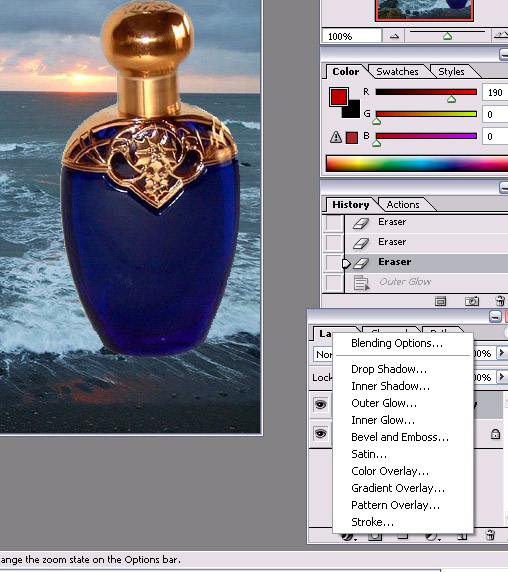
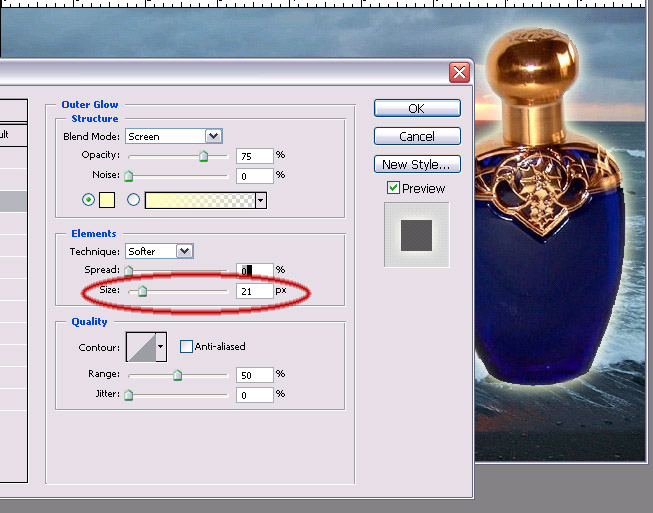
6. Click on outer glow from the menu that pops up. Leave all default options, except for size, type '21' into the size box. You can play with the options a bit, I just find the outer glow to be most effective with a larger 'size' of glow.
 We're just starting to begin :)
>Step 4 lighting effects (very important)
>>perfume ad - photoshop tutorial
| Show these comments on your site |
 Stumble!