Tutorial: Neat Tricks in MS Paint.
Colouring on the computer can be hard enough without having to do so in a less than satisfactory art program. Therefore I have made this tutorial, to make things a little bit easier for those of you who are stuck with MS Paint.
~[Triola]
PS: All the images can be clicked on for full view versions!
 Trick number one - Making your lineart ready for work!
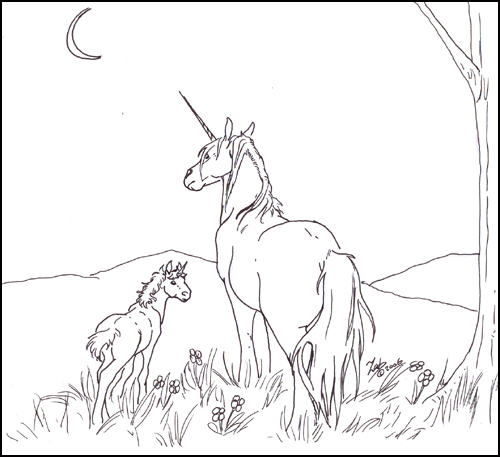
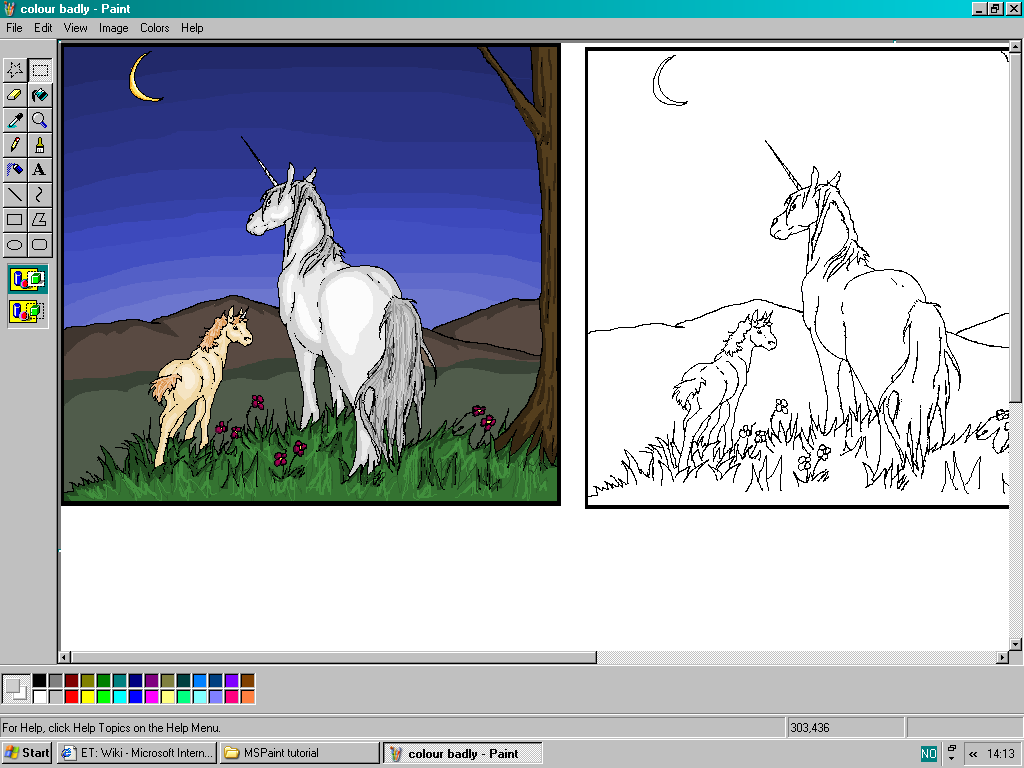
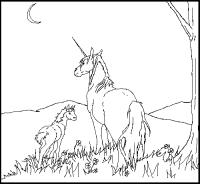
First we have to have a drawing we can colour. And since I am miles away from my scanner, I have very sneakily stolen one of [
Zab]'s linearts... *cough*... so anyway, credit and honour and all that rot to her!
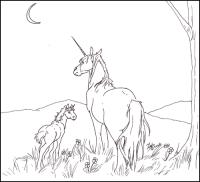
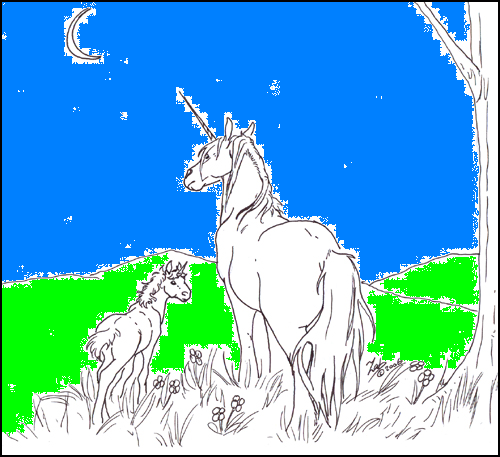
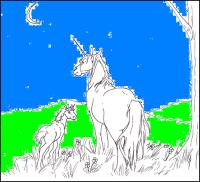
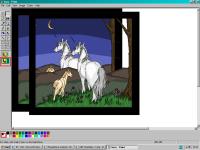
Now, there is a slight problem with this image. As you can see from the example below, when you try colouring it it turns all blotchy and whitespotted. This is because not everything that looks white
is white. It's more of a whitey greyish light colour. Yeah. That means we have to find a way to make the whole image completely black and white, and
only black and white!
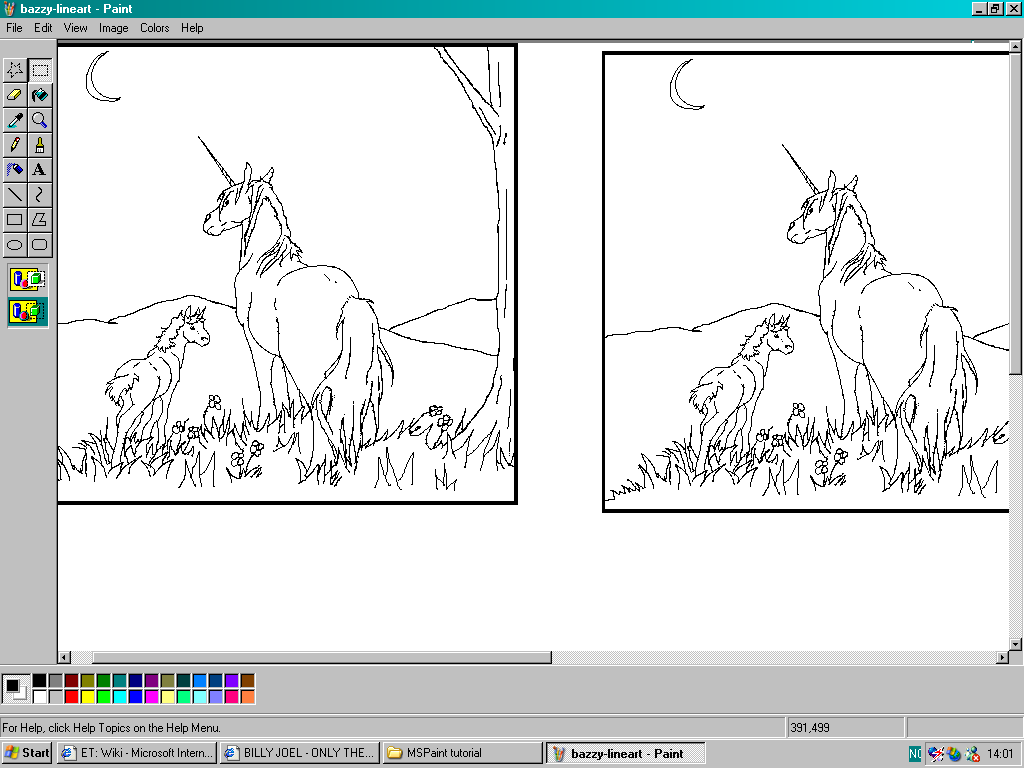
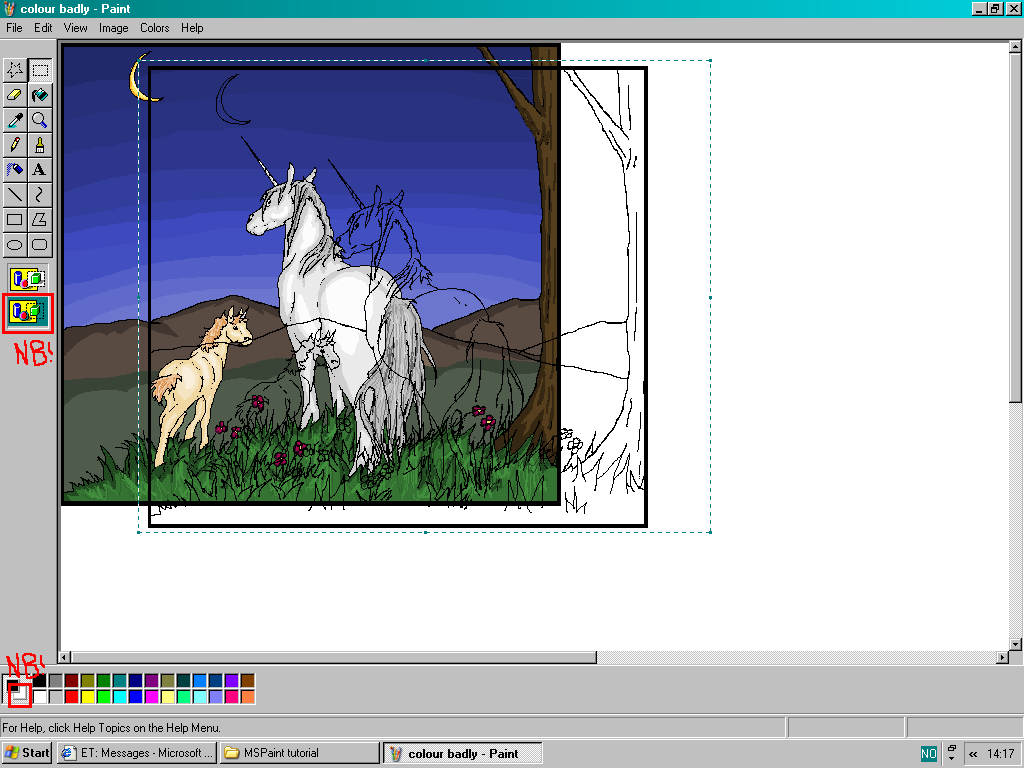
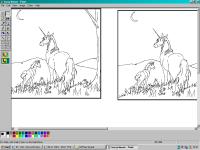
The way to do that is to save the images as a monochrome bitmap, instead of the default 24-bit. Savvy? Look at the picture if confused.
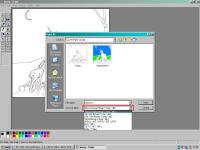
Now, when you have saved it as a monochrome bitmap you will have to copy the image and paste it into a regular 24-bit canvas to be able to work with normal colours again, but the result should be something like this:

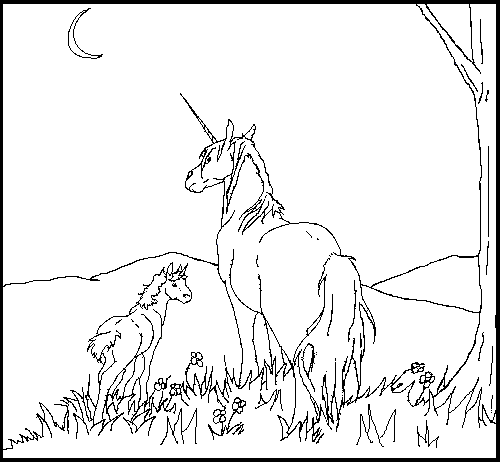
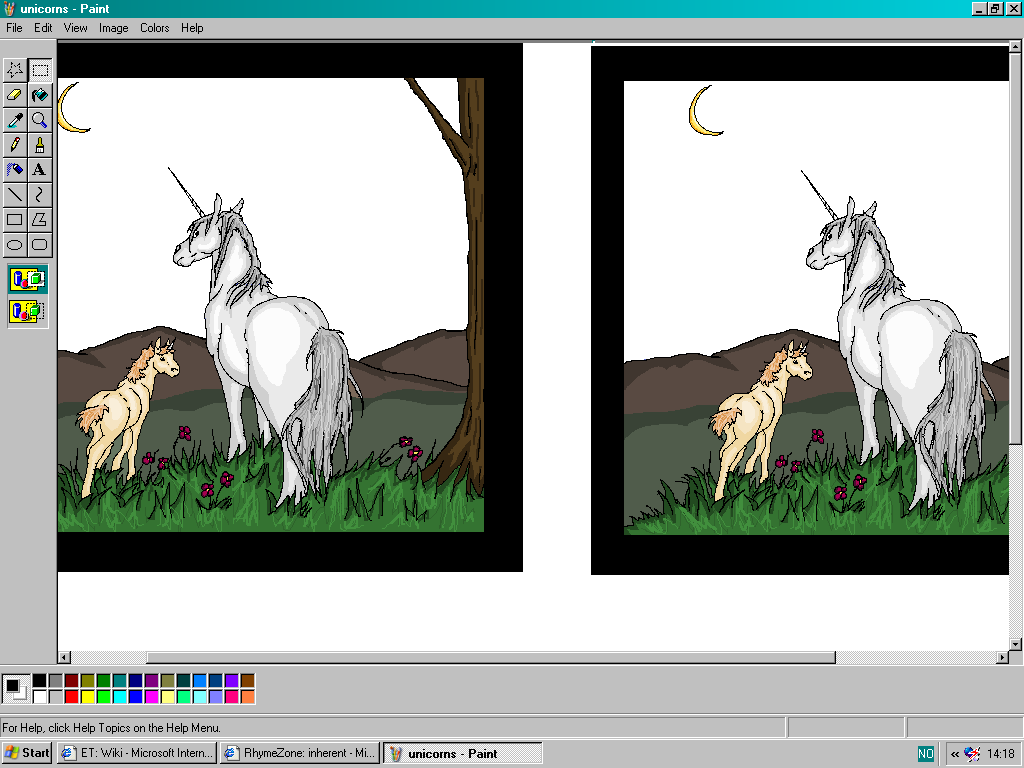
As you can see the lineart is not complete yet, but with a little bit of work with the pencil tool, it can soon look something like this:
And there we have the lines done! :D
Trick number two - colouring without messing up the lines!
Now, people who have done a bit of work in MS Paint will know that sometimes it is difficult to colour an image, and still have the original lineart remain intact. Which is why we have this very neat trick called 'copy-the-line
s-and-put-them-on-later'! And here comes the explanation on how to do that:
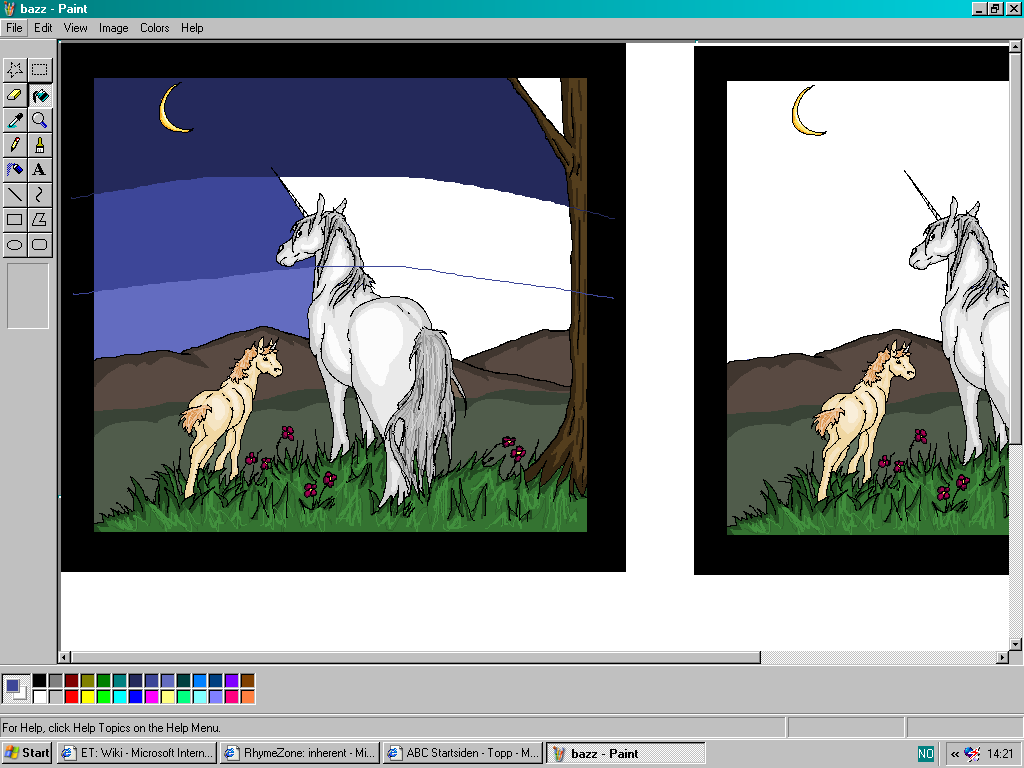
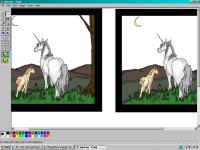
First, you copy your lineart and put it next to your original picture (for this it is wise to have a large canvas):
Then you colour the image! However, as you might notice, after finishing the colouring many of the black lines are missing!

How do we fix this? Why, by copying the lineart we have next to the image and pasting it above the coloured version!
Watch, and learn:
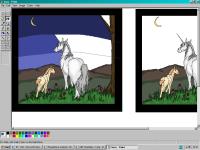
Step One - we have a coloured version and a lineart version:

Step Two - We move the lineart version above the coloured version:

NB! Make sure that white is the underlying colour, and that you choose the see-through option!
Now, the only thing left to do is to make sure the lines are completely on top of the old ones, and the result might end up something like this:

Tada!
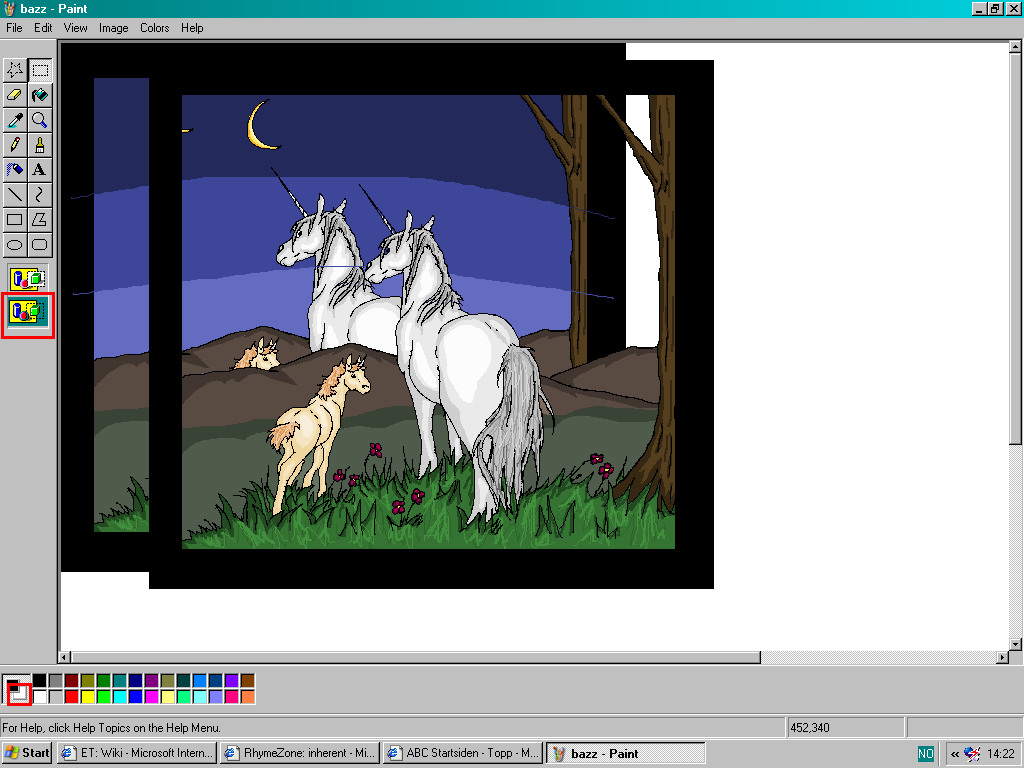
Trick number three - colouring without messing up the rest of the image!
Now, the trick with putting the lines on the side can be used while colouring as well. Are you afraid that the next step in your work is going to mess up the rest of the image? No worries! Just look here:
We copy the image:
We colour the sky:
We put the image back on top:
And that's all there is to it!
Go or return to:
- The Elftown Tutorials
- The Elftown CG Tutorials
- The Art department of the Elftown Academy
- Tutors
| Show these comments on your site |
 Stumble!